6
3) Top Plate Disassembly:
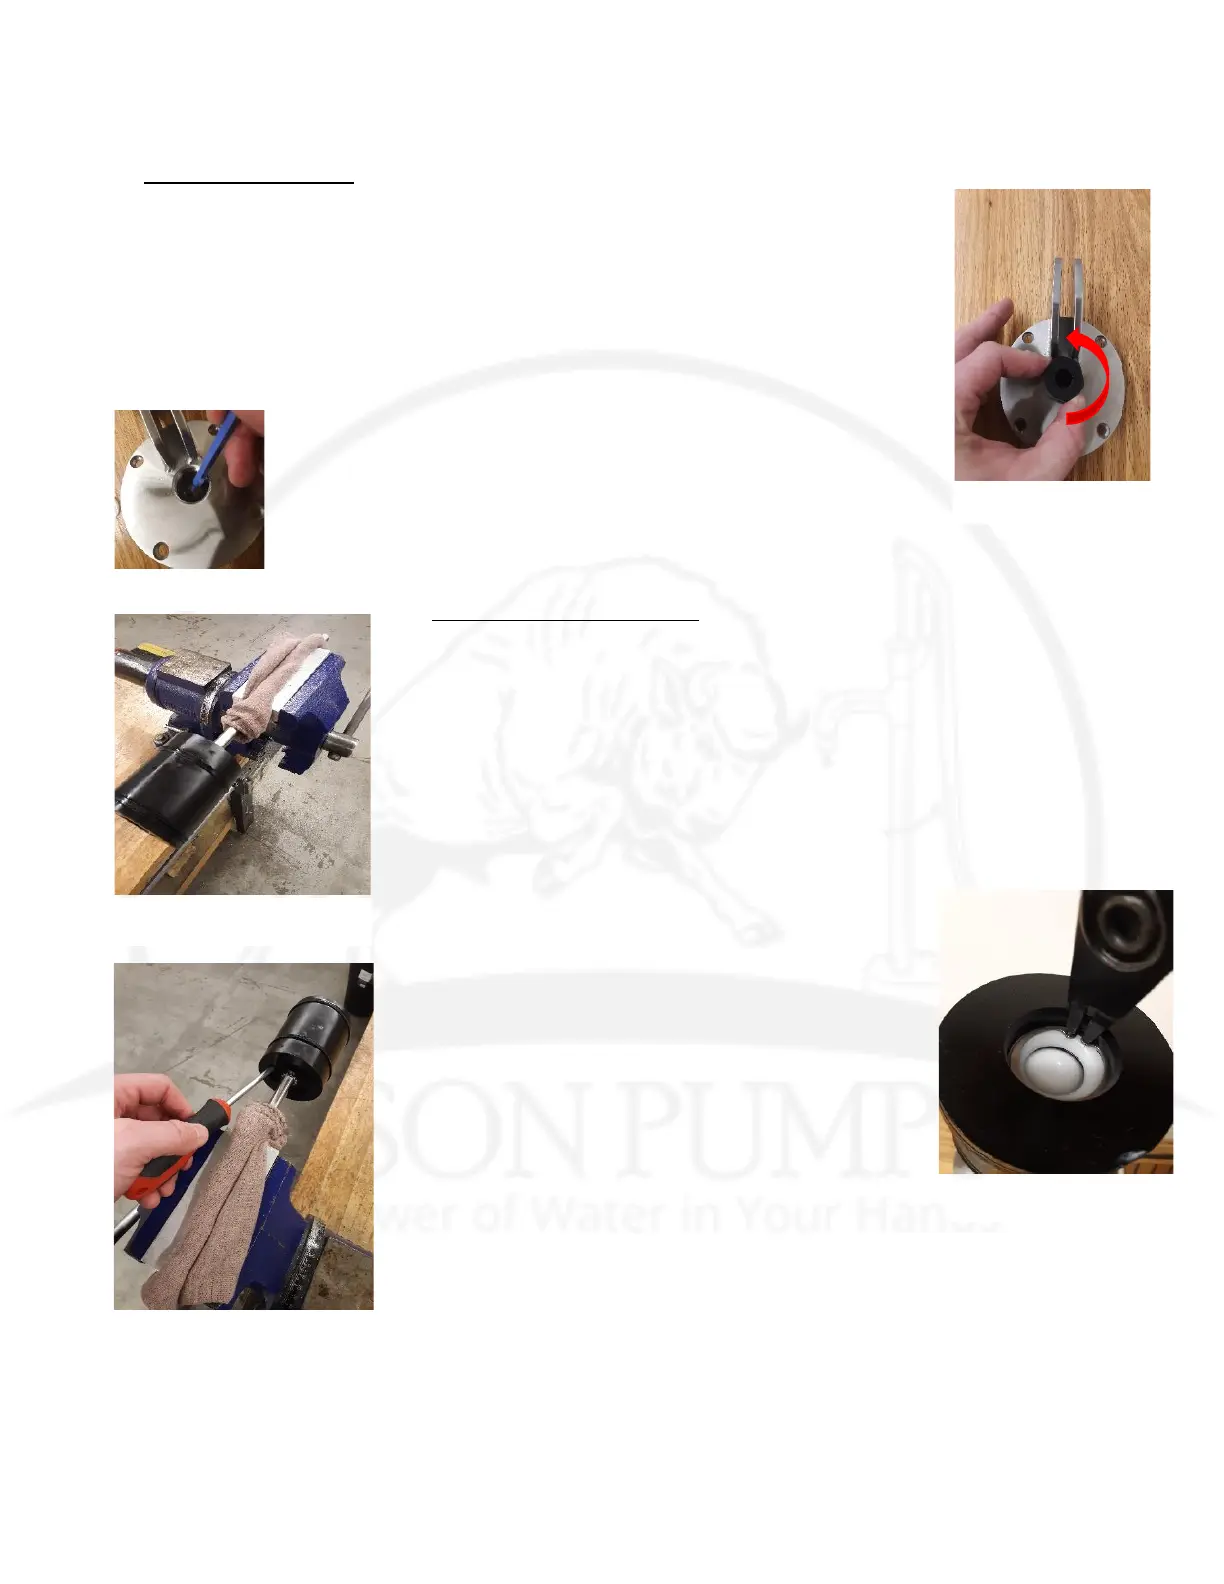
a. Use your hand, loosen and remove the Gland Nut by turning it counter-
clockwise, as shown in Figure 4. Discard the used Gland Nut. There is a
replacement component, located in the maintenance kit.
Note: If you cannot loosen the Gland Nut by hand, use a 1-1/8” open end wrench or a
pair of pliers to lightly apply pressure in the counter-clockwise direction until the Gland
Nut beaks loose. Then run the Gland Nut out by hand and remove.
b. Use the O-ring Pick provided in the maintenance kit to remove
the Packing Gland Cup Seal, Backing Washer and Bottom Bushing, as
shown in Figure 5. Discard all removed components. There is a
replacement for each, located in the maintenance kit.
4) Rod/Piston Cup Disassembly:
a. Fold a 12”x12” Cloth Rag in half and wrap it around the Lift Rod. Use a vice to
secure the Rod in a position that allows access to the snap ring inside the bottom of
the Piston Cup, retaining the check valve, as shown in Figure 6.
Note: Clamp the Rod in the vice with enough force to hold it in position securely, but
not so much as to damage or mar the surface of the Rod.
b. Use the O-ring Pick Tool to remove two Piston Cup Seals from the outer surface
of the piston. Discard both gaskets, they will be replaced using new components from
the maintenance kit.
c. Use the Internal Snap Ring Pliers to remove the
Internal Snap Ring by inserting the tip of the pilers into the
two holes, squeezing them together, and lifting the ring
out of the cavity, as shown in Figure 7. Discard the Snap
Ring, it will be replaced with a new component from the
maintenance kit.
d. Use a Flat Head Screwdriver, push the Check Valve out
of the cavity as shown in Figure 8. Take care not to damage
the wall of the cavity or ring groove. Discard the Check
Valve, it will be replaced with a new component in the
maintenance kit.
e. Thoroughly clean the Piston and Lift Rod with fresh
water, paying close attention to the Check Valve Cavity, Internal Snap Ring groove
and Cup Seal grooves.
Model 1900 Maintenance Manual Rev B-6
 Loading...