6
www.BISSELLdirect.co.uk
4.
Your machine assembles quickly and
easily. The only tool you will need for assembly
is a Phillips head screwdriver.
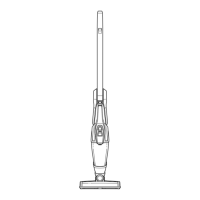
1. Slide upper body onto lower body. Make sure
there is not a gap between upper and lower
body.
2. Firmly holding upper body, screw two screws
into holes marked with arrows. If tightening
screws is difficult, remove, re-insert and tighten
again.
3. If assembled properly, there should be no
gap between upper and lower body. If a gap
appears, continue to tighten screws until no gap
is present.
4. Slide upper handle into upper body by
aligning pin and sliding into place.
NOTE: Be sure to secure upper handle before
lifting. Rotate handle lock clockwise to secure.
5. Place solution tank on back of unit.
6. Wrap power cord around cord wraps.
Assembly is now complete.
Asmbly
WARNING
Do not plug in your machine until
you are familiar with all instructions and
operating procedures.
1.
5.
2.
pin