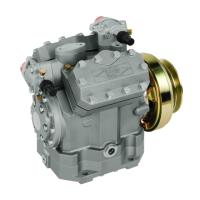
22 KB-570-1 RUS
ST-130-2
2
2 Functions
The OLC-D1-S can monitor either the
minimum or the maximum oil level,
depending on its mounting position
and incorporation into the safety
chain. If the minimum and the maxi-
mum oil level should be monitored,
two OLC-D1-S devices must be
installed.
2.1 Monitoring of the minimum
level
Lock out
The compressor is shut off, if the
prism sticks out of the oil longer than
the delay time specified by the circuit.
The OLC-D1-S then opens the output
contact and the circuit locks out elec-
tronically: The control voltage to the
compressor contactor is interrupted.
The red LED at the face side of the
opto-electronic unit lights up (figure 1)
as well as the signal lamp H4.
Reset
The circuit can be manually reset by
pressing the reset button. This reset
button (S4) has to be mounted into
the swich board. (Connection see
sche matic wiring diagram.)
2 Fonctionnement
Le OLC-D1-S peut contrôler soit le
niveau d'huile minimal soit le niveau
d'huile maximal, dépendant de la position
de montage et de l'intégration dans la
chaîne de sécurité. Pour surveiller le
niveau d'huile minimal et maximal en
même temps, deux OLC-D1-S doivent
être installés.
2.1 Contrôle du niveau d'huile minimal
Verrouiller
Le compresseur est arrêté des lors que le
temps pendant lequel le cône de verre
dépasse le niveau d'huile est supérieur à
la la temporisation prédéfinie par le
réglage.
Le OLC-D1-S ouvre alors le contact de
sortie et le circuit se verrouille électroni-
quement: la tension de commande du
con tacteur du compresseur est alors
coupée. La LED rouge sur le côté frontal
de l'unité opto-électronique s'allume (figu-
re 1) et ainsi que la lampe H4.
Déverrouiller
Le circuit peut être remis manuellement
en fonctionnement par la touche de reset.
Cette touche (S4) devra être montée
dans l'armoire électrique. (Raccordement
voir schéma de principe.)
2 Funktionen
Das OLC-D1-S kann entweder das
mini male oder das maximale Ölnive au
über wachen, je nach Montage-Posi ti -
on und Einbettung in die Sicher heits -
kette. Falls sowohl das mini male wie
das maximale Ölnive au über wacht
werden soll, müssen zwei OLC-D1-S
installiert werden.
2.1 Minimale Ölniveau-Überwa-
chung
Verriegeln
Der Verdichter wird abgeschaltet,
wenn der Glas-Kegel länger als die
durch die Schaltung vorgegebene Ver -
zöge rungs zeit aus dem Öl herausragt.
Das OLC-D1-S öffnet dann den Aus -
gangs kon takt und die Schaltung ver-
riegelt elektronisch: Die Steuerspan -
nung zum Verdich ter schütz wird unter-
brochen. Die rote LED auf der Stirn -
seite der opto-elektronischen Ein heit
(Abb. 1) und die Signallampe H4
leuchten.
Entriegeln
Die Schaltung kann über eine Reset-
Taste manuell zurück gesetzt werden.
Diese Reset-Taste (S4) muss im
Schalt schrank montiert werden.
(Anschluss siehe Prinzipschaltbild.)
Abb. 1 Abmessungen und Aufbau Fig. 1 Dimensions and design
Fig. 1 Dimensions et construction
1 Prisma-Einheit
2 Glas-Kegel
3 Dichtung
4 Opto-elektronische Einheit "OLC-D1"
(360° drehbar)
5 Anschlusskabel
6 Schraubkappe
1 Prism unit
2 Glass cone
3 Gasket
4 Opto-electronic unit "OLC-D1"
(360° revolving)
5 Connecting cable
6 Screwing cap
1 Unité prisme
2 Cône en verre
3 Joint
4 Composant opto-électronique "OLC-D1"
(mobile sur 360°)
5 Câble de raccordement
6 Chapeau à visser
6.5 LängererStillstand
Achtung!
Beim Start Gefahr von Flüssig-
keitsschlägen!
Beschädigung der Wellen-
abdichtung und Kältemittelverlust
möglich!
Bei längeren Stillstandszeiten
(Wintermonate) die Anlage
monatlich für ca. 15 min in
Betrieb nehmen.
7 Außer Betrieb nehmen
Demontage des Verdichters
Bei Reparatureingriffen, die eine
Demontage notwendig machen, oder
bei Außer-Betriebnahme:
Absperrventile am Verdichter schlie-
ßen. Kältemittel absaugen. Kältemittel
nicht abblasen, sondern umweltge-
recht entsorgen!
!
Warnung!
Verdichter kann unter Druck
stehen!
Schwere Verletzungen möglich.
Schutzbrille tragen!
Verschraubungen oder Flansche
an den Verdichter-Ventilen öffnen.
Verdichter ggf. mit Hebezeug ent-
fernen.
Verdichter entsorgen
Öl am Verdichter ablassen.
Altöl umweltgerecht entsorgen!
Verdichter reparieren lassen oder
umweltgerecht entsorgen!
6.5 Longerperiodofdisuse
Attention!
When starting danger of liquid
slugging!
Damage to the shaft seal and
loss of refrigerant are possible!
During longer shut-off periods
(winter months), commission the
plant for approx. 15 minutes once
a month.
7 De-commissioning
Dismantling the compressor
For repair work, that makes dismant-
ling necessary, or when decommissio-
ning them:
Close the shut-off valves at the
compressor. Pump-off the refrigerant.
Do not release the refrigerant but
dispose it properly!
!
Warning!
Compressor can be under
pressure!
Severe injuries possible.
Wear safety goggles!
Open the threaded joints or flanges
at the compressor valves. Remove
the compressor if necessary with a
hoisting tool.
Disposing the compressor
Drain the oil at the compressor.
Dispose of waste oil properly!
Have the compressor repaired or
disposed properly!
6.5 Длительные периоды
неиспользования
Внимание!
Опасность гидроудара при
запуске!
Возможны повреждения сальника
и потеря хладагента!
Во время длительных периодов
неиспользования (зимние месяцы),
запускайте установку один раз в
месяц прим. на 15 минут.
7 Вывод из эксплуатации
Демонтаж компрессора
Для выполнения ремонтных работ, которые
вызывают необходимость демонтажа или
при выводе установки из эксплуатации:
Закройте запорные клапаны на
компрессоре. Откачать хладагент. Не
выпускайте хладагент в атмосферу,
утилизировать хладагент надлежащим
образом!
!
Предупреждение!
Компрессор может находиться под
давлением!
Возможны тяжелые травмы.
Оденьте защитные очки!
Откройте резьбовые соединения или
фланцы клапанов компрессора. При
необходимости извлеките компрессор
из установки, используя подъемное
оборудование.
Утилизация компрессора
Слейте масло из компрессора.
Утилизируйте отработанное масло
надлежащим образом!
Направить компрессор в ремонт или
утилизировать надлежащим образом!
 Loading...