RELM Wireless Page 9
KNG MOBILE INSTALLATION GUIDE
4.5 MICROPHONE MOUNTING
For proper operation of monitor modes, a microphone hanger clip must be used.
Mount the microphone hanger clip securely to the desired location. The KNG
mobile microphones have a self grounding hang-up button. No grounding is
required for the hang-up clip.
Drill 1/4” pilot holes through the mounting plate. A mounting template can 1.
be found on page 15 or use the hang-up clip as a template. Make sure the
holes are free from the metal fl ashing.
Fasten the mounting bracket to the chassis using self tapping screws.2.
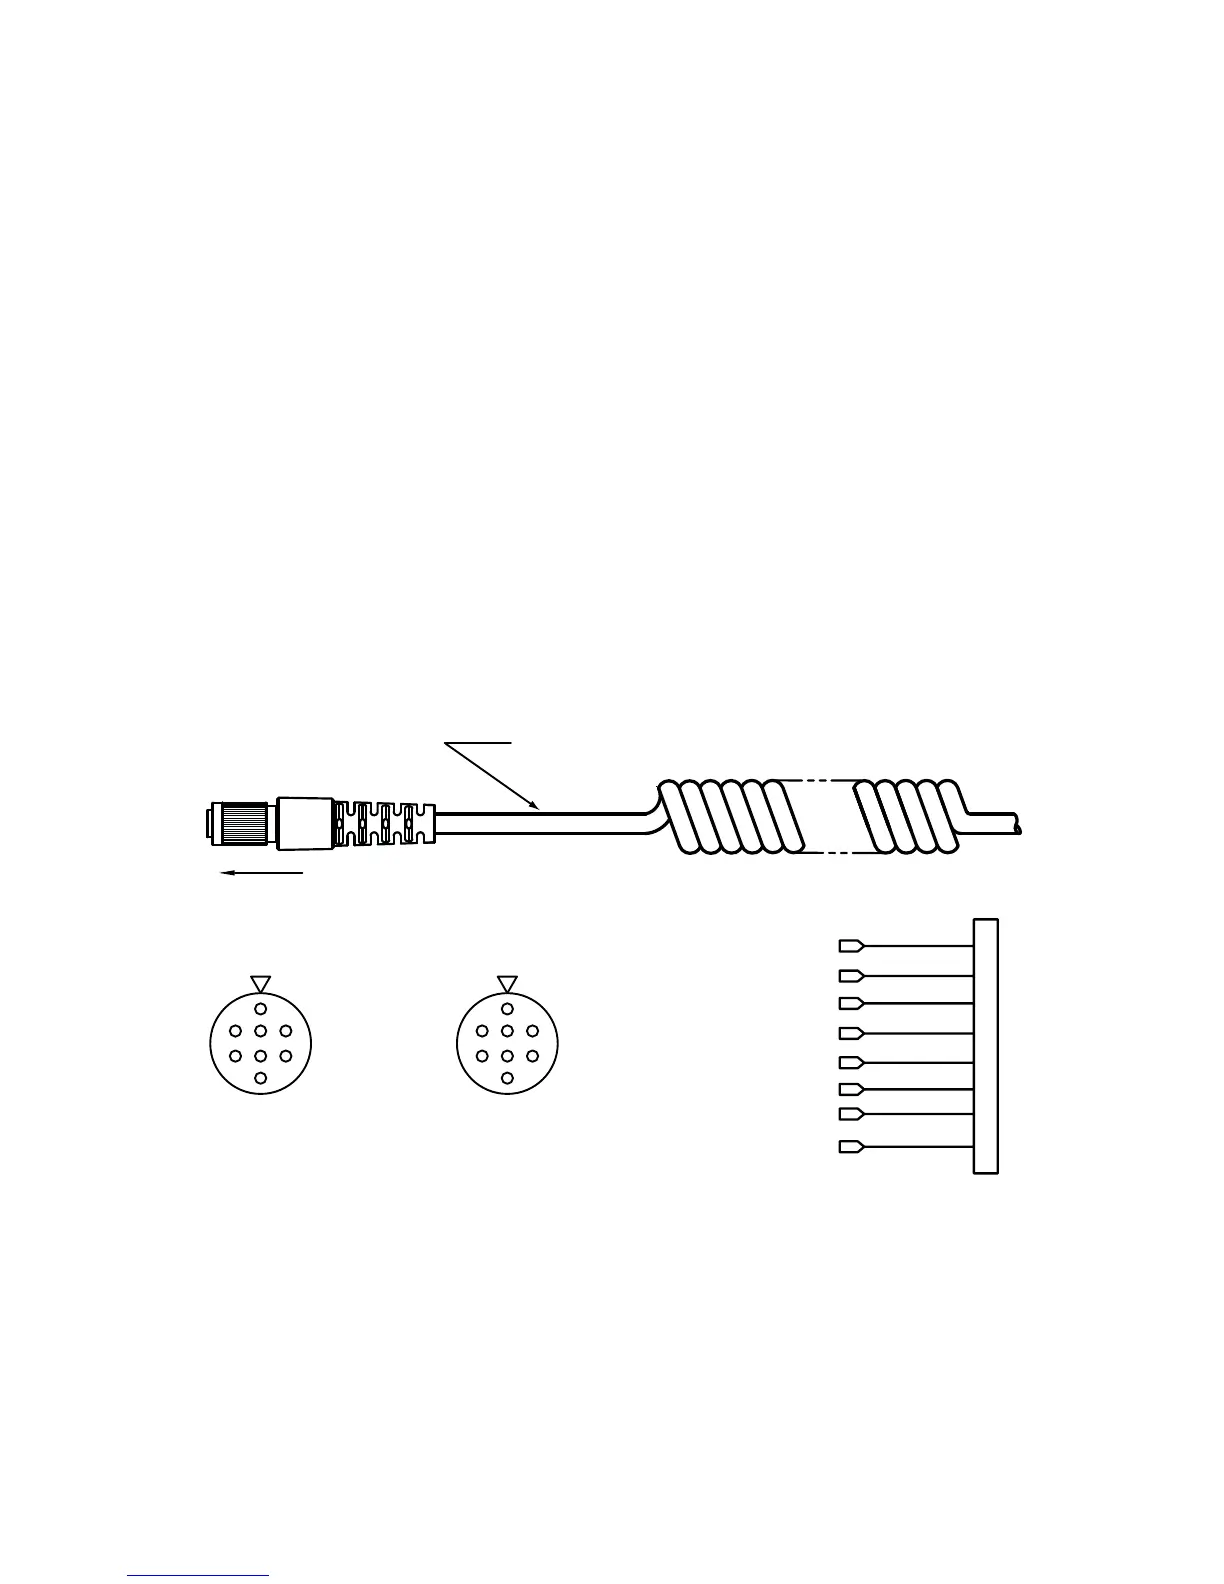
To connect the microphone to the radio:
Align the notch on the microphone connector toward the top of the radio.1.
Gently slide the connector onto the radio’s microphone jack.2.
DO NOT FORCE. EXCESS PRESSURE COULD DAMAGE THE
MICROPHONE.
Tighten the connection by screwing the microphone connector sleeve in a 3.
clockwise direction.
FINGER TIGHTEN ONLY
TO RADIO
MIC CONNECTOR
PART OF MICROPHONE
Microphone Connection Pinout
GND
Tx RS232
Key Data
+5V
Rx RS232
Mic -
Mic +
-PTT
1
2
3
4
5
6
7
8
8
5
2
7
1
4
Microhone
Pin Location
8
5
2
7
1
4
Radio
Pin Location
Figure 7 - Microphone Connections
4.6 ANTENNA INSTALLATION
Use only 50 ohm antenna in the proper frequency range. Make sure the
antenna is capable of handling the radio’s output power.
Install the antenna as instructed per the antenna’s manufacturer guidelines.
Keep the antenna free from other equipment and hardware. Keep the antenna
cable as short as possible and free from being pinched or in the way of other
mechanical hardware.
 Loading...