20
ENGLISH
Guarantee
Black & Decker is confident of the quality of its products and
offers an outstanding guarantee. This guarantee statement is in
addition to and in no way prejudices your statutory rights. The
guarantee is valid within the territories of the Member States
of the European Union, the European Free Trade Area, and
UnitedKingdom.
If a Black & Decker product becomes defective due to faulty
materials, workmanship or lack of conformity, within 24months
from the date of purchase, Black & Decker guarantees to replace
defective parts, repair products subjected to fair wear and tear
or replace such products to ensure minimum inconvenience to
the customer unless:
• The product has been used for trade, professional or hire
purposes;
• The product has been subjected to misuse or neglect;
• The product has sustained damage through foreign objects,
substances or accidents;
• Repairs have been attempted by persons other than
authorised repair agents or Black & Decker servicestaff.
To claim on the guarantee, you will need to submit proof of
purchase to the seller or an authorised repair agent. You can
check the location of your nearest authorised repair agent
by contacting your local Black & Decker office at the address
indicated in this manual. Alternatively, a list of authorised Black &
Decker repair agents and full details of our aftersales service and
contacts are available on the Internet at: www.2helpU.com
Please visit our website www.blackanddecker.co.uk to register
your new Black & Decker product and to be kept up to date on
new products and special offers. Further information on the
Black & Decker brand and our range of products is available at
www.blackanddecker.co.uk
Protecting the Environment
w
Separate collection. Products and batteries marked
with this symbol must not be disposed of with
normal householdwaste.
Products and batteries contain materials that
can be recovered or recycled reducing the demand for raw
materials. Please recycle electrical products and batteries
according to local provisions. Further information is available at
www.2helpU.com.
Transport
• Always transport your products disconnected from
powersupply.
• Turn power switch to the offposition.
• Check the appliance for damage before use aftertransport
• Remove all bottles, capsule, straws, and stoppers from the
appliance fortransport.
• Do not transport with bottlesinstalled.
• Remove all bottles, capsules, straws, and stoppers from the
appliance when storing for long periods oftime.
• Check the appliance for damage before use after long periods
ofstorage.
Storage
• Clean out the liquid lines as described in the CLEANING
MODEsection.
• Switch off theappliance.
• Always store disconnected from power supply!
• Store in a place that is as cool and dry aspossible.
• Store in a place where it cannot be accessed by children or
unauthorizedpersons.
Optional Accessories
WARNING: Since accessories, other than those offered
by BLACK+DECKER, have not been tested with this
product, use of such accessories with this appliance
could be hazardous. To reduce the risk of injury, only
BLACK+DECKER recommended accessories should be used
with thisproduct.
Consult your dealer for further information on the
appropriateaccessories.
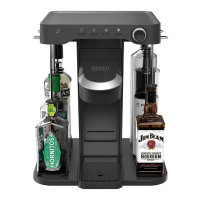
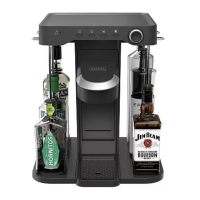
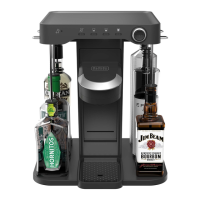
Cleaning Mode (Fig.E, I, L, M
It is recommended to clean the liquid lines of the cocktail maker
at least once amonth.
1. Remove the capsule
20
from the capsule holder
21
.
Ensure the capsule cup
23
remains inplace.
2. Place a large glass that holds at least 10oz (300 ml) on the
driptray
3
.
3. Remove the bottles as described in the REMOVING
BOTTLESsection.
4. Fill a glass with at least 2oz (60 ml) ofwater.
5. Place a straw
7
in the glass and install the straw as
described in the INSTALLING BOTTLESsection.
6. Repeat steps 1- 5for allbottles.
7. Press the cleaning mode button
28
for 6seconds.
8. Once the unit starts pumping water, let go of the cleaning
modebutton.
9. The bottle LEDs
16
will light one at a time to indicate which
line is being cleaned. Once all LEDs turn on, the process
iscomplete.
10. Water may splash on the barcode scanner
31
. Use a clean,
dry towel to wipe the barcode scanner and surroundingarea.
11. Install the bottles as described in the INSTALLING
BOTTLESsection.
CAUTION: Straws, bottle stoppers, capsule cup, drip tray
cover, and water bottle are top-rack dishwasher safe. It is
recommended that you manually rinse the attachments
before placing them in thedishwasher.
• Clean the inside of the straws with warm water, mild soap,
and the provided straw cleaner
30
.
• Clean all external parts with a cloth dampened with warm
water and mildsoap.
• Remove the capsule cup
23
by pulling it up and out of
the capsule holder
21
. To reinstall the cup, slide it into the
capsule holder and press down. Ensure the cup sits fully and
securely inside the capsuleholder.
 Loading...