Page 8
SAFETY OPERATION MAINTENANCEASSEMBLY
SAFETY OPERATION MAINTENANCESETUP
Operating Instructions
TO PREVENT SERIOUS INJURY: Do not work on the Lift, or leave it unattended if the Stop
Bars (41, 44) are not in the locked position, or the Lock Bolts (16) are not engaged (lifting the
Rear Wheels [17] off of the ground). Keep clear of Lift Arms (8, 43) during operation.
Lifting
1. Lift the Stop Bar Connecting Rod (40) and
secure it to the Stop Bar Rod Clamp (37).
2. Use the Handle (34) to roll the Lift and position it
next to the load. Lower the Lift by depressing the
Release Pedal (13a). (See ATV or motorcycle
owner’s manual for recommended lifting points.)
3. Once positioned under the load, turn the
Lock Bolts (16) until they contact the ground
and lift the Rear Wheels (17) slightly off of
the ground to keep the Lift from rolling.
4. Use tie-down straps (sold separately) to secure
the load. Repeatedly depress the Foot Pedal (27)
slowly to raise the Lift. When the Lift makes
contact with the load, make sure the load sits
evenly on the Lift Saddle (2) before raising the
load. If the load is not evenly distributed on the
two Rubber Pads (3) or not secured in place with
tie-down straps, it may fall from the Lift, resulting
in personal injury and property damage.
5. Continue to raise the Lift to the desired height.
Disengage the Stop Bar Connecting Rod from
the clamp. Lock the Lift at one of the three
locking positions on the Bottom Base (13)
with the Stop Bars (41, 44) and lower Lift
slightly to securely engage the Stop Bars. Not
engaging the Stop Bars may result in serious
injury or death, and damage the Lift.
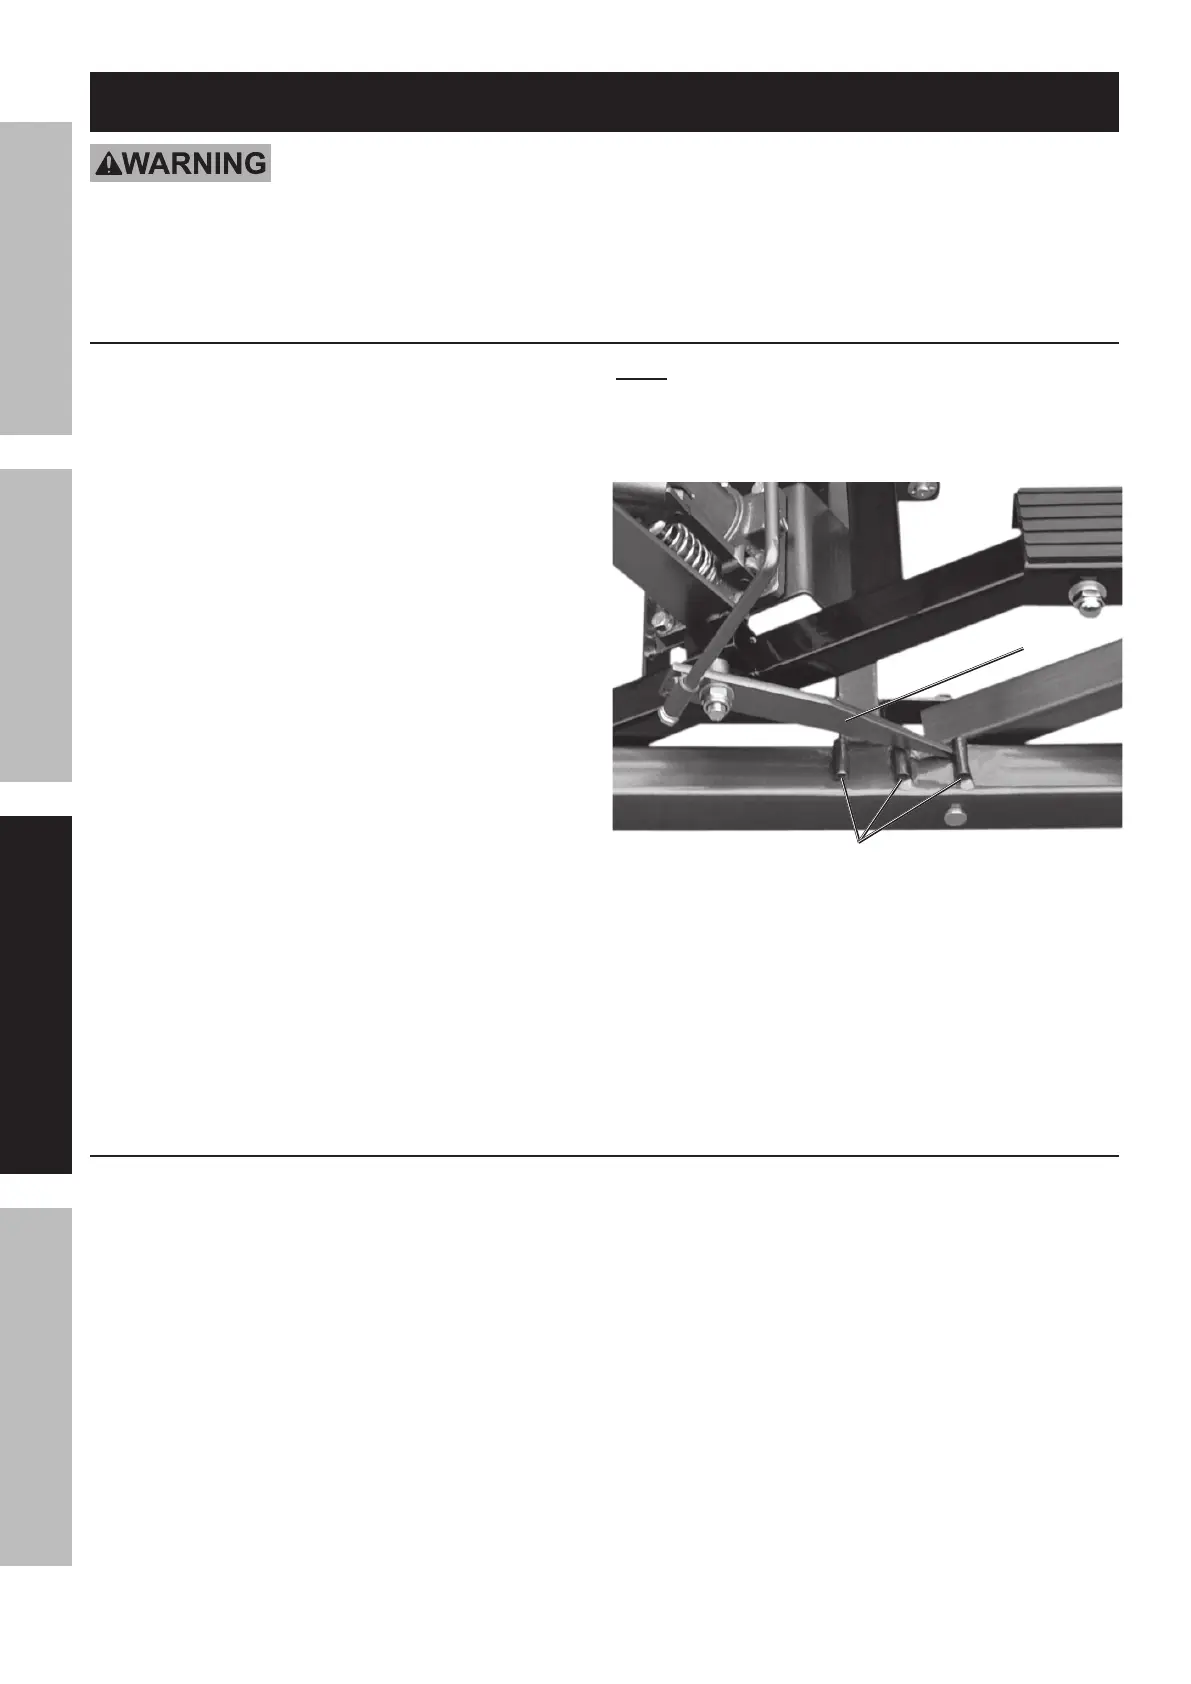
Note: Stop Bars fit behind the welded stops on
both sides of the Bottom Base. See Figure G
showing Stop Bars in the locked position.
Stop Bar (41)
Welded stops on Bottom Base (13)
Figure G
Lowering
1. Carefully remove all tools, parts, etc.
from under the Lift.
2. Depress the Foot Pedal (27) slowly to raise the
Lift enough to disengage the Stop Bars (41,
44). Lift up the Stop Bar Connecting Rod (40)
and secure it to the Stop Bar Rod Clamp (37).
3. Press the Release Pedal (13a) slowly and
gently lower the load. Never allow the load
to come down quickly or suddenly.
4. Once the load is on the ground, remove the tie-down
straps. When the Lift is clear of the load, turn the
Lock Bolts (16) until they are clear of the ground,
allowing the Rear Wheels (17) to firmly contact
the ground. Roll the Lift out from under the load.
5. Clean external surfaces of the Lift with
a clean, dry cloth. Store Lift in dry,
indoor area out of reach of children.
 Loading...