8
ENGLISH / ITALIANO / FRANÇIAS / ESPAÑOL
InstallatIon • InstallazIone • InstallatIon • InstalacIón
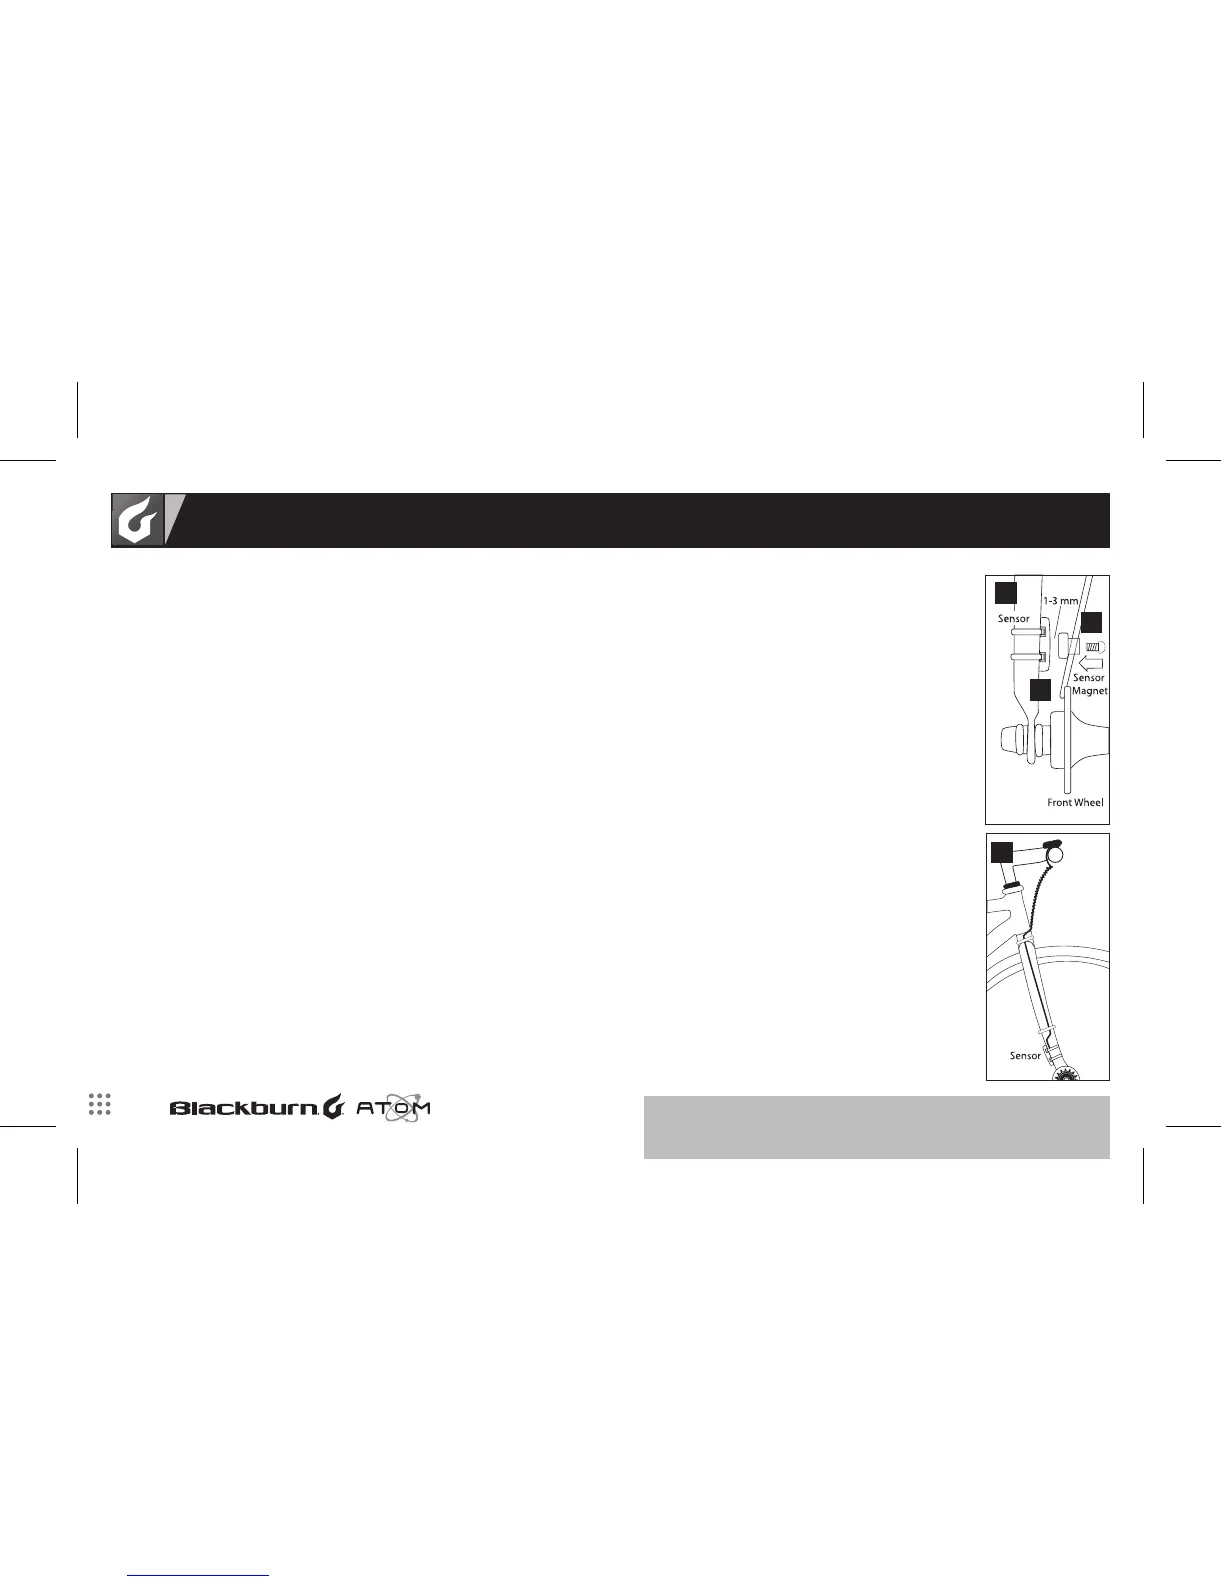
eng: The Blackburn Atom 2.0 uses a single wired sensor attached to the front fork.
INSTALLING WIRED SPEED SENSOR AND BRACKET
2. Attach the spoke magnet on same side of wheel as sensor.
the front brake cable housing allowing enough slack for the bracket to reach the handlebars. Attach
ita: Blackburn Atom 2.0 utilizza un unico sensore cablato attaccato alla forcella anteriore.
1. Senza stringere, attaccare il sensore della ruota ad uno degli steli della forcella usando le fascette
2. Attaccare la calamita del raggio sullo stesso lato della ruota in cui si trova il sensore.
sensore.
4. Far passare il cavo rimanente e il supporto sulla forcella fissandoli con del nastro adesivo. Av-
volgere il cavo in eccesso attorno alla guaina del freno anteriore lasciandolo abbastanza allentato
per fare modo che il supporto arrivi al manubrio. Attaccare il supporto al manubrio o all’attacco.
Stringere la calamita e le fascette.
1
4
2
3
 Loading...