Plugging in Return SDI Outputs 183
Mounting BlackmagicCamera
Fiber Converter
183
Attaching the URSA Studio Viewfinder 186
Plugging in a Talkback Headset 186
Operating the CameraFiberConverter 187
Selecting a Return Feed 187
Using the Call Button 188
Using Talkback 188
Using Tally 189
Status Indicators 189
Audio Inputs 190
IP Video 191
Power Specifications 191
Additional Camera Controls 192
Operating the Studio Fiber Converter 193
Using the Menu 194
Rack Mounting the Studio Unit 197
Camera Unit Connections 201
Camera Power Connection 201
PTZ Interface 201
Talkback Connection 202
Tracker Interface 203
DC Connection 203
D-Tap Output 204
Reference Output and Operation 204
Studio Unit Connections 205
12G-SDI Output 205
Return SDI Inputs 205
Reference Input and Output 206
Talkback Interface 206
PTZ Interface 208
Audio Outputs 208
Updating Internal Software 209
Updating Blackmagic Camera
Fiber Converter
209
Updating Blackmagic Studio
Fiber Converter
209
Interchangeable Lens Mount 210
Blackmagic URSA Mini Pro PL Mount 212
Blackmagic URSA Mini Pro F Mount 214
Blackmagic URSA Mini Pro EF Mount 217
Blackmagic URSA Mini Pro B4 Mount 219
Blackmagic URSA Mini Pro Shim Kit 221
Using DaVinci Resolve 222
Project Manager 222
Editing with the Cut Page 223
Adding Clips to the Timeline 226
Editing Clips on the Timeline 227
Adding Titles 227
Working with Blackmagic RAW Files 228
Color Correcting your Clips
with the Color Page
231
Adding a Power Window 235
Using Plugins 236
Mixing Your Audio 237
Adding VFX and Compositing
on the Fusion Page
242
Mastering Your Edit 250
Quick Export 250
The Deliver Page 251
Understanding Studio Camera Control 252
Using Camera Control 253
DaVinci Resolve Primary
ColorCorrector
259
Blackmagic Camera Setup Utility 262
Working with Third Party Software 264
Working with Files from
CFast 2.0 and SD cards
264
Working with Files from SSDs 265
Using Final Cut Pro X 265
Using Avid Media Composer 2018 266
Using Adobe Premiere Pro CC 267
Developer Information 268
Blackmagic Bluetooth Camera Control 268
Blackmagic SDI and Bluetooth
Camera Control Protocol
270
Example Protocol Packets 277
Blackmagic Tally Control Protocol 277
Blackmagic URSA Mini B4 Mount 280
Shimming Lens Mounts 282
Shimming URSA Mini PL 282
Shimming URSA Mini Pro 284
URSA Mini SSD Recorder 285
Mounting and connecting
URSAMini SSD Recorder
286
Using URSA Mini SSD Recorder 288
Updating URSA Mini SSD
Recorder’s internal software
290
Help 291
Regulatory Notices 292
Safety Information 293
Warranty 294
5
Blackmagic URSA Mini and URSA Mini Pro
Which camera are you using?
You’ll notice while reading this manual that occasionally a feature will be specific to a particular
Blackmagic URSA Mini camera. All URSA Mini cameras produce incredible, wide dynamic range
images and share the same basic chassis. There are some differences between different
models, though.
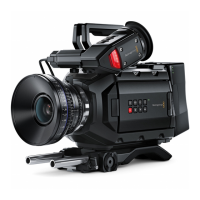
The available models are
URSA Mini Pro 12K
URSA Mini Pro 4.6K G2
URSA Mini Pro 4.6K
URSA Mini 4.6K
URSA Mini 4K
URSA Mini Pro 12K URSA Mini Pro 4.6K G2
12 pin broadcast
connector
ND filters
12 pin broadcast
connector
ND filters
URSA Mini Pro 4.6K URSA Mini 4.6K PL
12 pin broadcast
connector
ND filters
12 pin broadcast
connector
URSA Mini 4K EF
6Which camera are you using?
URSA Mini Pro
URSA Mini Pro 12K comes with a PL mount, and URSA Mini Pro 4.6K G2 and URSA Mini Pro 4.6K
come with an EF mount. You can change the lens mount on all URSA Mini Pro cameras to
accept other lens types. For more information on the interchangeable lens mount, see the
‘interchangeable lens mount’ section.
URSA Mini Pro is easy to recognize by the additional control buttons and LCD status screen on
the left side of the chassis, as well as the ND filters near the lens mount. URSA Mini Pro 4.6K G2
also features an orange ‘G2 4.6K’ icon on the front above the lens mount and an orange ‘G2’
icon on the left side of the external control panel. Naturally, the additional control buttons will
mean that you have different options for controlling your camera and changing settings. On the
side of URSA Mini Pro 12K’s external control panel is a ‘12K’ icon and ‘HDR’ icon. The rear panel
of URSA Mini Pro 12K has the headphone socket on the top right corner above the SDI ports,
and a USB-C port is located in the bottom right corner below the 12V power connector.
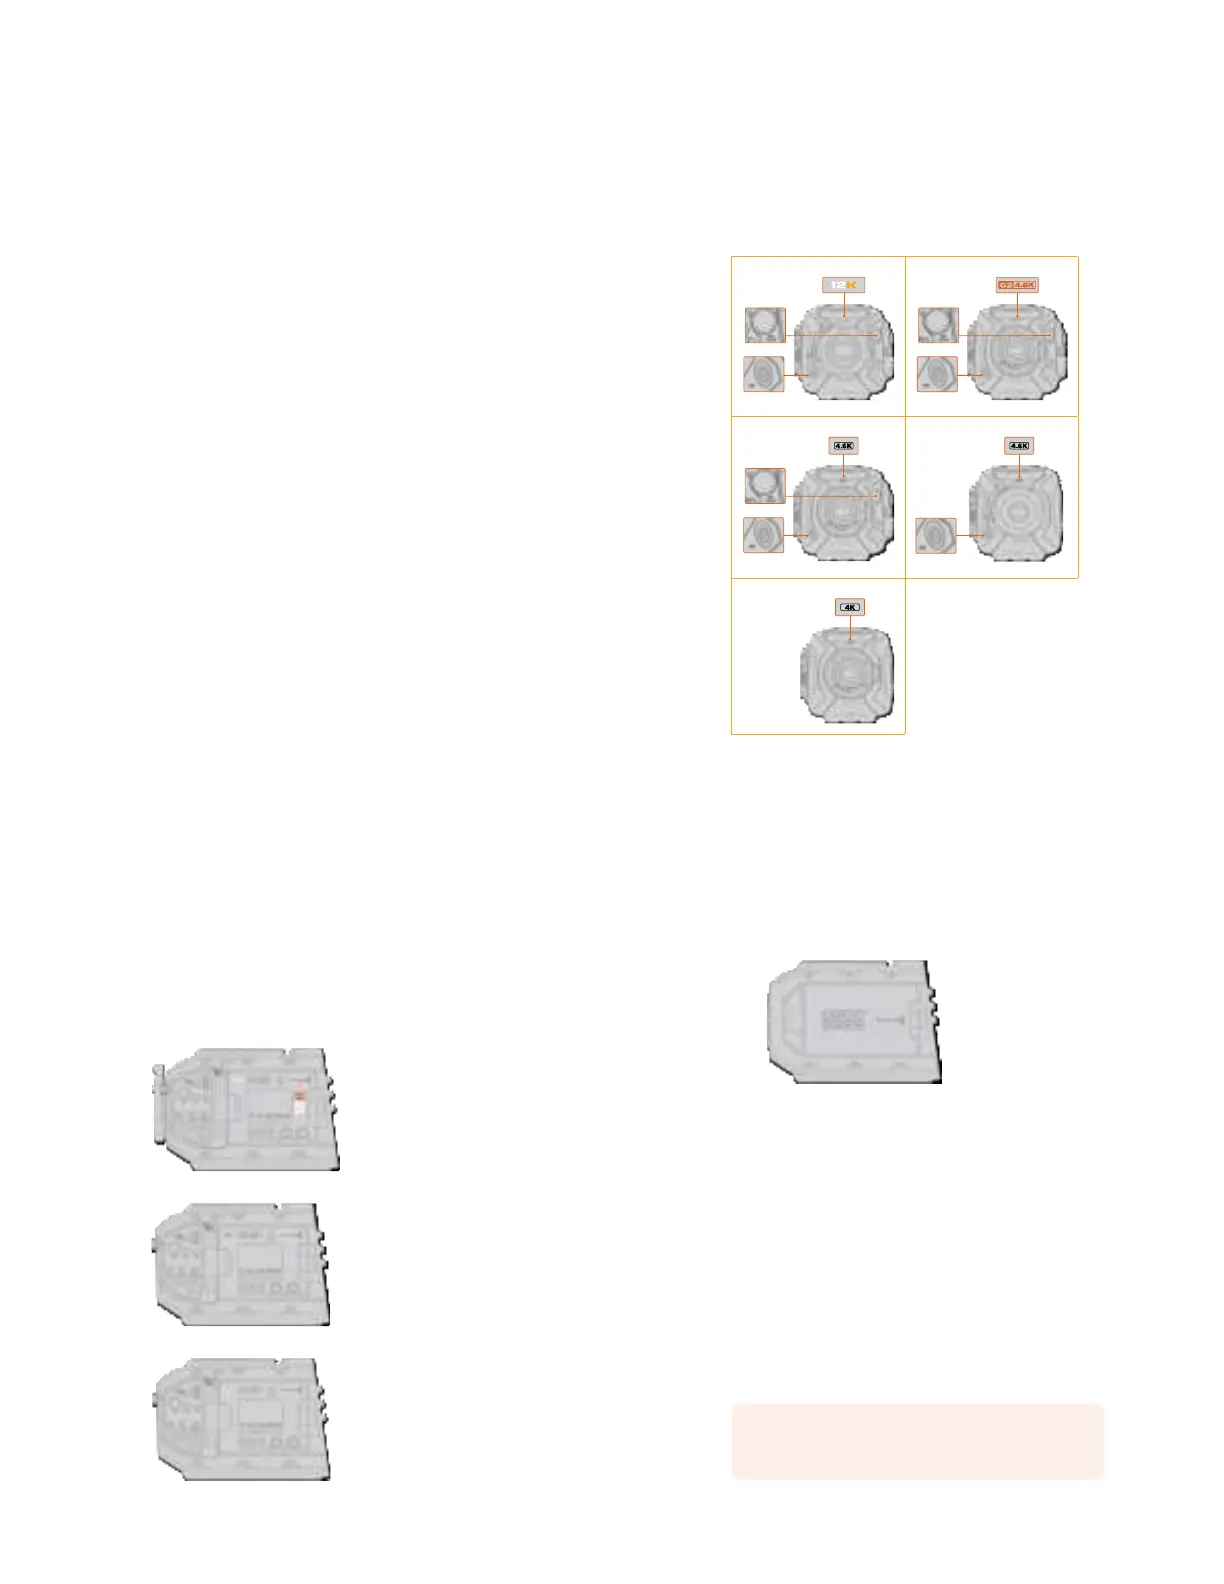
URSA Mini Pro 12K, left side
URSA Mini Pro 4.6K G2, left side
URSA Mini Pro 4.6K, left side
7Which camera are you using?
URSA Mini
Aside from the sensors used, URSA Mini 4K and 4.6K models are nearly identical. The control
buttons and software menus are laid out the same way, and operating the cameras is
essentially the same. You’ll simply find a few more resolution options on cameras using the
4.6Ksensor, together with a greater range of ISO settings. An easy way to tell which sensor
your camera has is to look for a ‘4K’ or ‘4.6K’ icon above the lens mount.
URSA Mini, left side
It’s also worth noting that URSA Mini cameras are available with EF and PL lens mounts.
Aneasy way to tell the difference between these is the presence of a 12 pin broadcast lens
connector near the lens mount on PL models, and of course, the mounts themselves if you are
familiar with EF and PL mounting systems. See the ‘getting started’ section for more information
on these mounts.
Now that you know how to identify the different URSA Mini models, you can get started
usingyour camera!
Getting Started
Getting started with your Blackmagic URSA Mini is as simple as mounting a lens, and powering
your camera.
Attaching a Lens
Attaching a lens to your camera is the same process for all URSA Mini cameras, however the EF,
PL, B4 and F mounts have slightly different ways of operating. In all cases, the first step is to
remove the protective dust cap.
To remove the protective dust cap from the EF lens mount, hold down the locking button and
rotate the cap counterclockwise until it is released. For the PL and B4 mount lenses, rotate the
locking ring counterclockwise and pull the protective dust cap away from the mount. For the F
mount, hold down the locking button and rotate the cap clockwise until it is released.
NOTE Blackmagic URSA Mini Pro features an interchangeable lens mount capable
of accepting EF, PL, B4 and F mount lenses, as well as additional lens mounts with
accessories. Formore information on switching between mount types on
URSAMiniPro, refer to the ‘interchangeable lens mount’ section in this manual.
8Getting Started
 Loading...