EasyManua.ls Logo

Blackridge BR500 - User Manual

Blackridge BR500
16 pages
Print Icon
To Next Page IconTo Next Page
Loading...
MODEL NO. BR500 - PLU: 590729
1HP AIR
INFLATOR
L/MIN
FREE AIR DELIVERY
70
12
MTH
WARRANTY
INSTRUCTION MANUAL
8
L
TANK CAPACITY
115
PSI
8 BAR PRESSURE
NO REGULATOR
1HP Direct drive motor
8 Litre tank size
Includes Nitto style fitting
Question and Answer IconNeed help?

Do you have a question about the Blackridge BR500 and is the answer not in the manual?

Summary

Warranty Information

What is Covered by Warranty

Details manufacturing faults or defects covered by the warranty.

How to Claim Warranty

Outlines steps to claim warranty, requiring receipt, model, and serial number.

Technical Specifications

Air Inflator Specifications

Lists key technical details like voltage, motor, tank size, pressure, and air delivery.

Know Your Air Inflator

Component Identification

Identifies and labels key parts of the air inflator with numbers for reference.

Operating Instructions

Pre Setup Checks

Guides on checking alignment, parts, and mains voltage compliance before operation.

Assembly Procedures

Instructions for unpacking, and assembling the air filter and handle.

Controlling Your Air Inflator

Turning On and Off

Explains how to operate the ON/OFF button on the pressure switch for power control.

Using Your Product

Initial Use and Placement

Covers initial running-in, positioning on level ground, and away from dust/paint.

Pressure Adjustment Limitations

Explains that outlet pressure is fixed at 115PSI and a regulator is needed for adjustment.

Post-Operation Procedures

Steps for safely shutting down, disconnecting, cleaning, and storing the air inflator.

Maintenance Schedule

Daily and After Use Tasks

Tasks to perform before and after use, including sealing/opening the drain tap and checking the safety valve.

Periodic Air Filter Replacement

Recommends replacing the air filter every 50 hours of use.

Drain Tap Operation Guide

Details on how to open and seal the drain tap for draining moisture and air.

Connections and Safety Checks

Air Fitting Outlet Connection

Instructions for connecting a 'Nitto style' male plug to the female socket.

Safety Valve Operational Check

Procedure to check the safety valve operation by pulling the ring and releasing air.

Troubleshooting Common Issues

Inflator Not Starting or Pressurizing

Provides solutions for inflator not starting, not building pressure, or not holding pressure.

Specific Safety Instructions

Electrical and Power Safety Guidelines

Warnings about plug compatibility, avoiding extension cords, and generator use.

Operational Safety Precautions

Advice on duty cycle, avoiding hot components, and disconnecting power before servicing.

Personal Protective Equipment (PPE)

Recommends safety eye, ear, and respiratory protection during operation.

Complete Warranty Statement

Warranty Terms and Conditions

Outlines coverage, exclusions, voiding conditions, and responsibilities for repairs and transit.

Consumer Rights and Warranty

Explains rights under Australian Consumer Law and how the warranty aligns with mandatory guarantees.

General Safety Instructions

Lubrication and Assembly Safety

Notes that the inflator is oil-free and requires full assembly to avoid voiding warranty or injury.

Work Area and Environment Safety

Guidelines for keeping work areas tidy, well-lit, and ensuring the inflator is level and stable.

Electric Shock and Power Cord Safety

Precautions against electric shock and advice on handling the power cord to prevent damage.

Duty Cycle and Tool Usage

Explains the 50% duty cycle and the importance of using the correct tool for the job.

Product Care and Precautions

Extension Cords and Hot Components

Prohibits extension cords due to voltage loss and warns about hot parts like pipes and the motor.

Maintenance and Disconnection

Advices on cleaning with a damp cloth, checking the power cord, and disconnecting power before any adjustments or cleaning.

Safe Starting and Fire Prevention

Emphasizes ensuring the ON/OFF switch is off before plugging in and general fire precautions.

Personal Safety Guidelines

Clothing and Hair Safety

Recommends avoiding loose clothing/jewelry and securing long hair to prevent entanglement.

Eye, Foot, and Ear Protection

Advises wearing safety goggles, non-slip footwear, and ear protection during operation.

Respiratory Protection and Awareness

Recommends dust masks for dusty operations and staying alert, avoiding operation under influence of medication or substances.

Parts Diagram and Identification

Component List with Part Numbers

Lists all parts of the air inflator with their corresponding descriptions, quantities, and unique part numbers.

Overview

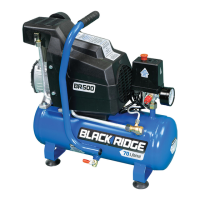
This document is an instruction manual for the BLACK RIDGE 1HP Air Inflator, model BR500 (PLU: 590729).

Function Description:

The BLACK RIDGE 1HP Air Inflator is a portable air compressor designed for various inflation tasks. It features a 1HP direct drive motor and an 8-litre tank. The inflator is equipped with a Nitto style fitting for connecting air tools and hoses. It is intended for domestic use and is not suitable for industrial, commercial, or continuous running applications. The device compresses normal air and should not be used to compress other types of gases. It is also not suitable for pharmaceutical, food, or sanitary purposes, nor for filling scuba or oxygen air bottles/tanks.

Important Technical Specifications:

  • Model No.: BR500
  • PLU: 590729
  • Motor: 1HP Direct drive electric motor
  • Wattage: 750W
  • Voltage: 240V AC - 50 Hz
  • No Load Speed: 2800 RPM
  • Tank Capacity: 8 Litres
  • Free Air Delivery (FAD): 70 L/min
  • Max. Tank Pressure: 115 PSI (8 BAR)
  • Outlet Pressure: 115 PSI Adjustable (Note: No regulator supplied, so outlet pressure is fixed at 115 PSI unless a separate regulator is purchased)
  • Motor/Pump Kicks In: 85 PSI
  • Pressure Cycle Stops: 115 PSI
  • Duty Cycle: 50% (Meaning: 30 seconds ON motor pumping and 30 seconds OFF motor not pumping. Air tool should only be used when the air inflator is not pumping).
  • Noise Rating: 77dB@5M
  • Number of Outlets: 1
  • Warranty: 12 Months

Usage Features:

The air inflator is designed for ease of use with a simple ON/OFF button.

  • Turning ON: Lift up the red ON/OFF button on top of the pressure switch.
  • Turning OFF: Push down the red ON/OFF button on top of the pressure switch.
  • Positioning: Always position the air inflator on level ground, away from the work area to prevent it from getting covered in dust, water, or paint.
  • Pressure Adjustment: The inflator does not come with an outlet pressure regulator, meaning the outlet pressure is fixed at 115 PSI and will gradually drop as air is used. For adjustable or lower pressure, a separate regulator with a gauge must be purchased. The pump automatically starts at 85 PSI and stops at 115 PSI.
  • Air Fitting Outlet: It is fitted with a 'Nitto style' (female) socket. To connect a 'Nitto style' male plug (not included), slide the outer collar down, push in the male plug, release the collar, and ensure the plug clicks fully into place.
  • Safety Valve Check: With a full air tank, gently pull the safety valve ring outwards to release air. Releasing the ring should immediately stop the airflow. If it doesn't work, stop using the inflator and have it serviced. Always wear safety glasses when checking the safety valve.
  • Power Connection: The inflator must be plugged directly into a standard 240V AC power point. Extension cords are not recommended as they can cause power voltage loss and damage the motor, voiding the warranty. A longer air hose should be used instead if more reach is needed.
  • Hot Components: Be aware that many components, including metal pipes, pump, and motor, can become very hot during use and should not be touched.
  • Work Environment: Avoid using in rain, damp, or wet conditions. Ensure the work area is well lit and the inflator is stable.
  • Safety Precautions: Always ensure the air inflator is turned off and disconnected from the power supply before performing any operations, servicing, or changing attachments. Wear safety eye, ear, and respiratory protection when operating. Do not overreach and maintain balance. Stay alert and do not operate under the influence of alcohol, drugs, or medication causing drowsiness.

Maintenance Features:

  • Oil-Free Design: This air inflator is OIL FREE, meaning no oil is used for lubrication.
  • Daily Maintenance (before use):
    • Seal the tank drain tap.
    • Check safety valve operation.
  • Daily Maintenance (after use):
    • Disconnect from main power.
    • Open the tank drain tap to drain excess air and moisture/water. Leave the tap open during storage to allow moisture to drain. To open, pull the lever down to vertical; to seal, push the lever up to horizontal.
    • Wipe down the air inflator.
    • Store safely and securely.
  • After Every 50 Hours of Use:
    • Replace the air filter. The air filter should be carefully screwed into the threaded hole on top of the pump head by hand.
  • Cleaning: Always disconnect the air inflator from the mains power supply and allow it to cool for about one hour before cleaning and storing. Use only a damp soft cloth; never use liquid or solvents.
  • General Maintenance: Periodically check the power cord for damage and have it replaced by an authorised service facility if necessary. Keep handles clean, dry, and free from oil and grease. Ensure ventilation slots and the air filter are clean and free from dust to prevent overheating and motor damage.

Blackridge BR500 Specifications

General IconGeneral
BrandBlackridge
ModelBR500
CategoryPower Tool
LanguageEnglish