Do you have a question about the BlackVue DR750X LTE Plus and is the answer not in the manual?
Avoid installing the product where it obstructs the driver's view.
Install the microSD card into its slot until it locks.
Insert the SIM card using the SIM eject tool.
DR750X LTE Plus is only compatible with 4G LTE networks.
Check the SIM activation guide for detailed information.
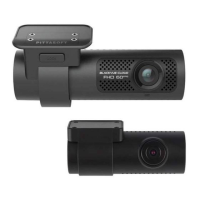
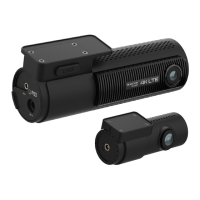
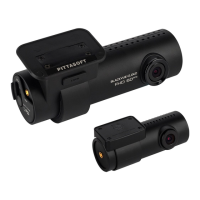
Mount the front camera on the windshield and adjust its angle.
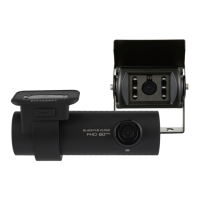
Mount the rear camera on the rear windshield and adjust its angle.
Connect the front and rear cameras using the rear camera connection cable.
Tuck the rear camera connection cable behind window sealing.
Plug the power cord into the cigarette lighter socket and front camera.
Tuck the power cord behind windshield trim.
Turn on the engine to power up and start recording.
Turn off the engine to stop recording; use parking mode kit for engine-off recording.
Firmware loads automatically onto microSD on first use for customization.
Connect and play videos using your smartphone app.
Connect your smartphone to the dashcam via Wi-Fi direct.
Open the app, connect to camera, and select a video from the list.
Wi-Fi direct range, quick play option, and app illustration notes.
Remove the microSD card from the dashcam and insert it into a reader.
Download and install the BlackVue Viewer program from the website.
Run BlackVue Viewer, select a video, and click play.
All images shown are for illustration purpose only.
Pair smartphone, open app, select settings, and configure time zone and other options.
Change Wi-Fi, image quality, sensitivity, voice, speed unit, LEDs, and cloud settings.
Configure settings using the BlackVue Viewer program.
Change Wi-Fi, image quality, sensitivity, voice, speed unit, LEDs, and cloud settings via Viewer.
Open the BlackVue app, log in or sign up, and verify your email.
Connect to Cloud in the app, enable push notifications, and register camera via QR code or manual entry.
Ensure hotspot is on, pair phone, navigate app settings, enable cloud service, and select hotspot.
Save up to 3 SSIDs, not compatible with 5GHz networks.
Go back to firmware settings, tap, and save the Wi-Fi hotspot configuration.
Dashcam establishes internet connection after reboot; Wi-Fi preferred over LTE.
Insert SIM, pair phone, open app, and configure APN settings to activate the SIM card.
Once connected to internet, access Cloud features via the Connect to Cloud menu.
SIM must be activated; use Cloud features like Live View, playback, location, and updates.
Recommended to format the microSD card once a month for stable operation.
Format the microSD card using the device or the BlackVue Viewer program.
Use official BlackVue microSD cards and regularly upgrade firmware for improvements.
Visit www.blackvue.com for support, manuals, and firmware updates; email cs@pittasoft.com.
| Product Type | Dash Camera |
|---|---|
| Rear Camera Resolution | Full HD (1920x1080) |
| LTE | Yes |
| GPS | Yes |
| Battery | Super Capacitor |
| Channels | 2 |
| Video Resolution | Full HD (1920x1080) |
| Front Camera Sensor | Sony STARVIS CMOS Sensor |
| Viewing Angle | 139° (Front), 139° (Rear) |
| Wi-Fi | Yes |
| Parking Mode | Yes |
| Storage | MicroSD card up to 256GB |
| Power Supply | 12V-24V DC |
| Operating Temperature | -20°C to 70°C |
| Cloud Connectivity | Yes (BlackVue Cloud) |