5
3. Mincing-tube-locking unit
6. Rev button
2. Mincing-tube-release button
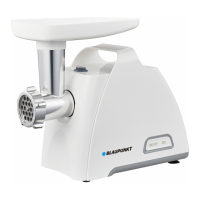
1. Body
4. Power-on button
5. Securing ring
7. Pusher
8. Feeder tray
11. Blade
10. Screw conveyor
9. Mincing tube
12, 13, 14. Mincing discs 3, 5 & 7mm
ASSEMBLY
2. Slot the screw conveyor (10) into the mincing tube and fit it into the motor gear.
5. Tighten the securing ring (15).
6. Mount the feeder tray (8).
1. Insert the mincing tube (9) into the locking unit (3). Swivel the neck of the mincing tube clockwise,
fit the lugs in place, and lock by swivelling the tube (9) anticlockwise.
3. Attach the blade (11) to the end of the screw conveyor.
4. Fit the required mincing disc (12-14), fitting the lugs into the grooves.
All parts, except for the body (1) with the motor, are suitable for cleaning with water and washing-up
liquid.
4. Feed in the products to be minced by placing them on the feeder tray and moving them with the
pusher into the mincing tube. Avoid applying too much pressure on the pusher to allow the screw
conveyor to move the products gradually into the mincing tube.
Note: if products get stuck inside the mincing tube, turn off the Mincer and use the Rev button to draw
the products in the mincing tube back in the opposite direction. If the products are still stuck, turn off
the Mincer and unplug it to empty the mincing tube.
3. Use the Power-on button to start the Mincer.
Clean the body (1) with a mildly damp cloth, and then wipe it dry. Do not submerge the body in water
or other liquids.
Make sure the appliance has been disconnected from the power source.
Note: when using as a sausage-maker attachment, using the Slow button for the lower speed is
recommended.
USE
CLEANING AND MAINTENANCE
1. Assemble the Meat Mincer.
2. Connect the power supply.
FMM401