4
SETTING UP THE LIGHT
Stand-by/sleep mode: Short press button 1,
cycling through brightness modes until eect
turns o. (Retains charge ~12 hours)
Full shut down: Long press buttons 1 and 2.
(Retains charge 5-7 days. Must be plugged into
USBC power source to turn on again.)
Before operating your H2Orb, please read the “Before you Begin” section and
“Notice” section of this user’s guide.
1. Charge the unit via the provided USB power cord. Short press the power button to
turn on the eect. The unit will illuminate based on the settings previously used.
2. To enter stand-by mode (and charge more quickly), short press the power button
until the eect turns o. Stand-by mode holds a charge for roughly12 hours. The red
indicator light will ash when battery is low. If there is no light, the battery is depleted.
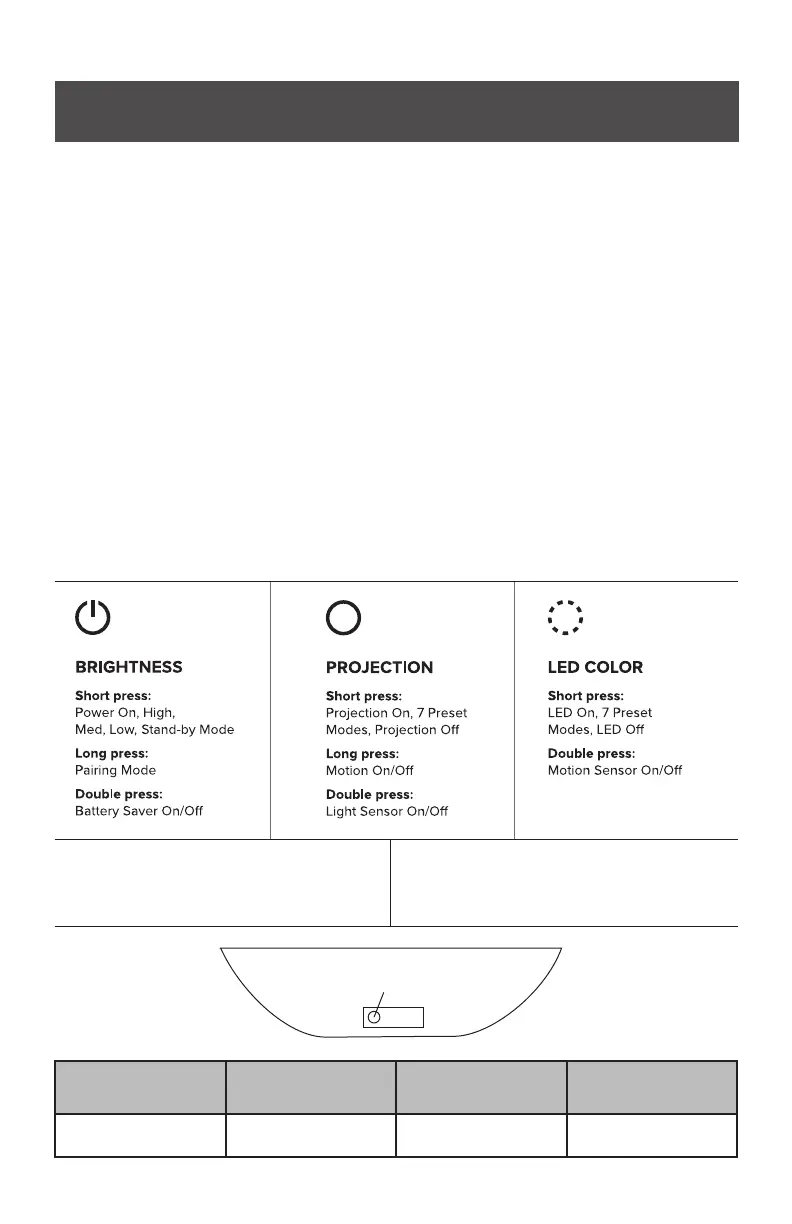
3. Short press the power button to adjust brightness. Short press the middle button
to cycle through default projection/swirl eects. Short press the last button to cycle
through preset LED colors.
4. The H2Orb has a built-in battery saver mode. It also has a light sensor, which allows
the light to turn on automatically when it gets dark, and a motion sensor, which can
control power on/o with a hand wave near the unit. These are all features that can be
toggled on or o via the physical buttons or the app. See the chart below for detailed
button functions.
5. To pair with the BlissHome app, long press the power button until the H2Orb ashes
blue. It is best to pair in an area with good Wi-Fi signal, then take the unit outside for
use. If there is no Wi-Fi signal, tap“Skip Wi-Fi” to connect via Bluetooth.
6. To power down the light, long press the rst and second buttons until the unit turns
o. The H2Orb will hold a charge for up to a week when fully powered down.
Solid Red Light
Blinking Red Light
(plugged in)
Blinking Red Light
(in use)
Light O
Charged / ready to use Charging Low battery
Charge depleted /
Shutdown mode
Battery charge
indicator light