customerservice@focus-ontools.com
11
SPOOL
WARNING: Before replacing the nylon
line, stop the engine of the brush cutter
and check whether the cutting head
stops rotating.
1. If the line is used up, the spool must
either be replaced by one of the
same type, or the trimming line (39)
must be refilled.
We recommend to use the nylon line
which has good elasticity but contains
no metal wire.
2. To refill the trimming line, lay the
product on a flat, stable surface
with its trimmer head facing upwards.
3. Rotate the backing flange until one
of the notches is aligned with the
hole in the gear head.
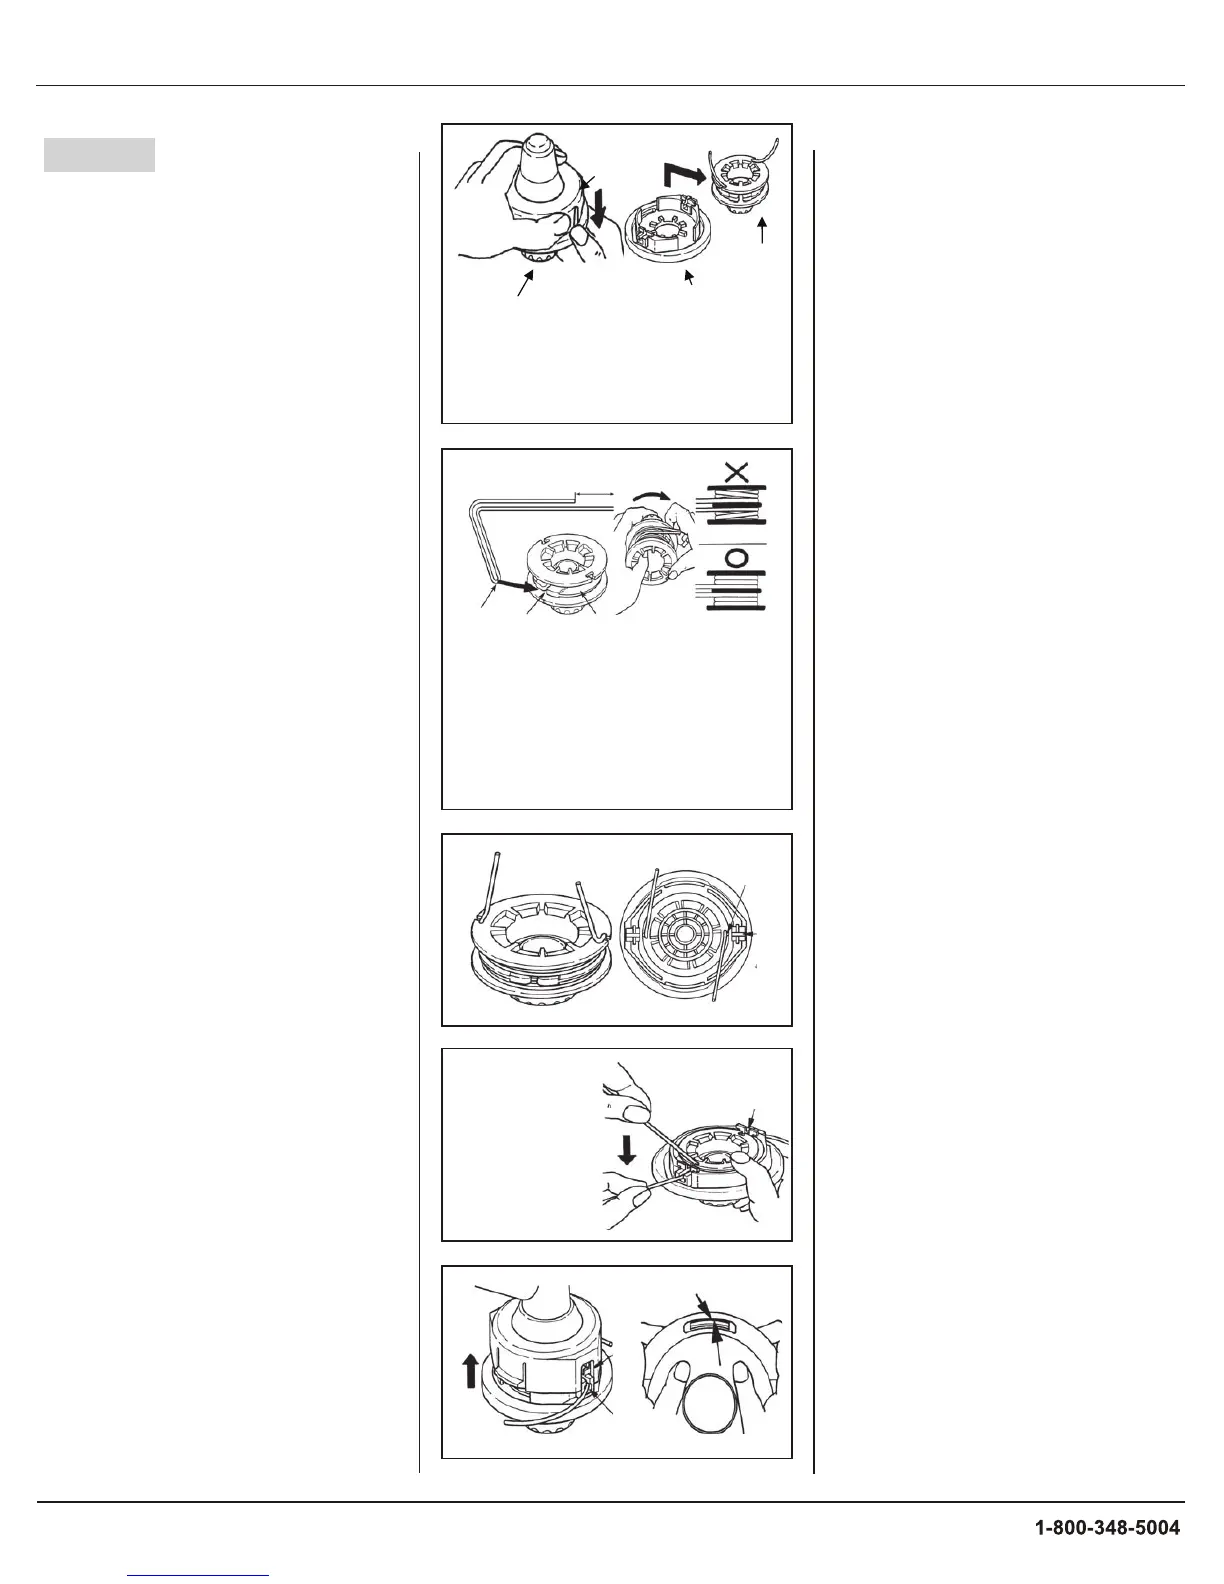
4. Replacement of nylon line.
Step (1): Press the stop claw in from
both sides and remove the cover.
Then remove the parts one by one.
Step (2): Remove the roll.
Step (3): When almost the whole nylon
line on the roll is pulled out, remove the
residual nylon line, and wind a new
nylon line according to Step (4). If the
nylon line on the roll is “molten and
bonded”, remove the whole nylon line,
strip the molten and bonded part, and
rewind the residual line according to
Step (4). Step (4): Bend the nylon line
at 12cm away from the end. Then
insert the bent part into the nylon line
hole of the intermediate split plate.
Step (5) : Tightly wind the line leftwards
into the roll groove.
Step (6): After winding, bend both ends
into the hook shape and respectively
insert them into the corresponding
holes. Reserve about 10cm outside
the holes.
Step (7) : Align the holes
of the roll and the small holes of the
groove and install the cover.
Step (8) : Pull the line out of the cover.
(A): Pull out one end of the line out of
the corresponding hole of the roll.
(B): Install the line through the
corresponding hole of the groove.
Step (9): Assemble the cover and shell.
(C): Align the hole of the cover and the
groove of the shell.
(D): Press the fixing claw of the shell
into the corresponding groove fo the
cover until the claw is fixed in the
groove of the cover.
5. Wind the 2 parts of the trimming
line in a clockwise direction firmly
around each part in the guide on
the spool.
6. Insert each end of the threads in
respective holes.The threads should
stick out 1/2 in.on each side.
7. Screw the bumper (38) anti-clockwise
until it is completely and safely locked.
WARNING:
After changing the trimming line, run
the product under no load for at least
the line and the product are opreating
correctly.
WARNING: Never use steel thread.
Always use cutting means in perfect
condition, free of damage.
1. Threaded knob of roll
2. Shell
3. Cover
4. Roll
4
3
1
Step (2)
2
Step (1) Step (3)
5. Intermediate split plate
6. Bending part
7. Nylon line hole
8. Winding direction
9. If winding is not performed tightly,
the line will not be neat after winding.
10. Wind the line into the groove.
12cm
6
7
5
10
9
8
Step (7)
Step (6)
Step (8)
(A)
(B)
Step (9)
(C)
(D)



 To Next Page