then use the provided wrench to tighten them an additional ~1/16 of a turn. If you
can’t loosen them with your fingers, they are tight enough.
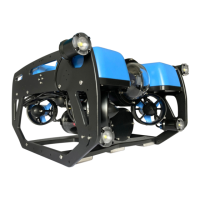
1. Thruster 1 (CCW propeller) with red penetrator nut
2. Thruster 5 (CCW propeller) with red penetrator nut
3. Thruster 3 (CW propeller) with red penetrator nut
4. Lumen with red penetrator nut (or Blank Penetrator (red) if not installing Lumens)
5. Thruster 4 (CW propeller) with red penetrator nut
6. Thruster 6 (CW propeller) with red penetrator nut
7. Thruster 2 (CCW propeller) with red penetrator nut
8. Tether with black penetrator nut (standard Tether) or red penetrator nut (Slim
Tether)
Installing the End Cap
To reinstall the Aluminium End Cap with 14 Holes, you will need the following parts and
tools:
• The face seal O-ring, the 6 M3x12 screws, and the clips that you removed from the
end cap earlier
• 1 x Silicone Grease - 10g Tube
• 1 x Aluminium End Cap with 14 Holes with all Cable Penetrators and Blank
Penetrators installed
• 1 x 2.5 mm hex driver
1. Clean the O-ring and make sure that it is free of any debris or damage.
2. Clean the O-Ring Flange (4” Series) and make sure that the O-ring groove is free of
any debris or damage
3. Apply Silicone grease to the O-ring.
4. Install face seal O-ring onto the O-Ring Flange (4” Series).
5. Apply one drop of threadlocker to each of the M3x12 screws. Roll the screws around
on a paper towel to evenly spread the threadlocker and to remove excess
threadlocker.
6. Install Aluminium End Cap with 14 Holes with all Cable Penetrators and Blank
Penetrators installed onto the O-Ring Flange (4” Series). Do not fully tighten any
screws when first installing them; it may cause the O-ring to slip out of its groove. The
end cap’s orientation when installed should match the image below. Make sure that
the clips are oriented correctly. One should be just right of the Thruster 3 penetrator,
and the other should be just left of the Thruster 4 penetrator.
 Loading...