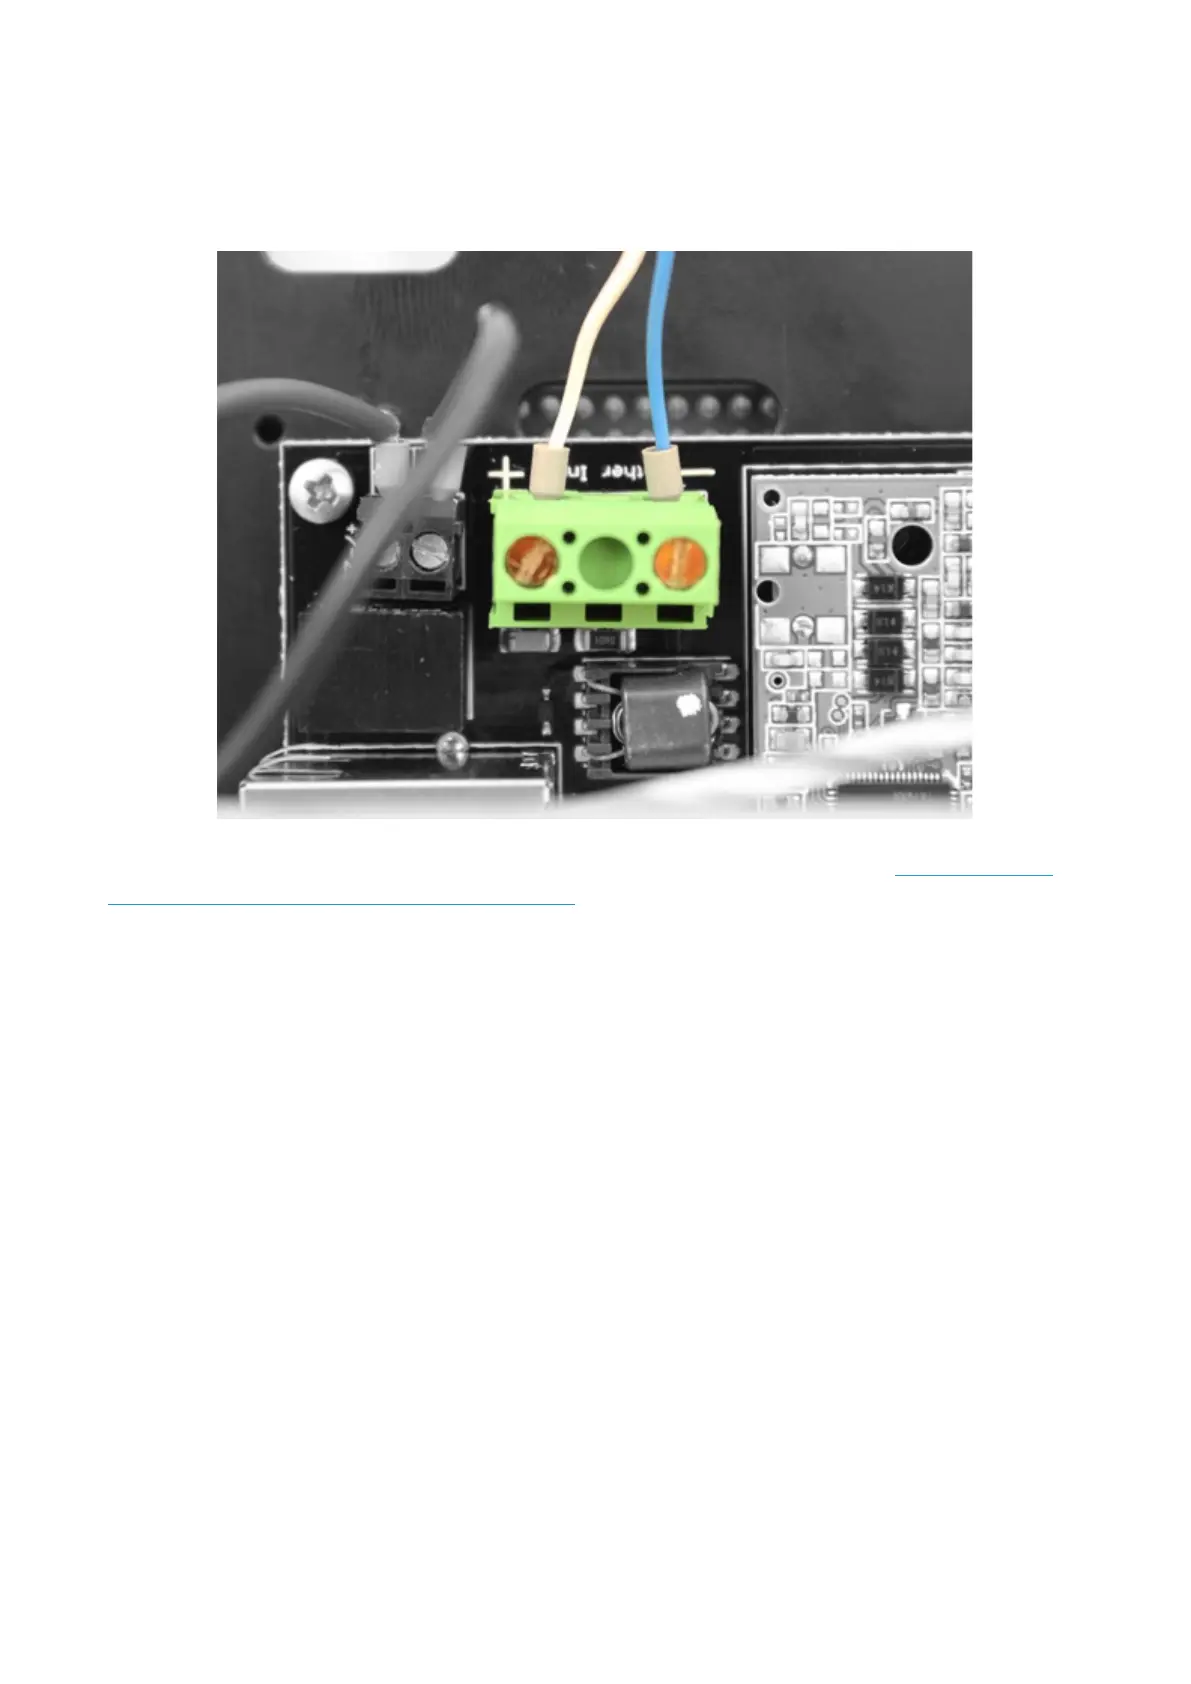
If you received your BlueROV2 prior to August 7th, 2018, the following step applies to R1
tethers:
Connect the tether wires to the Fathom-X Tether Interface Board. The other 6 wires can do
not need to be connected to anything to operate the ROV. They are for future expansion.
If you received your BlueROV2 prior to March 14th, 2017 you will need to install the SOS
Leak sensor using the archived instructions.
Cable Routing
To route the cables in the Electronics Enclosure so that they will not snag on the
Watertight Enclosure for ROV/AUV (4” Series) with Dome End Cap installed, you will need
the following parts and tools:
• 3 x 5 1/2” zip ties
• 1 x Wire strippers or scissors
1. On the starboard side (Pixhawk side) collect the Bar30 wires and the Lumen signal
wire and zip tie them to the long hex standoff slightly forward of the Motor Terminal
Block using one zip tie. Make sure that the locking head of the zip tie and the wires
are oriented to the inside of the long hex standoff.