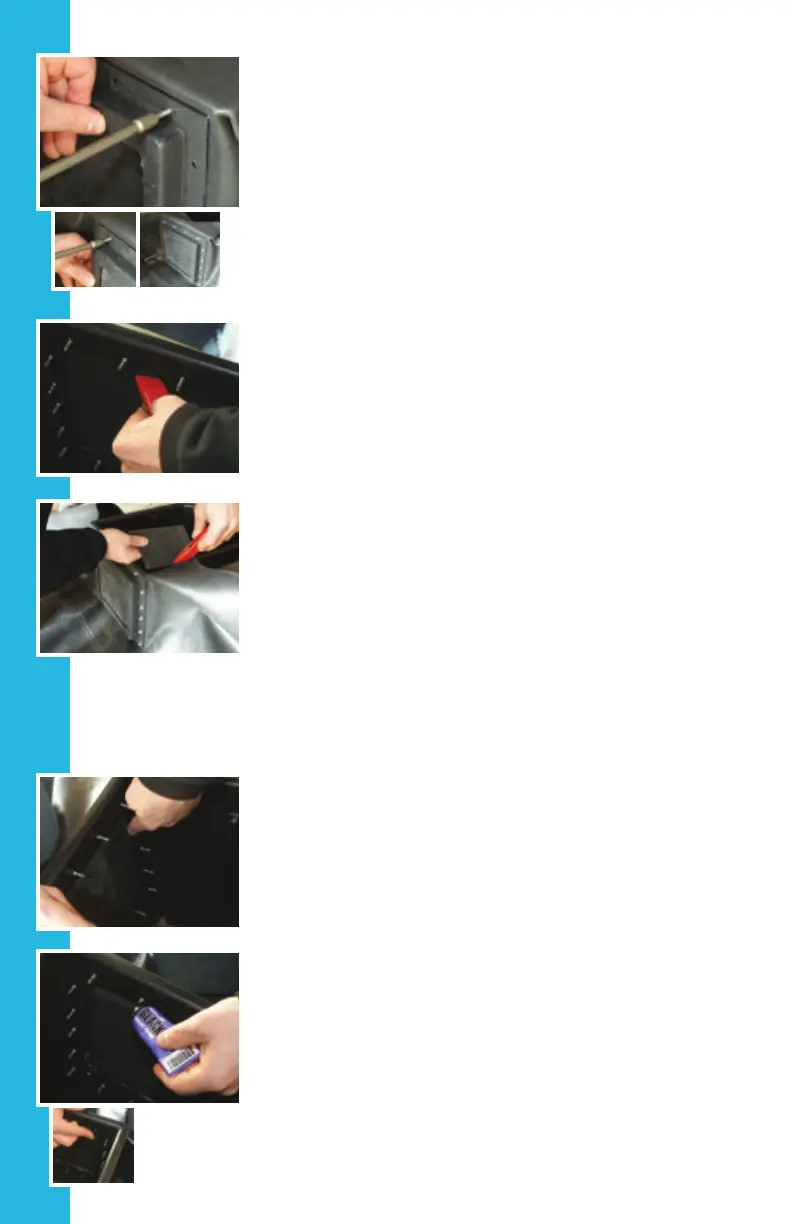
Push the guide nails through the guide holes and liner
from the inside of the skimmer (this will puncture a
small hole in the liner). Place the snout into position
by sliding the top corner holes of the snout over the
guide nails. (The snout should be installed so that the
snout door hinges at the bottom and opens into the
skimmer). While holding the snout in position remove
one of the guide nails and drive the rst screw into
that hole. Keeping the snout in position, remove the
other guide nail and drive a screw into the second
guide hole. With the snout held into position with
the rst two screws, continue driving the remaining
screws into the pre-drilled holes around the snout.
Be sure to install screws into all pre-drilled holes to
prevent water from leaking around the snout.
From inside the skimmer use your utility knife to cut
out the liner in the snout area so water can ow from
the pond into the skimmer. Simply follow the edge of
the skimmer opening with your knife to cut away liner.
This works best with a new, sharp blade.
At this time you can also trim away any excess liner
that extends above the front top edge of the skimmer
box.
Use your remaining silicone to run an additional bead
along the joint inside of the snout where the skimmer,
liner, and snout come together. Use your nger to
smooth out the excess silicone.
Install Black Screw Caps
Push the black screw caps onto each of the screw
tips on the inside of the skimmer box. We recommend
placing a small dab of silicone on the end of the screw
before pushing the black cap over the screw. This will
help keep the screw caps in place.
STEP 5


 To Next Page
 Loading...