03
Operation
ALWAYS ensure that operators are fully comfortable operating the downlight installation
kit and understand all of the safety precautions before beginning.
ALWAYS ensure the drill is not connected to a power source and is fully switched off
before attaching the holesaw to the drill.
ALWAYS ensure you have checked and are aware of whether there are any wires or pipes
above where you are drilling.
Note – We always recommend testing this first on a test piece of material until you
become comfortable operating the downlight installation kit.
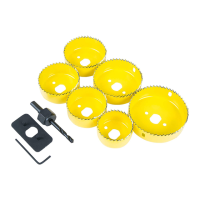
How to attach a holesaw to a drill
1. Choose the holesaw that has the diameter needed for the hole that you would like
to cut.
2. Refer to the parts diagram on page 2 and check the fit of the arbor with the holesaw.
3. Unthread the arbor nut from the arbor.
4. The holesaw in the downlight installation kit has three holes at the back. A drive plate
will have been provided in the set. This will need to be used on the back of the holesaw
to provide a secure connection.
5. Insert the arbor through the centre of the holesaw and drive plate. Then secure in
place using the mandrel nut.
ALWAYS ensure that there is a tight and secure connection between the holesaw and
the arbor.
6. On your drill open the jaws of the drill chuck.
7. Insert the arbor into the drill chuck.
ALWAYS ensure that the drill chuck has been tightened and that there is a secure
connection before operation.
How to use the downlight installation kit
1. Mark the centre of the hole that you would like to cut. Drill a pilot hole completely
through the workpiece.
2. Align the holesaw on the centre of the workpiece with the pilot hole you have just
drilled. The drill should be held at 90°.
3. Pull the trigger on the drill and make contact with the workpiece, pressing straight in.
4. Start slowly and increase the speed of the drill when a circle groove has been made in
the workpiece, pushing the drill in with moderate pressure.
5.
When the hole has been cut release the trigger on the drill.
ALWAYS ensure the drill has come to a complete stop before it is removed from the
workpiece.
 Loading...