Do you have a question about the BlueSpot MINI HVLP 07909 and is the answer not in the manual?
Covers essential safety guidelines including equipment handling, work area conditions, and personal protection.
Instructions for cleaning the paint cup, including scraping excess paint and using solvent.
Procedure for flushing and cleaning the main body of the spray gun with solvent.
Guidance on cleaning critical nozzle components and adjusting fluid flow for optimal performance.
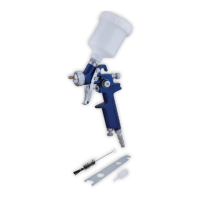
The BlueSpot Mini HVLP Spray Gun (125ml) is a specialized tool designed for applying coatings with precision and minimal material waste. Its primary function is to atomize paint or other coating materials into a fine mist, allowing for an even and smooth application on various surfaces. The HVLP (High Volume Low Pressure) technology ensures that a high volume of air is used at a lower pressure, which significantly reduces overspray and improves transfer efficiency, meaning more paint lands on the target surface and less is wasted into the air. This makes the spray gun particularly suitable for projects where material conservation is important, or when working with expensive coatings.
The design of the spray gun is compact and ergonomic, making it comfortable to handle for extended periods. The 125ml cup capacity is ideal for smaller projects, touch-ups, or when frequently changing colors and finishes, as it minimizes the amount of paint needed per batch and reduces cleaning time between different applications. The gun is equipped with a 0.8mm nozzle, which is a versatile size for a range of coating materials, providing a good balance between fine finish and coverage. The pattern width of 190mm allows for efficient coverage of surfaces while maintaining control over the spray area.
Before operating the spray gun, it is crucial to read and understand the user manual thoroughly to ensure safe and effective use. Always ensure the spray gun is disconnected from the air supply before performing any adjustments, maintenance, or accessory changes. The paint cup remains pressurized after disconnection, so it should be depressurized by gently opening it, rather than pulling the trigger.
The spray gun requires an air pressure of 43 PSI for optimal performance. It is vital to ensure that the air supply is clean and does not exceed this maximum pressure. Excessive pressure or unclean air can lead to premature wear of the product and potentially cause damage or injury.
Setting up the work area is an important first step. The area should be clean, uncluttered, and well-lit. Children and unauthorized persons should be kept away from the work area to prevent distractions or injuries. The air hose should be routed to avoid creating a tripping hazard and should be long enough to allow for free movement during operation. Masking nearby objects that are not to be sprayed is also recommended.
To prepare the spray gun for use, thread the paint cup onto the top of the gun and tighten it securely. Follow the paint manufacturer's instructions for preparing and mixing the paint. Unscrew the lid of the cup, fill it approximately three-quarters full with the prepared paint, and then securely tighten the lid.
Once the air compressor is started, set the regulator to the required pressure, ensuring it does not exceed the maximum. The spray gun features several adjustment controls to fine-tune the spraying process. The paint adjustment knob controls the amount of paint flow, allowing the user to regulate how much material is dispensed. The air flow control knob manages the atomizing air flow, influencing the fineness of the spray. The air input adjustment knob controls the overall volume of air input.
The air nozzle can be rotated 90 degrees to achieve either a horizontal or vertical fan spray pattern, depending on the orientation of the surface being sprayed. Once the desired direction is set, the nozzle can be locked in place with the retaining ring.
When spraying, it is important to hold the gun perpendicular to the surface and move it parallel to achieve an even coating. Using two hands, one to steady the cup and the other to operate the trigger, can improve control. Aim the nozzle at the material to be sprayed. To avoid paint buildup, start the stroke before squeezing the trigger and release the trigger before finishing the stroke. Each stroke should overlap the preceding one to ensure a uniform finish. Maintain a distance of 6 to 9 inches between the spray gun and the material, adjusting based on flow and paint type. Do not stop moving the spray gun while spraying. If a break of more than 5 minutes is needed, turn off the air supply, disconnect the cup, and thoroughly rinse the cup and spray gun with clean water.
Proper maintenance is essential for the longevity and performance of the BlueSpot Mini HVLP Spray Gun. Cleaning the spray gun immediately after every use is paramount. Delayed or inadequate cleaning can lead to blockages and significantly impair the product's future performance. Always disconnect the spray gun from the air supply before attempting any cleaning or maintenance tasks. It is also crucial to follow the paint manufacturer's recommendations for cleaning solvents and their proper disposal.
When re-assembling the spray gun, always take care to avoid cross-threading. Screw parts hand tight. If a part does not turn easily, check for the correct part, realign it, and try again. Never use excessive force during re-assembly. If changing the nozzle size, ensure that the complete nozzle set (air nozzle, fluid nozzle, and paint needle) is exchanged together. Always insert the paint nozzle before the paint needle.
Troubleshooting common issues is also covered in the manual. For example, a heavy center pattern might indicate paint that is too thick or air pressure that is too low. A light center pattern could be due to air pressure that is too high or an adjustment screw that is not open enough. Air nozzle blockages, loose seals, or dried paint can cause heavy top/bottom patterns. Pattern issues on one side might be caused by dirt on the air nozzle or blocked holes. Spluttering spray can be due to low paint level, a tipped cup, a clogged air vent, or a loose/damaged fluid tip. The manual provides specific solutions for each of these problems, such as thinning paint, adjusting air pressure, cleaning components, or replacing damaged parts.
By following these detailed usage and maintenance instructions, users can ensure the BlueSpot Mini HVLP Spray Gun operates efficiently, provides consistent results, and has a long service life.
| Model | 07909 |
|---|---|
| Nozzle Size | 1.4 mm |
| Max Pressure | 3 bar |
| Air Consumption | 170 l/min |
| Container Capacity | 600 ml |
| Type | HVLP |