EasyManua.ls Logo

BMB DAR-800II User Manual

BMB DAR-800II
22 pages
To Next Page IconTo Next Page
Page #1 background imageLoading...
Page #1 background image
CONTENTS
OWNER’S MANUAL
Thank you very much for purchasing our DIGITAL ECHO 4CH AV
AMPLIFIER. Prior to use, be sure to read this owner's manual from
cover to cover so that you can make the most out of this unit. The
manual will come in handy whenever you come across any question or
trouble while using the unit.
DIGITAL ECHO AV AMPLIFIER
IMPORTANT SAFETY PRECAUTIONS ................... 2
IMPORTANT SAFETY PRECAUTIONS ................... 3
SPECIAL FEATURES .............................................. 4
PRECAUTIONS FOR HANDLING ........................... 4
BEFORE CONNECTION ......................................... 4
SAFETY PRECAUTIONS ........................................ 5
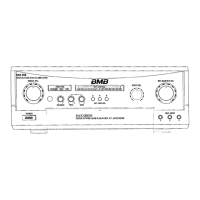
NAMES OF FRONT-PANEL CONTROLS AND
THEIR FUNCTIONS................................... 6
NAMES OF REAR-PANEL CONTROLS AND
THEIR FUNCTIONS................................... 8
SYSTEM CONNECTIONS......................................11
CONNECTIONS ................................................... 12
MECHANISM TO PREVENT EXCESSIVE VOLUME
LEVELS OF MIC MASTER VOL CONTROL AND
M
USIC VOL CONTROL ...................................... 13
DOOR LOCKING .................................................. 13
BASIC OPERATION .............................................. 14
ECHO/EFFECT OPERATION ................................ 15
AUTO/VIDEO SIGNAL DETECTION MODE .......... 16
VIDEO SWITCHING .............................................. 16
REMOTE CONTROL OPERATION ........................ 17
TROUBLE SHOOTING ......................................... 18
MAINTENANCE .................................................... 20
AFTER-SALE SERVICING .................................... 20
MANNERS FOR CUSTOMERS ............................. 20
COPY RIGHT ....................................................... 20
ABOUT THE PRODUCT ....................................... 20
SPECIFICATIONS ................................................ 21
DAR-800II.indd 1 09.11.5 10:13:24 AM

Questions and Answers:

BMB DAR-800II Specifications

General IconGeneral
Power Output800W
Dimensions420(W) x 173(H) x 430(D)mm
Weight17.8kg
Frequency Response20Hz - 20kHz
THD<0.05%
CoolingFan

Summary

Important Safety Precautions

Warning: Prevent Fire or Shock Hazard

Warns against exposing the appliance to rain or moisture to prevent fire or shock hazards.

Specific Safety Precautions

Lists detailed safety instructions for operating and maintaining the unit.

Special Features

Precautions for Handling

Before Connection

Safety Precautions

Check the voltage of your local mains supply

Ensures the unit is connected to the correct voltage supply for safe operation.

Avoid push or drop any object or liquid into the unit

Warns against inserting objects or liquids to prevent electric shock or fire hazards.

Do not damage the Power Cord

Instructs on proper handling of the power cord to prevent damage and electrical hazards.

Do not disassemble the unit

Advises against opening the unit due to risks of dangerous voltage and lack of user-serviceable parts.

Do not overload the AC outlet on the unit

Caution against exceeding the AC outlet's wattage limit to prevent fire or other hazards.

When you leave your home or installation location

Recommends turning off and unplugging the unit when leaving it for extended periods to prevent accidents.

Names of Front-Panel Controls and Their Functions

POWER switch (ON — /OFF)

Turns the unit ON or OFF.

MUSIC TONE controls (BASS/MID/TREBLE)

Adjusts the bass, middle, and treble frequencies for music input.

MIC TONE controls (BASS/MID/TREBLE)

Adjusts the bass, middle, and treble frequencies for microphone input.

ECHO controls (REPEAT/DELAY)

Controls the echo's duration (Repeat) and repetition intervals (Delay).

BGM VOL control

Adjusts the background music (BGM) volume to an optimum level.

L-R BALANCE control

Adjusts the balance between the left and right channel audio outputs.

TAPE VOL control

Adjusts the volume level for tape playback.

REC BALANCE control

Balances the music source and microphone sound levels during recording.

REC/PLAY selector switch (REC/PLAY)

Selects between recording (REC) or playback (PLAY) modes for tape operation.

3-MC/ECHO switch (ON — /OFF)

Enables or disables echo effect for the third microphone input.

MIC INPUT jacks (1, 2, 3-MC)

Ports for connecting microphones.

REMOTE control sensor

Receives signals from the wireless remote control unit.

KEY control buttons

Buttons to adjust the pitch of songs in chromatic intervals.

MIC MASTER VOL control

Adjusts the overall microphone input volume level.

MIC VOL controls (1/A, 2/B, 3-MC)

Adjusts input levels for individual microphone inputs (MIC 1/A, 2/B, 3-MC).

MUSIC VOL control

Adjusts the volume of connected audio input sources.

ECHO VOL control

Adjusts the overall echo and effect level for microphones.

EFFECT: Effect Mode Indicator

Indicates when an effector mode is selected.

V- CHG: Vocal Change Indicator

Indicates when the vocal change function is active.

ECHO: Echo Indicator

Indicates when the echo effect is active.

REVERB: Reverb Indicator

Indicates when the reverb effect is active.

MUSIC Input peak indicator

Shows the peak input level for MUSIC (Left and Right).

MIC Input peak indicator

Shows the peak input level for microphones.

LCD Display

Multi-function display showing input position, effectors, and error messages.

SP 1-2 BALANCE

Adjusts the output level balance between speaker systems 1 and 2.

ECHO SELECT switch

Selects desired echo effectors, indicated on the LCD display.

FEEDBACK REDUCER (ON/OFF)

Reduces howling (feedback) by identifying and filtering problematic frequencies.

V-CHG selector switch

Selects voice change effectors, indicated on the LCD display.

Names of Rear-Panel Controls and Their Functions

KARAOKE SENSITIVITY switch

Sets sensitivity for automatic detection and switching of KARAOKE audio input.

KARAOKE INPUT LEVEL control

Adjusts KARAOKE input level relative to other audio sources.

KARAOKE audio input jacks

Connects audio output from a KARAOKE player.

DVD audio input jacks

Connects audio output from a DVD/CD karaoke player.

DVD INPUT LEVEL control

Adjusts DVD input level relative to other audio sources.

DVD SENSITIVITY switch

Sets sensitivity for automatic detection and switching of DVD audio input.

TAPE audio input jacks

Connects audio output from a tape deck.

TAPE audio output jacks

Outputs audio signals for connection to a tape deck's line input.

TAPE SENSITIVITY switch

Sets sensitivity for automatic detection and switching of tape playback input.

AUX INPUT LEVEL control

Adjusts AUX input level relative to other audio sources.

AUX SENSITIVITY switch

Sets sensitivity for automatic detection and switching of AUX audio input.

AUX audio input jacks

Connects audio output from external audio source equipment.

BGM audio input jacks

Connects audio source for BGM from a wired broadcasting system.

PRE-OUT output level control

Adjusts output level for connection to a power amplifier.

MONO/STEREO select switch

Selects mono or stereo input for BGM sources.

PRE-OUT output jacks

Output terminals for connecting a power amplifier or mixer.

MUSIC EFFECTOR IN/OUT jacks

Input/output jacks for connecting external effectors like graphic equalizers.

SPEAKER SYSTEMS connectors

Connectors for attaching speakers (6Ω to 16Ω).

SIGNAL GND terminal

Terminal for grounding the unit to prevent electric shock or noise.

AC OUTLETS

Provides switched and unswitched power outlets for connected equipment.

EXT(ernal) REMOTE SENSOR terminal

Connects an external remote control unit, deactivating the front panel sensor.

AUTO SELECT switches

Switches detection mode between AUDIO, A & V, or VIDEO for input signals.

VIDEO input jacks

Connects video output from Karaoke units, DVD players, or video cameras.

VIDEO output jacks

Outputs video signals to up to three TV monitors.

MIC FREE switch

Allows microphone to be used at all times or controls ON/OFF for BGM mode.

MIC [A][B] jacks

Mixing input jacks for microphones, linked to front panel MIC INPUT 1 and 2.

USB I/F (Interface)

Interface for maintenance purposes only, not for normal use.

BTL Selector switch

Selects BTL amplification mode for speakers.

SUB OUT

Outputs low-frequency signals for connecting a subwoofer amplifier.

System Connection Diagram

Connections

How to connect speaker cords

Step-by-step guide on connecting speaker wires to the unit's terminals.

One pair of speakers

Diagram and instructions for connecting a single pair of speakers.

Two pairs of speakers

Diagram and instructions for connecting two pairs of speakers.

For BTL mode

Specific connection instructions for the BTL (Bridge-Tied Load) mode.

Mechanism to Prevent Excessive Volume Levels

Setting Procedure

Step-by-step guide on how to adjust the volume limiting mechanism.

Door Locking

Basic Operation

How to Use Microphones Properly and Operating Precautions

Provides tips and precautions for optimal microphone usage and sound quality.

Echo/Effect Operations

ECHO SELECT

Procedure to select and cycle through available echo and effect modes.

ECHO VOL Control

Adjusts the overall echo and effect level for microphone inputs.

ECHO Controls (REPEAT/DELAY)

Controls the echo's sustaining duration (Repeat) and repetition intervals (Delay).

FEEDBACK REDUCER

Activates and explains the feedback reduction function.

V-CHG selector switch

Selects vocal change effectors, altering voice pitch and tone.

Audio/Video Signal Detection Mode

Video Switching

Remote Control Operation

KEY control buttons

Controls for adjusting song pitch via the remote.

ECHO control button

Adjusts the echo level using the remote control.

MIC MASTER control button

Adjusts microphone master volume using the remote.

MUSIC control button

Adjusts music volume using the remote control.

ECHO SEL (select) button

Selects programmed echo effectors via the remote.

V-CHG select button

Activates and selects vocal change functions via the remote.

Wireless remote control

Specifies the operating distance and conditions for the wireless remote.

Changing the batteries

Instructions for changing the batteries in the wireless remote control unit.

Troubleshooting

No power is supplied to the unit.

Troubleshooting steps for when the unit does not power on.

Power ON but no sound.

Diagnosing and resolving issues when the unit powers on but produces no sound.

No sound at beginning of the music when switching function.

Addressing no audio output when switching between input functions.

No sound from microphone (but music is played back).

Troubleshooting microphone sound issues when music playback is normal.

No sound from microphone only when function is set to BGM.

Resolving microphone silence specifically during BGM mode.

No music sound (BGM and microphone sounds are available).

Diagnosing why music sound is absent while microphones are functional.

No video.

Troubleshooting steps for when no video signal is output or received.

Function is switched to AUX, TAPE or BGM while playing KARAOKE or DVD.

Resolving unintended function switching during media playback.

No audio is played back even if KARAOKE or DVD audio signal is input.

Troubleshooting lack of audio output despite valid KARAOKE or DVD input signals.

Playback picture does not appear even if KARAOKE or DVD signal is input.

Diagnosing issues when video playback fails despite signal input.

Amplifier stops with 'ERROR 01' or 'ERROR 02'

Addressing amplifier stopping with 'ERROR 01' or 'ERROR 02' indications.

Amplifier stops with 'ERROR 12'

Addressing amplifier stopping with 'ERROR 12' indication.

Checking for error indications

Guidance on checking speaker impedance and unit temperature after error indications.

Maintenance

After-Sale Servicing

Information on how to obtain repair or replacement services for defective units.

Manners for Customers

Copyright

About the Product

Specifications

Related product manuals