The camera perspective appropriate for the cor‐
responding driving situation is shown.
Switching on/off manually
Press the Park Assistant button.
▷ On: the LED is illuminated.
▷ Off: the LED is extinguished.
Automatic deactivation when
moving forwards
The system switches off once a certain distance
or speed is exceeded.
Switch the system back on if necessary.
Camera perspectives
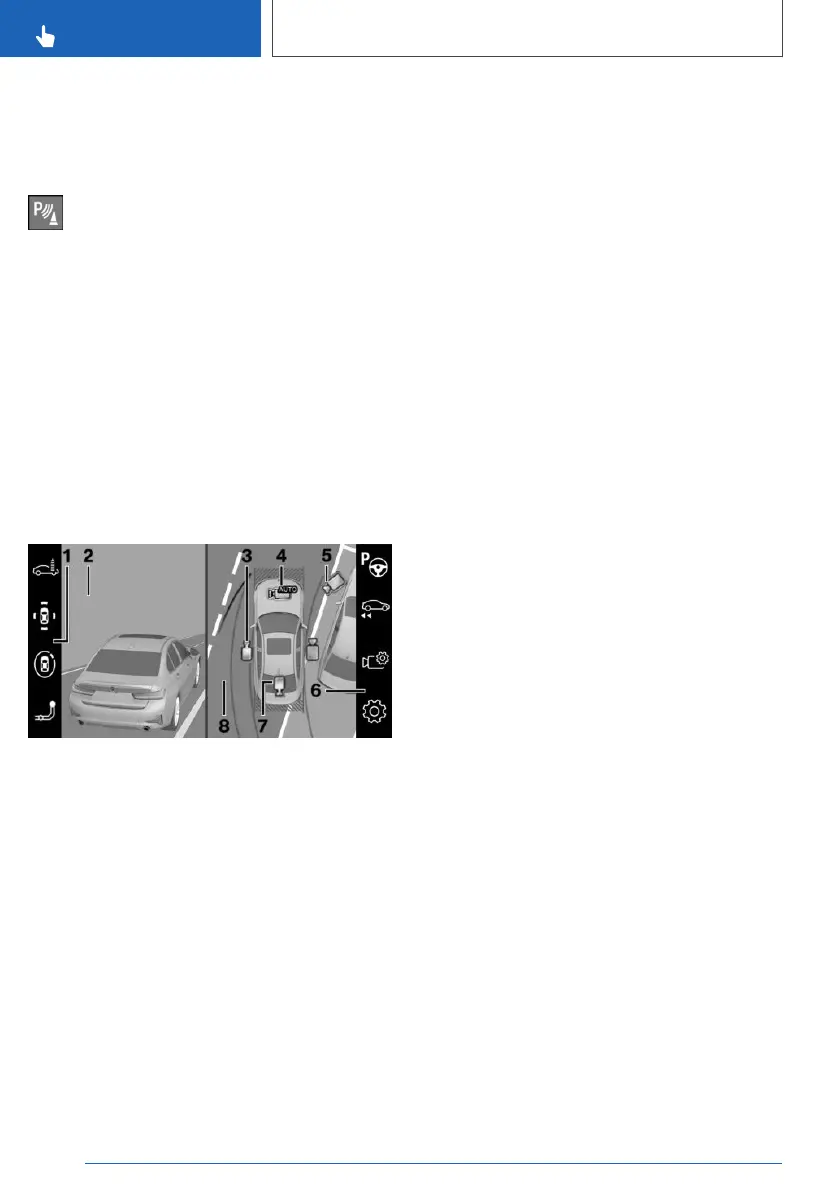
Overview
1 Toolbar, left
2 Camera image
3 Flank view
4 Automatic camera perspective
5 Movable, free camera perspective
6 Toolbar, right
7 Rear-view camera
8 Selection window
Selection window
In the selection window, the individual camera
perspectives can be selected using iDrive.
Flank view
The flank view can be selected for the right or
left side of the vehicle.
This view displays the area at the side to assist
with positioning the vehicle at the kerb or along‐
side any other obstacles.
The flank view looks from the rear to the front. If
there is a hazard, it automatically focuses on pos‐
sible obstacles.
Automatic camera perspective
The automatic camera perspective displays a
steering angle-dependent view looking towards
the vehicle's direction of travel.
This perspective adapts to the respective driving
situation.
As soon as obstacles are detected, the view
switches to a fixed display of the area in front or
behind the bumper or, if necessary, to a flank
view.
Movable, free camera perspective
If the movable camera perspective is selected, a
circular path is shown on the Control Display.
By turning the Controller or using the touch func‐
tion, defined perspectives along the circular path
can be selected.
The current perspective is marked with a camera
symbol.
To exit the function, tilt the Controller to the side
and select a different camera function.
Rear-view camera
This view shows the image from the rear-view
camera.
Toolbars
Toolbar, right
Assistance functions can be activated and set‐
tings made using the function bar on the right.
To do this, tilt the Controller to the right if neces‐
sary.
Seite 264
CONTROLS
Driver Assistance Systems
264
Online Edition for Part no. xxx - VI/19