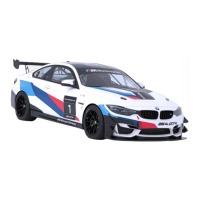
This document is a user manual for the BMW M4 GT4, a customer sports car available in the iRacing simulation platform. It provides detailed information on the car's technical specifications, setup adjustments, and in-game usage.
Function Description:
The BMW M4 GT4 in iRacing is a virtual representation of the real-world M4 GT4 race car, designed to deliver an authentic sim racing experience. The manual serves as a guide for users to understand, configure, and optimize the car's performance within the simulation. It covers general information, advanced setup options, and details on various in-car systems.
Important Technical Specifications:
Chassis:
- Suspension: Fully adjustable independent front and rear suspension.
- Length: 4,750 mm (187.0 in)
- Width: 2,014 mm (79.3 in)
- Wheelbase: 2,808 mm (110.6 in)
- Dry Weight: 1,440 kg (3,175 lbs)
- Wet Weight (with driver): 1,551 kg (3,419 lbs)
Power Unit:
- Engine Type: M TwinPower Turbo Technology, Direct Injection, Valvetronic I6
- Displacement: 3.0 Liters (183.1 cid)
- Torque: 360 lb-ft (488 Nm)
- Power: 455 bhp (339 kW)
- RPM Limit: 7450
Usage Features:
Getting Started:
- Baseline Setups: iRacing provides baseline setups for each commonly raced track. Users can access these via the Garage > iRacing Setups menu. If a dedicated setup isn't available, a similar track's setup can be used as a starting point.
- Controls Mapping: It is recommended to map controls for Brake Bias and DSC (Dynamic Stability Control) settings for quick adjustments during a race.
- Starting the Car: Once loaded into the car, pull the "upshift" paddle to engage gear and press the accelerator.
- Transmission: The car uses an automated sequential transmission, eliminating the need for manual clutch operation for shifting.
- Downshift Protection: The car's system prevents downshifting if the vehicle speed is too high for the requested gear.
- Upshifting: Recommended when all shift lights on the dashboard are fully illuminated, typically around 7100 rpm.
Loading Setups:
- Default Setup: The iRacing Baseline setup (
baseline.sto) automatically loads at the start of a session.
- Loading Pre-built Setups: Users can load iRacing's pre-built setups for various conditions by navigating to Garage > iRacing Setups.
- Customizing and Saving Setups: Changes made in the Garage can be applied and saved for future use via the "Save As" option. Personally saved setups are accessible under "My Setups."
- Sharing Setups: Setups can be shared with other drivers or everyone in a session using the "Share" option. Shared setups received from others appear under "Shared Setups."
Dash Pages:
- Display: The dash display is non-adjustable and features a single page showing critical vehicle information.
- Information Displayed: Includes tire pressures (front and rear), engine oil and water temperatures, gearbox and differential oil temperatures, current gear, brake bias percentage, battery voltage, remaining fuel, current lap number, engine RPM, road speed, DSC mode, lap time, and FDS setting.
- Pit Limiter: A red banner appears at the bottom of the display and the PSL light illuminates on the left side of the dashboard when the pit limiter is active.
- Shift Lights: Illuminate from the outer edges inwardly, indicating optimal upshift points:
- 2 Green: 6450 rpm
- 2 Green: 6600 rpm
- 2 Yellow: 6750 rpm
- 4 Yellow: 6900 rpm
- All Flashing: 7050 rpm
Advanced Setup Options:
This section is for advanced users to fine-tune the vehicle's setup. Incremental adjustments and testing singular variables are recommended.
-
Tires:
- Cold Air Pressure: Air pressure in the tire when the car is loaded. Higher pressures reduce rolling drag but decrease grip; lower pressures increase drag but increase grip. Adjust based on track characteristics.
- Hot Air Pressure: Pressure after the car returns to pits. Used to assess balance. Aim for similar pressures across tires at operating temperature.
- Tire Temperatures: Carcass temperatures measured via Pyrometer. Reflects wheel loads and work done by the tire. Center temperatures compare work, while inner/outer temperatures analyze wheel alignment (camber). Measured in three zones: Inside, Middle, and Outer.
- Tread Remaining: Amount of tread left after a run. Helps identify alignment issues (e.g., excessive wear on one side) and analyze handling balance. Measured in the same three zones as temperature.
-
Chassis (Front & Rear):
- ARB Blades (Anti-Roll Bar):
- Increasing ARB setting: Shortens moment arm, increases front suspension roll stiffness, reduces body roll, increases mechanical understeer, and can lead to a more responsive steering feel. Can decrease aero efficiency due to less platform control.
- Reducing ARB setting: Lengthens moment arm, softens suspension, increases body roll, decreases mechanical understeer, and can result in a less-responsive steering feel but increased front axle grip.
- Settings: Three options (1 'soft' to 3 'stiff').
- Toe-in (Front):
- Toe-in: Front of the wheel closer to the chassis centerline. Reduces turn-in responsiveness but reduces temperature buildup.
- Toe-out: Front of the wheel farther from the chassis centerline. Increases slip in the inside tire, decreases straight-line stability, but increases turn-in responsiveness.
- Cross Weight: Percentage of total vehicle weight acting across the right front and left rear corners. 50.0% is optimal for non-oval tracks for symmetrical handling. Higher values increase understeer in left-hand corners and oversteer in right-hand corners. Adjusted via spring perch offsets.
- Rear Master Cylinder: Changes line pressure to rear brake calipers. Larger cylinder reduces rear line pressure (shifts bias forward, increases pedal effort). Smaller cylinder increases rear line pressure (shifts bias rearward, reduces pedal effort). Seven options available (15.9 mm / 0.626" to 23.8 mm / 0.937").
- Brake Pads: Alters braking performance. "Low" provides least friction, "Medium" and "High" provide more friction but increase lockup risk.
- Brake Pressure Bias: Percentage of braking force to front brakes. Values above 50% increase front pressure, increasing front tire lockup tendency but improving overall stability. Tuned for driver preference and track conditions.
- DSC Setting (Dynamic Stability Control):
- ON: Full assist with aggressive torque cut on wheelspin.
- MDM: Reduced intervention, allowing some slip. Recommended for learning the car.
- OFF: No assistance.
- FDS Setting (Engine Throttle Mapping): Two options:
- Position 1: Linear throttle mapping (1:1 engine torque to pedal).
- Position 2: Butterfly throttle mapping (mimics cable-style throttle). No performance difference.
- Corner Weight: Weight under each tire statically. Crucial for optimizing car for track and conditions. Adjusted via spring perch offset.
- Front Ride Height: Distance from ground to a reference point. Influences aerodynamic performance and mechanical grip. Increasing height decreases front downforce but allows more weight transfer. Reducing height increases downforce but reduces weight transfer. Minimum legal front ride height is 124.0 mm.
- Spring Rate (Front & Rear):
- Stiffer springs: Smaller ride height variance, superior aerodynamic performance, but increased tire load variation (loss of mechanical grip). More pronounced on rough tracks. Influences roll and pitch control.
- Softer springs: Increased overall performance on rougher tracks.
- Front Spring Rate Options: 180 N/mm (1028 lbs/in) to 220 N/mm (1256 lbs/in).
- Rear Spring Rate Options: 150 N/mm (857 lbs/in) to 190 N/mm (1085 lbs/in).
- Spring perch offsets must be adjusted to maintain static ride heights after spring rate changes.
- Spring Perch Offset: Adjusts ride height at a corner. Increasing lowers, reducing raises. Keep symmetrical across axles for consistent ride height and cross weight. Diagonal pairs (LF to RR, RF to LR) can change static cross weight.
- Bump Stiffness (Front & Rear): Paired adjustment for low and high-speed compression damping.
- Increasing bump stiffness: Faster weight transfer, increased turn-in response (front), but harsher response to kerb strikes. Can increase performance on smoother tracks.
- Decreasing bump stiffness: Increased mechanical grip on rougher tracks.
- Range: 0 (minimum damping) to 25 (maximum damping).
- Rebound Stiffness (Front & Rear): Paired adjustment for low and high-speed rebound damping.
- Increasing rebound stiffness: Slows damper extension, improves platform control, but can cause tire to lose contact with track if too slow. Can improve braking stability.
- Range: 0 (minimum damping) to 18 (maximum damping).
- Camber (Front & Rear): Vertical angle of the wheel.
- Negative camber: Top of wheel closer to chassis centerline. Increases cornering force but reduces longitudinal grip (braking). Excessive camber reduces tire life.
- Positive camber: Top of wheel farther from chassis centerline.
- Negative camber is desired on all four wheels. Rear camber is typically slightly reduced compared to front due to wider tires and traction performance trade-offs.
- Toe-in (Rear):
- Toe-in: Improves straight-line stability, reduces response during direction changes. Large values increase rolling drag and reduce straight-line speeds.
- Values are for each individual wheel (twice as powerful as combined front adjustment). Advised to keep left and right toe values equal.
- Rear Ride Height: Distance from ground to a reference point on the rear chassis.
- Increasing height: Decreases rear downforce, increases overall downforce, allows more weight transfer across rear axle.
- Reducing height: Increases rear downforce percentage, reduces overall downforce, reduces weight transfer.
- Minimum legal rear ride height is 119.0 mm, maximum is 140.0 mm.
- Fuel Level: Amount of fuel in the tank. Capacity is 104 L (27.5 g), adjustable in 1 L (0.26 g) increments.
- Wing Setting: Relative angle of attack of the rear wing.
- Increasing angle: More total downforce (and drag), more total cornering grip in medium to high-speed corners, but reduces straight-line speed.
- Adjust in conjunction with front and rear ride heights (rake). Increasing wing angle requires increasing rake to maintain aerodynamic balance.
Maintenance Features:
The manual implicitly suggests "maintenance" through careful setup adjustments and monitoring:
- Tire Wear: Monitoring "Tread Remaining" helps identify alignment issues that could lead to excessive tire wear, allowing users to adjust setups to prolong tire life and maintain performance.
- Temperature Monitoring: Dash display shows engine, gearbox, and differential oil temperatures, allowing users to monitor the car's health and ensure components are operating within safe limits.
- Handling Balance: The entire setup guide is a tool for "maintaining" optimal handling balance, ensuring the car performs consistently and predictably across different track conditions and over the duration of a race.