Do you have a question about the body Power Trio Trainer BRT5088 and is the answer not in the manual?
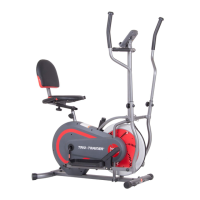
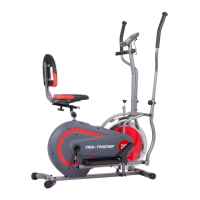
Explicit warning against removing the seat and the importance of its secure installation.
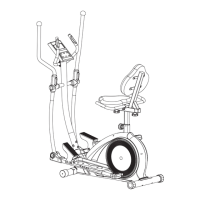
Instructions for attaching the rear stabilizer to the main frame using specific hardware.
Instructions for attaching the front stabilizer to the main frame using specific hardware.
Guides inserting the handlebar axle and attaching coupler bars with specified hardware.
Instructions for attaching the right pedal tube to the coupler bar using bolts and nuts.
Details connecting the pedal connection joint to the crankshaft with specific bolts and washers.
Explains how to attach the pedal connection joint to the pedal tube using bolts and nuts.
Repeats Step 3A for the left side, focusing on the left pedal hinge bolt and crankshaft connection.
Guides attaching the right pedal and foot pedal to the pedal tube with bolts, washers, and nuts.
Includes a warning about seat removal and emphasizes checking assembly completion and safety.
Explains how to use the tension control knob to increase or decrease resistance during workouts.
Provides instructions for calibrating the tension system by adjusting the friction belt for optimal slack.
Reiterates crucial safety warnings, including tightening hardware, checking for damage, and avoiding moving parts.
Provides solutions for issues with the computer display not showing data or being blank, including checking wires and power.
Offers troubleshooting steps for inaccurate or no hand pulse signal, such as moistening sensors and checking wires.
| Console Display | LCD |
|---|---|
| Resistance Type | Magnetic |
| Display Type | LCD |
| Programs | 12 |
| Display Functions | Time, speed, distance, calories, pulse |