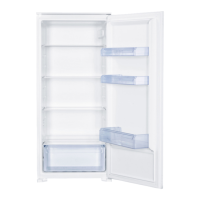
21
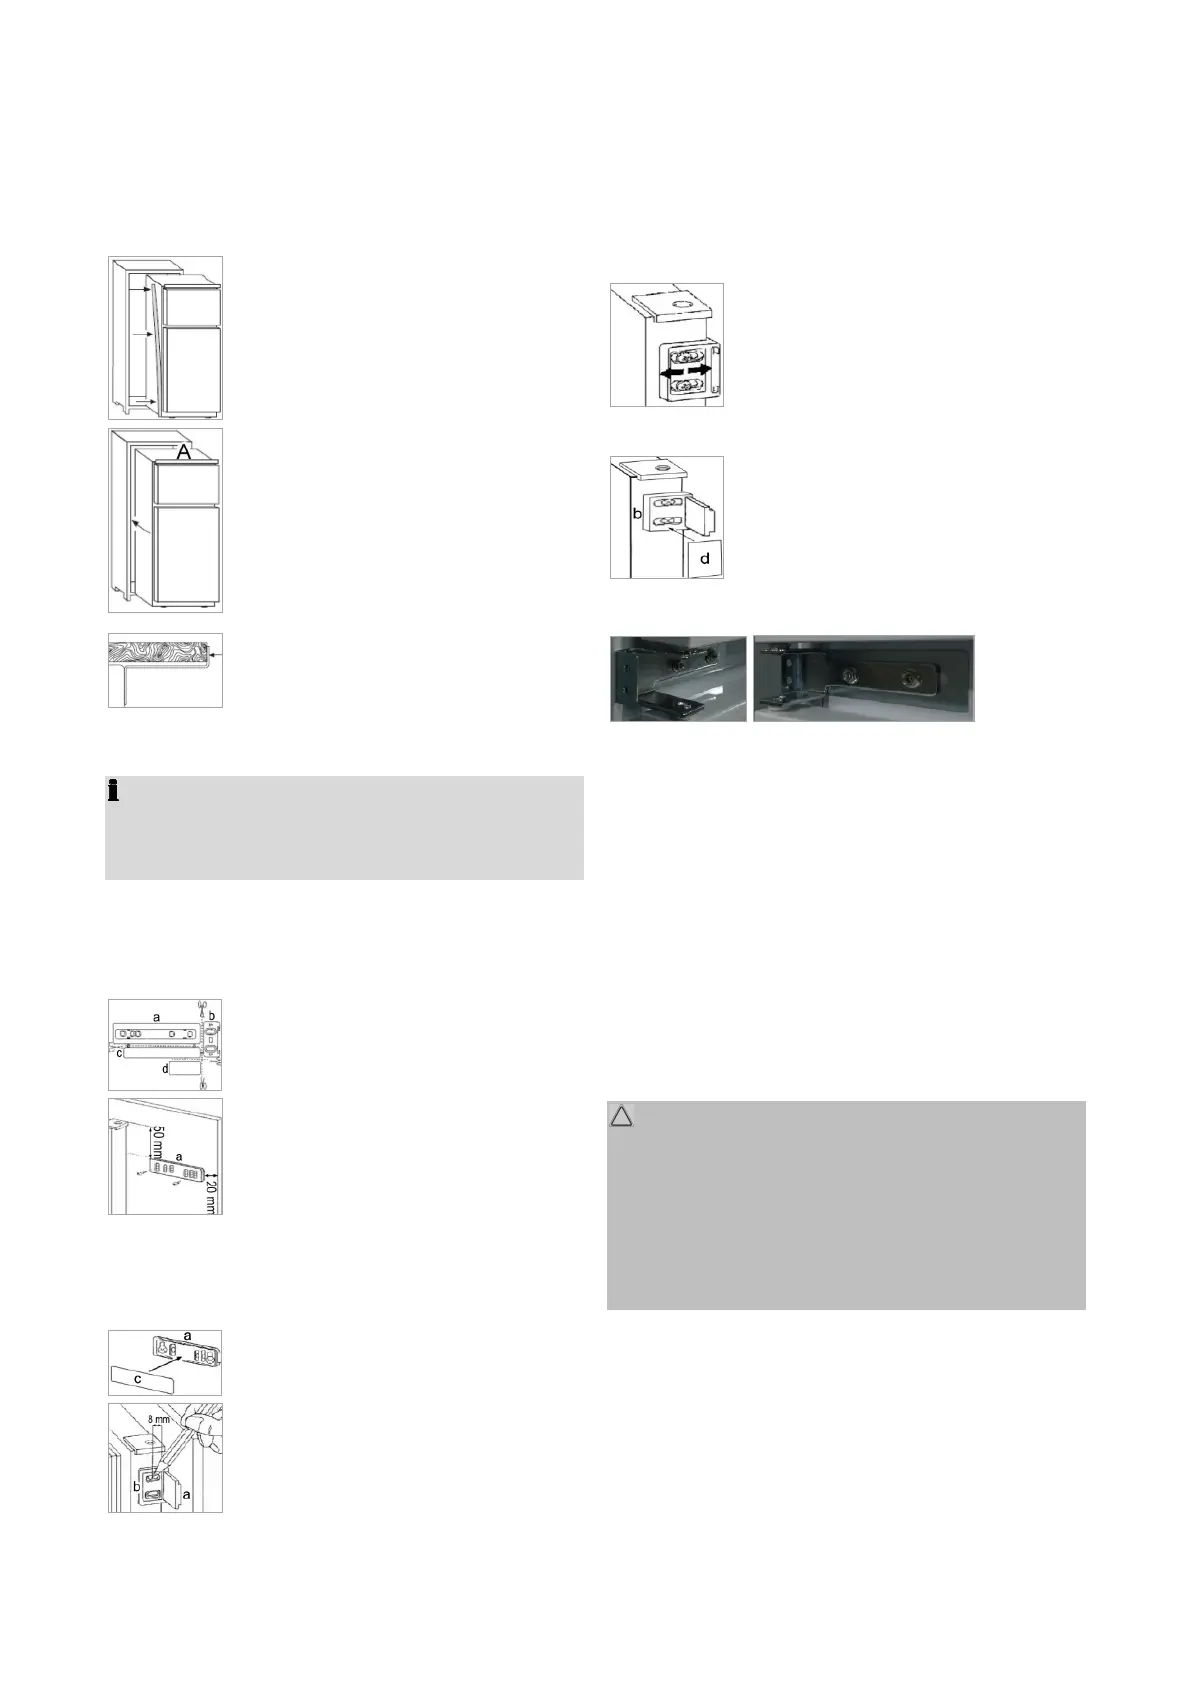
The ventilation openings in the furniture base and
building must be min. 200 cm
2
to ensure that heated
air can freely escape.
Install the power cord so that the appli-
ance can be easily connected after
installation.
Cut the sealing tape in accordance with
the built-in opening.
Stick the sealing tape succinct on the
appliance side to which the door
opens. Insert the appliance into the
built-in opening until the stop plate (A)
abuts the furniture.
Make sure that the stop plate lines up
properly with the top of the built-in
opening.
Screw the appliance door with th
Screw the appliance door with thScrew the appliance door with th
Screw the appliance door with the furniture door
e furniture doore furniture door
e furniture door
NOTE
NOTENOTE
NOTE:
::
:
Follow below instruction for connecting the furniture
door with the freezer and fridge appliance door.
First remove the caps of the bores on the outer edg-
es of the appliance doors.
Thereon the sliding hinge brackets have to be fixed.
Separate the parts b, c and d of part a.
In consideration of the shown distanc-
es, and in accordance with the appro-
priate door holes, hold the guide (a) at
the inside of the furniture door and
mark the positions of the drill holes.
After drilling, fix the guide with the
screws provided.
Insert the cover (c) until it clicks in the
guide (a).
Fully open the appliance and furniture
door and join them together. Slide the
bracket (b) in the guide (a) and mark
the drill holes. Remove the bracket and
drill Ø 2 mm holes with about 8 mm
distance to the outer door edge. Put the
bracket on again; secure it with the
screws provided.
If an aligning of the furniture door is
necessary, use the slot spacing. Check
if the door is arranged vertical as well
as horizontal, so that a smooth opening
and closing of the door is ensured.
Insert the cover (d) until it clicks on the
angle (b).
Fasten the appliance in the
Fasten the appliance in theFasten the appliance in the
Fasten the appliance in the
built
builtbuilt
built-
--
-in
inin
in
opening
openingopening
opening
Use the two supplied security angles to stabilize the
appliance. Attach the angles between the two doors on
the appliance and on the side of the furniture. Fix the
angle of the hinge-side in combination with the hinge.
Adjust the proper position of the angles by sliding them
in the screw-openings to the right/left until they meet the
sides of the built-in furniture.
Startup / Operation
Startup / OperationStartup / Operation
Startup / Operation
Prior to first use
Prior to first usePrior to first use
Prior to first use
CAUTION
CAUTIONCAUTION
CAUTION:
::
:
After transport, the appliance should be left standing
upright for about 4 hours before connecting to the
power supply. Nonobservance could lead to malfunc-
tion of the cooling system and causes an appliance
breakdown.
Clean the appliance interior including all accessory
parts. Consider the instructions which we provide in
the chapter “Cleaning and Maintenance”.
Starting the appliance
Starting the applianceStarting the appliance
Starting the appliance
• Connect the appliance to the power supply.
 Loading...