Chat design: Dondoli e Pocci
scheda montaggio - assembly instruction - Aufbauanleitung - notice de montage2
1
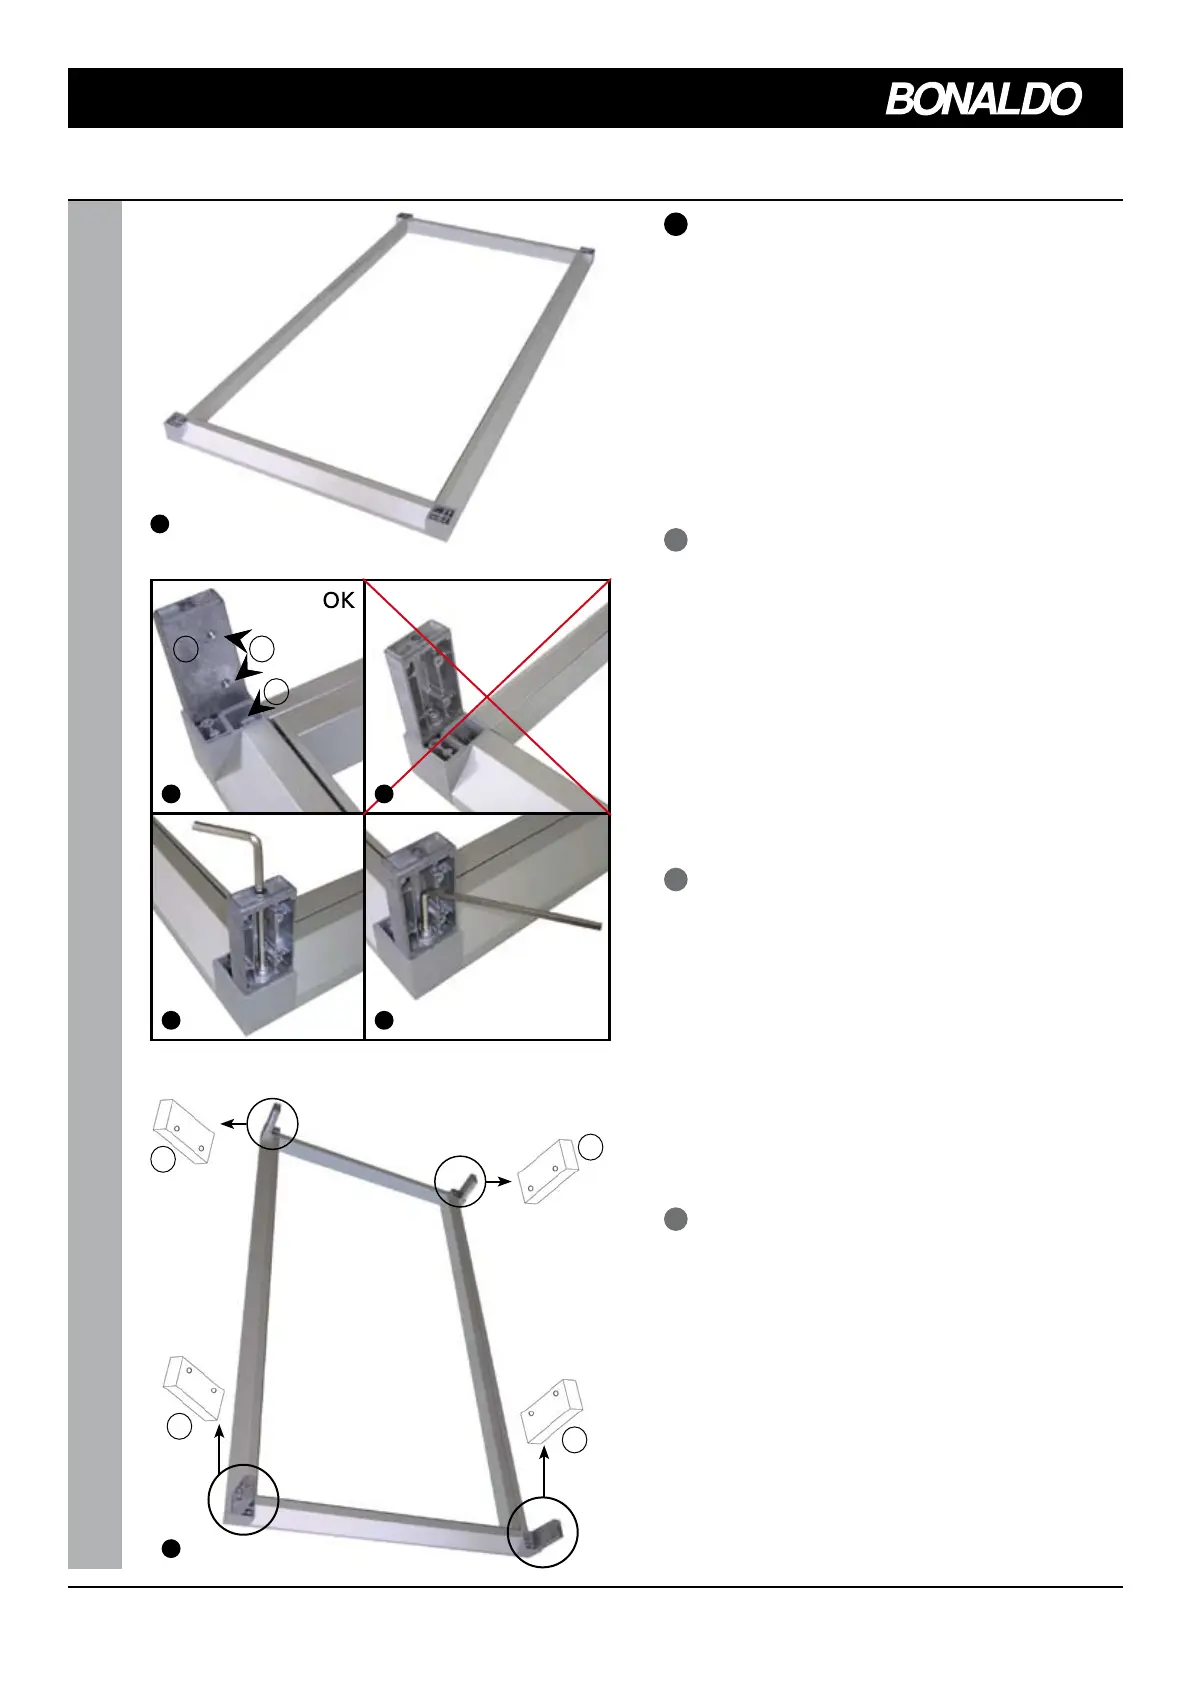
Togliere il telaio dall’imballo e capovolgerlo come
in Fig.1. Montare i 4 inserti (L) fissando le viti M8,
facendo molta attenzione al senso di montaggio
(Fig. 4-5). I due fori (F) del lato piatto vanno sem-
pre a coincidere con il buco (B) dell’angolo del
tavolo (Fig. 2), non vanno perciò montati con il
lato scanalato verso l'interno (Fig.3). Inoltre, gli
inserti (L), vanno sempre inseriti con i fori rivolti
verso l'interno del telaio (Fig. 6).
I
Remove the frame from the packaging and over-
turn it as shown in Fig. 1. Mount the 4 inserts (L)
tightening the M8 screws. Pay attention to the
assembly direction (Figs. 4-5). The two holes (F) of
the flat side must be always aligned with the hole
(B) in the corner of the table (Fig. 2). Therefore,
they shall not be mounted with the grooved side
inwards (Fig. 3). In addition, the inserts (L) must
always be inserted with the holes facing the in-
ternal part of the frame (Fig. 6).
GB
Das Gestell aus der Verpackung nehmen und
umdrehen (siehe Abb.1). Die 4 Einsatzstücke (L)
montieren. Dazu die Schrauben M8 anziehen und
auf die Montagerichtung achten (Abb. 4-5). Die
beiden Löcher (F) auf der Plattenseite müssen im-
mer mit der Öffnung (B) der Tischecke (Abb. 2)
übereinstimmen. Sie werden daher nicht mit der
Kanalseite nach Innen montiert (Abb. 3). Ferner
die Einsatzstücke (L) immer mit den Öffnungen in
das Rahmeninnere geben (Abb. 6).
D
Enlever la châssis de l’emballage et la retourner
comme il est indiqué sur la Fig.1. Monter les 4 pla-
quettes (L) en fixant les vis M8, et en faisant très
attention au sens du montage (Fig. 4-5). Les deux
trous (F) du côté plat doivent toujours coïncider
avec le trou (B) de l’angle de la table (Fig. 2), ils ne
doivent donc pas être montés avec le côté canne-
lé vers l’intérieur (Fig.3). En outre les plaquettes
(L) doivent toujours être insérées avec les trous
tournés vers l’intérieur du châssis (Fig. 6).
F
1
F
B
2 3
4 5
L
6
L
L
L
L
 Loading...