3
Assembly instrucons
1 . Speed is controlled by pressing the control buons.
Buon 0: Stop
Buon 1: Low
Buon 2: Medium
Buon 3: High
2. The airow can be adjusted upward or downward by loosening the lt adjustment knob and
adjusted the vercal angle as desired. Reghten the knob securely.
3. To set the mer turn the mer knob clockwise.
The fan requires lile maintenance. Do not try to x it by yourself. Refer it to qualied service personnel if service is needed.
1. Before cleaning and assembling, do not plug the pins into the socket.
2. To ensure adequate air circulaon to the motor. Keep vents at the rear of the motor housing from dust, u and etc. A vacuum cleaner can not be used to
clean these vents before unplug. Do not disassemble the fan remove u.
3. Please wipe the exterior parts with a so cloth soaking a mild detergent.
Do not use any abrasive detergent or solvents to avoid scratching the surface.
Do not use of the following as a cleaner: gasoline, thinner, bending.
4. Do not allow water or any other liquid into the motor housing or interior parts.
Maintenance
Cleaning
Operang Instrucons
1. Be sure to unplug from the electrical supply source before cleaning.
2. Plasc parts should be cleaned with a so cloth moisten with mild soap.
Thoroughly remove soap lm with dry cloth.
DISPOSAL: Do not dispose of electrical appliances as unsorted municipal waste, use separate collecon facilies. Contact you local government for informa-
on regarding the collecon systems available. If electrical appliances are disposed of in landlls or dumps, hazardous substances can leak into the ground-
water and get into the food chain, damaging your health and well-being.
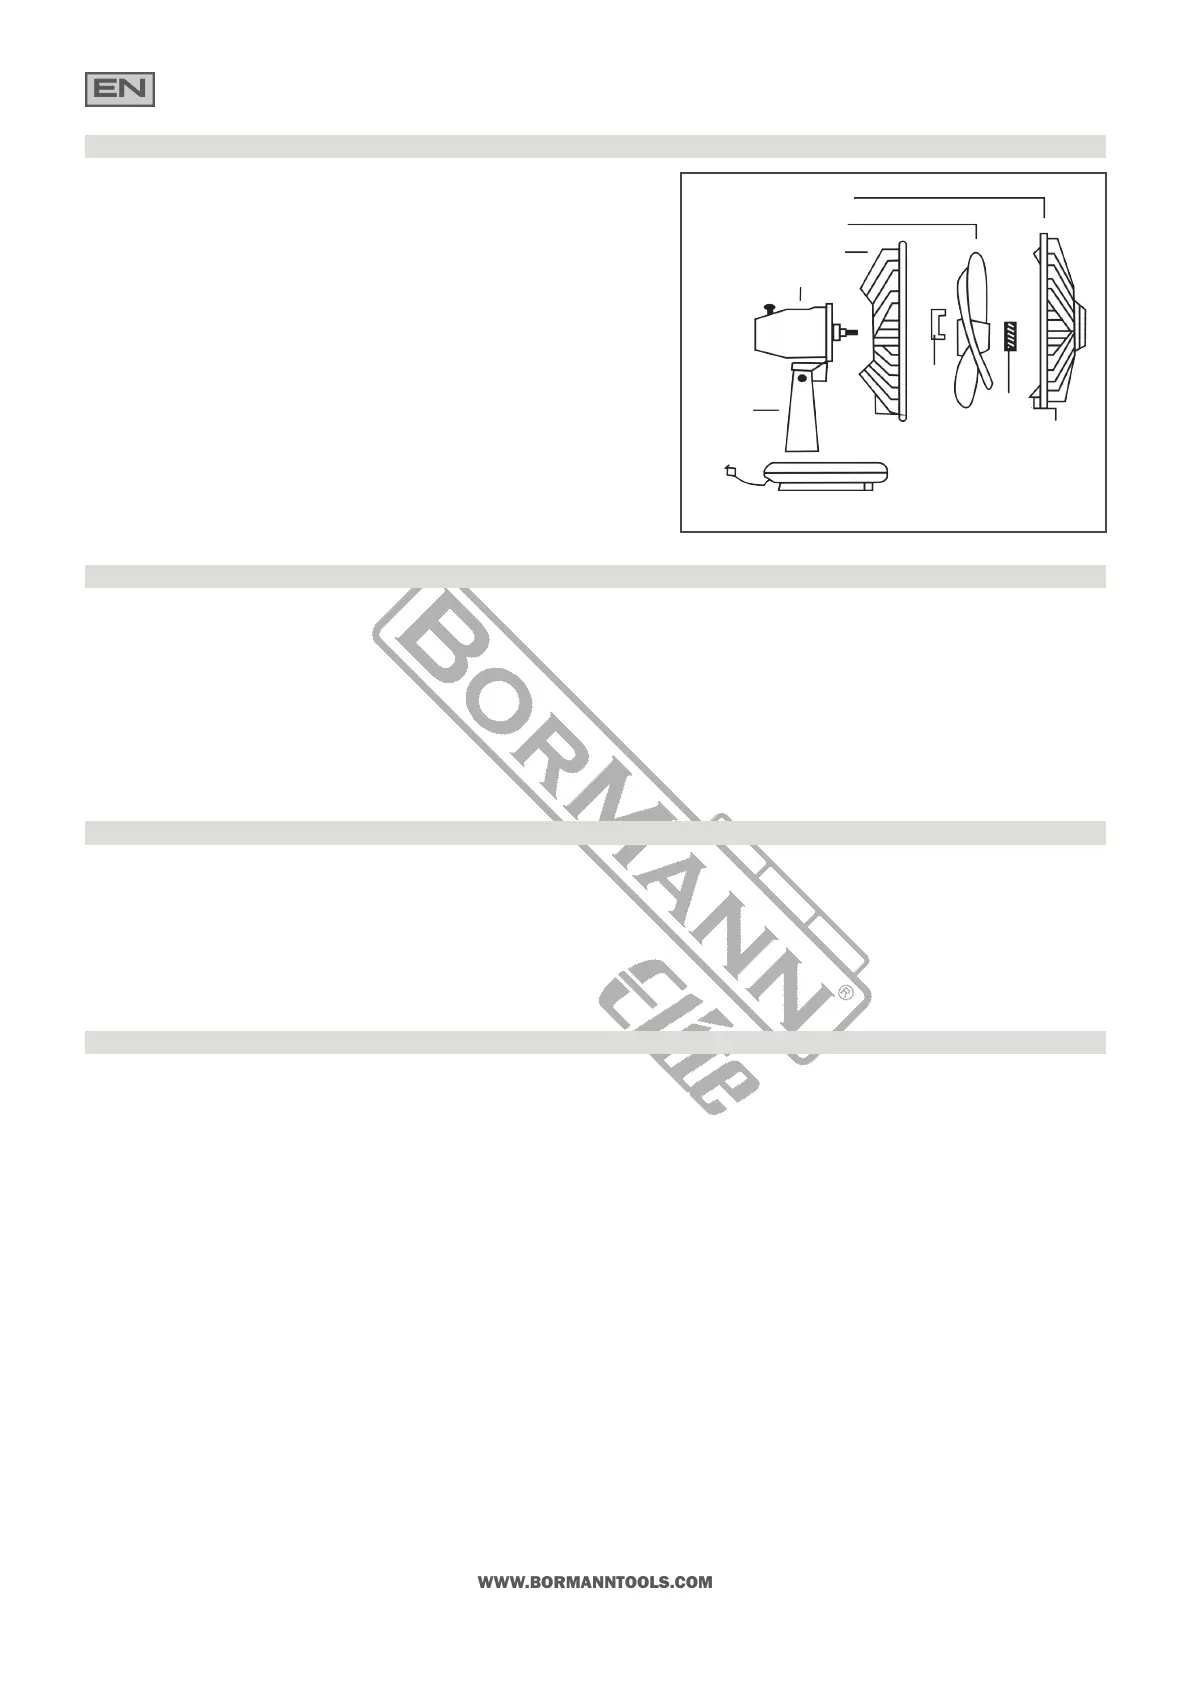
1. Take o guard lock nut from motor sha.
2. Place the rear guard on the front of the motor housing. Line up the 3 points on the
front of the motor housing with the 3 holes in the rear guard.
Secure the rear guard by placing the guard lock nut and turning it clockwise to ghten.
3. Place the fan blade on the motor sha
4. Place the spinner on the motor sha and turn it counter-clockwise to ghten.
5. Fit the front guard onto the rear guard and close the clips.
If the supply cord is damaged, it must be replaced by the manufacturer or its service
agent or a similarly qualied person in order to avoid hazard.
The noise level under normal operang condions is less than 70dB(A).
Blade
Nut
Spinner
Clip
Stand
Front Guard
Rear Guard
Motor Housing