4
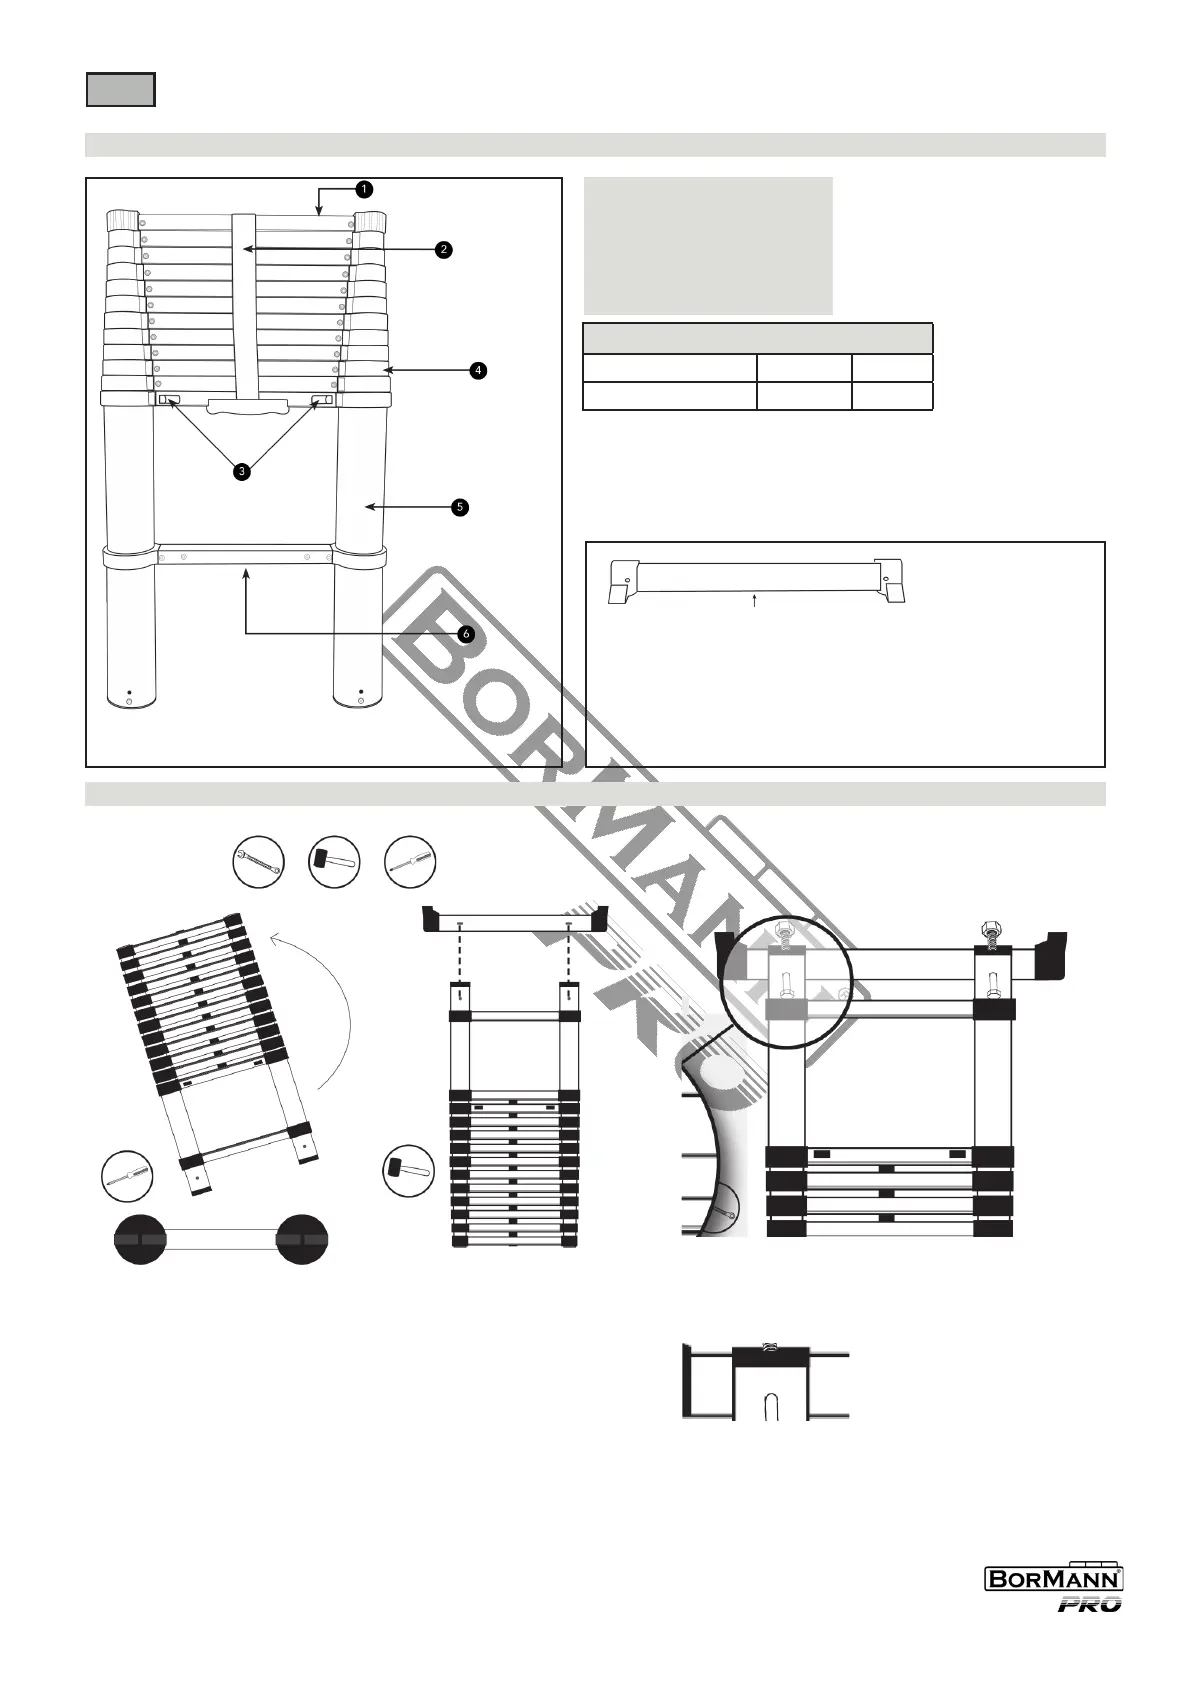
Descripon of main parts
1. Top Bar
2. Storage Strap
3. Locking Mechanisms
4. Hand Grips
5. Telescopic Tubes
6. Boom Rung
7. Stabiliser Bar
Please note that the 3.8m and 3.2m ladder is represented in the images,
the 2.0m and 2.6m ladder does not come with the stabiliser bar.
Fing The Stabiliser Bar
WARNING! The Stabiliser Bar must be ed before use (Stabilising Bar is only supplied with 3.8m ladder and 3.2m ladder).
Tools required:
1. Flip the Telescopic Ladder vercally
so that the feet are accessible. You will
noce plasc pins in the slot on each
foot. In order to t the Stabiliser Bar
(7), these pins will need to be snapped.
This can be done easily using a athead
screwdriver.
2. Once the pins have been snapped and
removed, the Stabiliser Bar will fit into
the slots. You will need to line up the
holes on the
Stabiliser Bar with the
holes on the legs of the
Telescopic
Ladder.
NOTE: You may need a rubber mallet to
carefully tap the Stabiliser Bar into the
slots securely.
3. With the Stabiliser Bar sloed onto the feet of the Ladder,
secure into place using the 2 bolts provided.
Tighten the bolts with a wrench to secure.
Technical Data
Model: BHL5710 BHL5720
Length/steps:
1.9+1.9m/12 2.2+2.2m/14
EN
WWW.NIKOLAOUTOOLS.GR