en Installation instructions
16
The enclosed screws and wall plugs are suitable for
use with solid brickwork. Use suitable fixing material
for other structures, e.g. plasterboard, porous con-
crete, poroton bricks.
4.
The maximum weight of the appliance is 40kg.
Preparing the wall
1.
Mark a vertical centre line on the wall from the ceil-
ing to the lower edge of the appliance.
2.
Ensure that there are no electrical wires, gas pipes
or water pipes in the area where holes are to be
drilled.
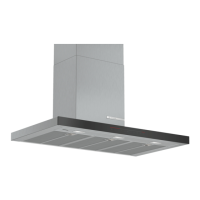
3.
Use the enclosed template to mark where the
screws are to be inserted and the outline of the at-
tachment area.
4.
Drill five holes with a diameter of 8mm to a depth
of 80mm for the attachments and push in the wall
plugs flush with the wall.
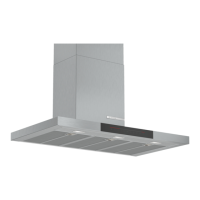
Installing the appliance bracket
1.
Screw on the angle bracket for the flue duct.
2.
Screw on the brackets for the appliance until they
are hand-tight.
Do not firmly tighten the screws.
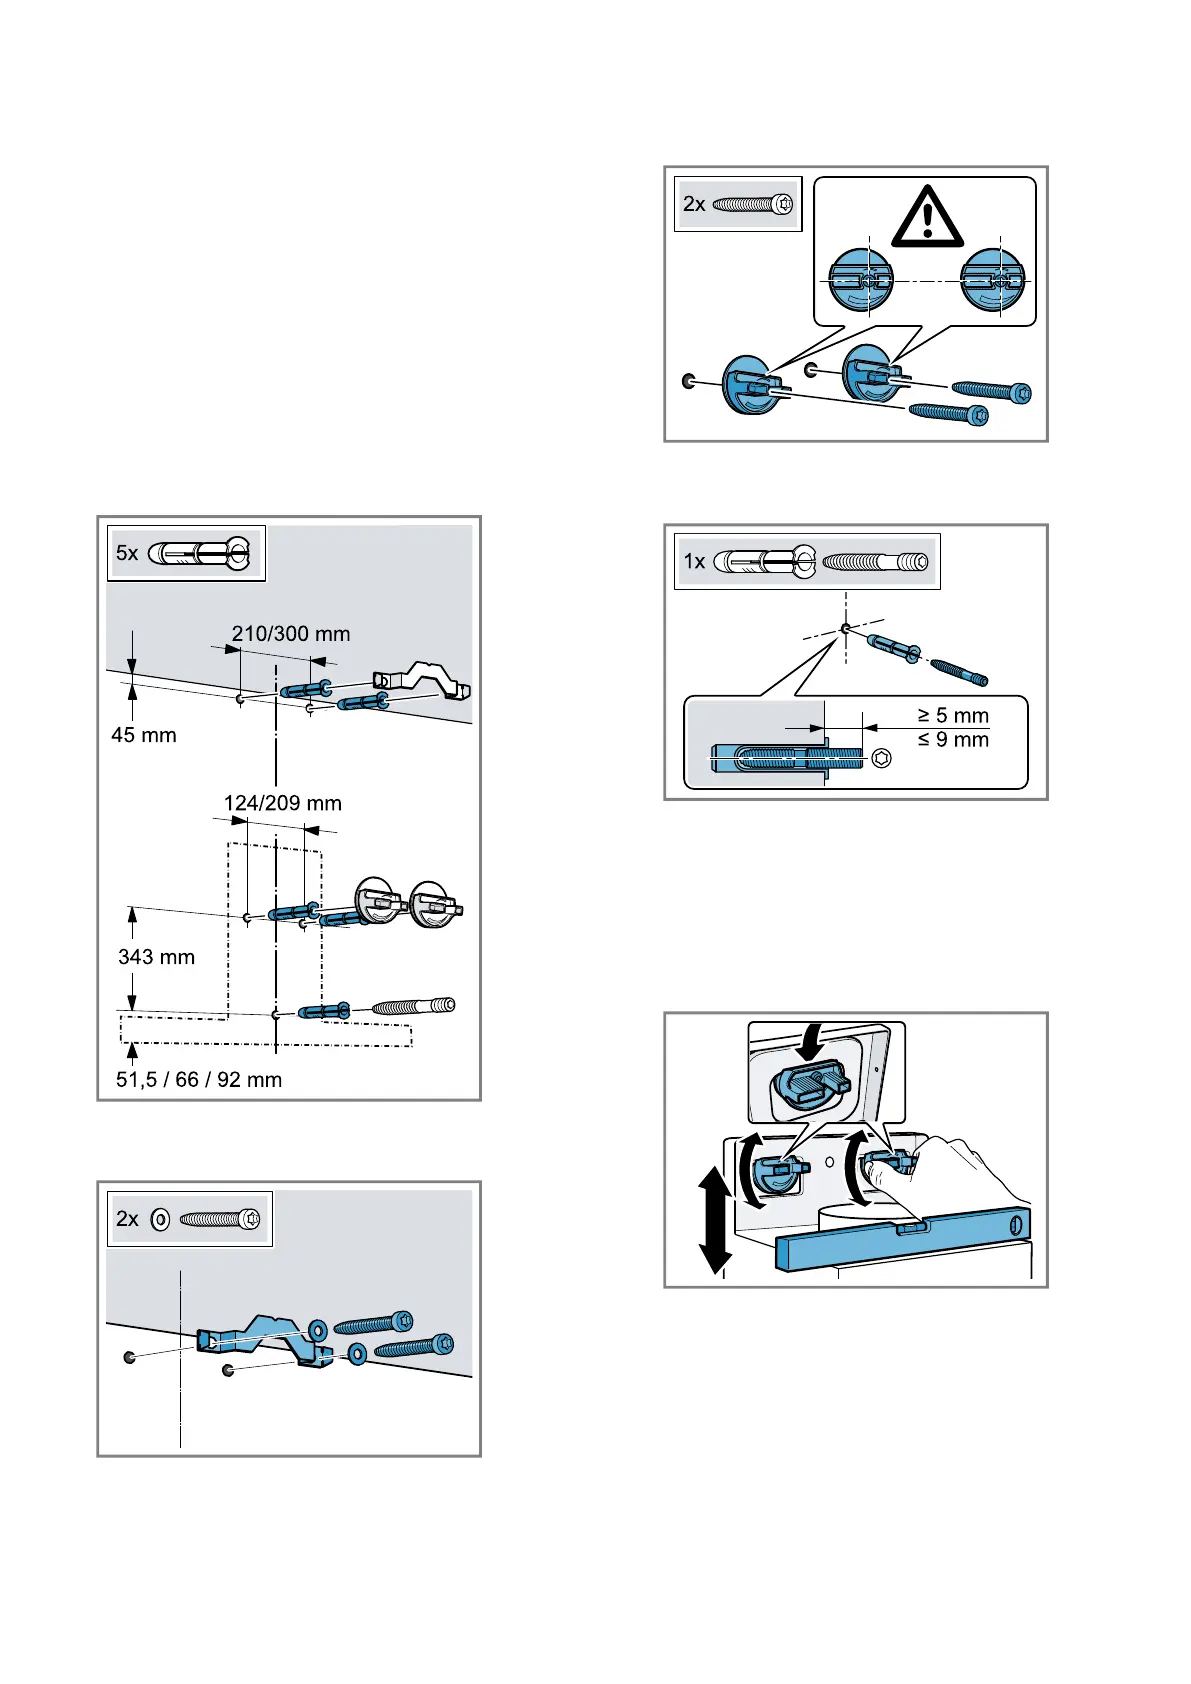
3.
Screw in the threaded pin, leaving it protruding out
of the wall by 5–9mm.
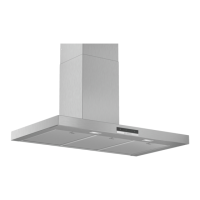
Installing the appliance
1.
First remove the protective film from the back of the
appliance and, following installation, remove the rest
of the film.
2.
When mounting the appliance, ensure that it en-
gages properly with the mounting supports.
3.
To align the appliance horizontally, turn the mount-
ing brackets.
If required, move the appliance to the right or to the
left.
4.
Firmly tighten the screws for the mounting brackets,
holding the mounting brackets in place.