8 | English
1 609 92A 47U | (28.02.2018) Robert Bosch Power Tools GmbH
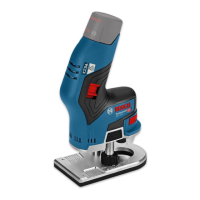
Technical data
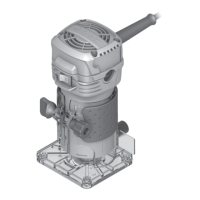
Router GKF 550
Article number
3 601 FA0 0..
Rated power input W 550
No-load speed rpm 33,000
Tool holder mm
inches
6
¼
Weight according to EPTA Pro-
cedure 01:2014
kg 1.4
Protection class / II
The specifications apply to a rated voltage [U] of 230 V. These spe-
cifications may vary at different voltages and in country-specific mod-
els.
Fitting
Changing the tool
u Pull the plug out of the socket before carrying out any
work on the power tool.
u Wearing protective gloves while fitting and changing
router bits is recommended.
Removing the routing base (see figure A)
Before fitting a router bit, you must first separate the routing
base(2) from the drive unit(1).
Open the wing bolt (11) on the routing base (2).
Pull the drive unit out in an upward direction.
Changing the collet (see figure B)
Depending on the router bit used, you may have to change
the tightening nut with the collet(14) before fitting the
router bit.
If the correct collet for your router bit is already fitted,
please follow the work steps in the following section on (see
"Fitting the router bit (see figure C1 – C2)", page8).
The collet(14) must sit in the tightening nut with a small
amount of play. The tightening nut(7) must be easy to fit. If
the tightening nut or collet is damaged, replace it immedi-
ately.
Place the open-end spanner(16) on the tool holder(15)
(see figureC1).
Unscrew the tightening nut(7) in an anti-clockwise direction
using the open-end spanner(17).
If required, clean all the parts you want to fit with a soft
brush or by blowing them clean with compressed air before
assembling them.
Place the new tightening nut onto the tool holder(15).
Loosely tighten the tightening nut.
u Do not, under any circumstances, tighten the collet
with the tightening nut until a router bit has been fit-
ted. The collet may otherwise become damaged.
Fitting the router bit (see figure C1 – C2)
Router bits are available in a wide variety of designs and
qualities depending on the intended application.
Router bits made of high-performance high-speed steel
(HSS) are suited to machining soft materials such as soft-
wood and plastic.
Router bits with carbide tips are especially suitable for
hard and abrasive materials such as hardwood and alu-
minium.
Original router bits from the extensive range of Bosch ac-
cessories are available from your specialist dealer.
Only use undamaged and clean router bits.
Fitting the routing base (see figure A)
To start routing, the routing base(2) must be fitted back
onto the drive unit(1).
Open the wing bolt(11) on the routing base(2).
Slide the drive unit(1) into the routing base(2).
Close the wing bolt(11) on the routing base(2).
u After assembly, always check that the drive unit is
firmly seated in the routing base.
Dust/Chip Extraction
Dust from materials such as lead-containing coatings, some
wood types, minerals and metal can be harmful to one’s
health. Touching or breathing-in the dust can cause allergic
reactions and/or lead to respiratory infections of the user or
bystanders.
Certain dust, such as oak or beech dust, is considered carci-
nogenic, especially in connection with wood-treatment ad-
ditives (chromate, wood preservative). Materials containing
asbestos may only be worked by specialists.
– Provide for good ventilation of the working place.
– It is recommended to wear a P2 filter-class respirator.
Observe the relevant regulations in your country for the ma-
terials to be worked.
u Avoid dust accumulation at the workplace. Dust can
easily ignite.
Operation
u Products that are only sold in AUS and NZ: Use a resid-
ual current device (RCD) with a nominal residual current
of 30 mA or less.
Setting the routing depth
u The routing depth must only be set while the power
tool is switched off.
To set the rough routing depth, proceed as follows:
– Place the power tool with a fitted router bit onto the work-
piece you want to machine.
– Open the wing bolt(11) on the routing base(2).
– Move the drive unit(1) to the desired depth using the
scale for setting the routing depth(13) as a guide.
– Close the wing bolt(11) on the routing base(2).
– Check the routing depth you have set by carrying out a
practical test and correct it if required.
 Loading...