English | 9
Bosch Power Tools 1 609 92A 01D | (11.2.13)
Assembly
Battery Charging
Use only the battery chargers listed on the accessories
page. Only these battery chargers are matched to the lith-
ium ion battery of your power tool.
Note: The battery is supplied partially charged. To ensure full
capacity of the battery, completely charge the battery in the
battery charger before using your power tool for the first time.
The Lithium-Ion battery can be charged at any time without
reducing its service life. Interrupting the charging procedure
does not damage the battery.
The Lithium-Ion battery is protected against deep discharging
by the “Electronic Cell Protection (ECP)”. When the battery is
empty, the machine is switched off by means of a protective
circuit: The inserted tool no longer rotates.
Do not continue to press the On/Off switch after the
machine has been automatically switched off. The bat-
tery can be damaged.
The battery is equipped with a NTC temperature control
which allows charging only within a temperature range of be-
tween 0 °C and 45 °C. A long battery service life is achieved
in this manner.
Observe the notes for disposal.
Removing the battery
The battery 3 is equipped with two locking levels that should
prevent the battery from falling out when pushing the battery
unlocking button 24 unintentionally. As long as the battery is
inserted in the power tool, it is held in position by means of a
spring.
To remove the battery 3, press the battery unlocking button
24 and pull the battery out of the power tool toward the rear.
Do not exert any force.
Battery Charge-control Indication (see figure F)
The three green LEDs of the battery charge-control indicator
32 indicate the charge condition of the battery 3. For safety
reasons, it is only possible to check the status of the charge
condition when the machine is at a standstill.
Press button 31 to indicate the charge condition. This is also
possible when the battery 3 is removed.
When no LED lights up after pushing button 31, then the bat-
tery is defective and must be replaced.
Mounting/Replacing the Saw Blade
Before any work on the power tool, remove the battery.
When mounting the saw blade, wear protective gloves.
Danger of injury when touching the saw blade.
Only use saw blades that correspond with the charac-
teristic data given in the operating instructions.
Do not under any circumstances use grinding discs as
the cutting tool.
Selecting a Saw Blade
An overview of recommended saw blades can be found at the
end of this manual.
Removal of the Saw Blade (see figure A)
For changing the cutting tool, it is best to place the machine
on the face side of the motor housing.
– Press the spindle lock button 14 and keep it pressed.
The spindle lock button 14 may be actuated only when
the saw spindle is at a standstill. Otherwise, the power
tool can be damaged.
– With the Allen key 16, unscrew the clamping bolt 22 turn-
ing in rotation direction .
– Tilt back the retracting blade guard 7 and hold firmly.
– Remove the clamping flange 21 and the saw blade 20 from
the saw spindle 18.
Mounting the Saw Blade (see figure A)
For changing the cutting tool, it is best to place the machine
on the face side of the motor housing.
– Clean the saw blade 20 and all clamping parts to be assem-
bled.
– Tilt back the retracting blade guard 7 and hold firmly.
– Place the saw blade 20 onto the mounting flange 19. The
cutting direction of the teeth (direction of arrow on the saw
blade) and the direction-of-rotation arrow on the retract-
ing blade guard 7 must correspond.
– Mount the clamping flange 21 and screw in the clamping
bolt 22 turning in rotation direction . Observe correct
mounting position of mounting flange 19 and clamping
flange 21.
– Press the spindle lock button 14 and keep it pressed.
– Tighten the clamping bolt 16 with the Allen key 22 by turn-
ing in rotation direction . The tightening torque is
6–9 Nm, which corresponds to hand tight plus ¼ turn or
3 graduation marks of the marks 23 on the blade guard
4.
Base plate dimensions
mm 146 x 272
Saw blade diameter, max.
mm 165
Saw blade diameter, min.
mm 160
Blade thickness, max.
mm 1.7
Tooth thickness/setting, max.
mm 2.6
Tooth thickness/setting, min.
mm 2.0
Mounting bore
mm 20
Weight according to
EPTA-Procedure 01/2003
kg 3.9/4.1*
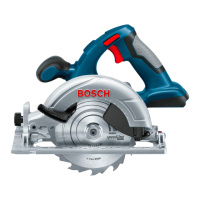
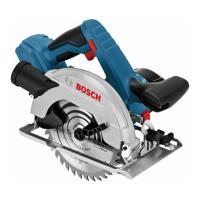
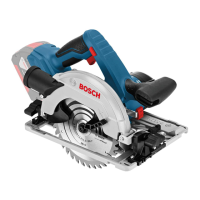
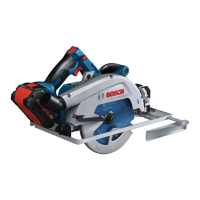
Circular Saw GKS 18 V-LI
* dependent of the battery pack being used
LED Capacity
Continuous lighting 3 x green 2/3
Continuous lighting 2 x green 1/3
Continuous lighting 1 x green <1/3
Flashing light 1 x green Reserve
OBJ_BUCH-765-002.book Page 9 Monday, February 11, 2013 11:29 AM
 Loading...