English - 3
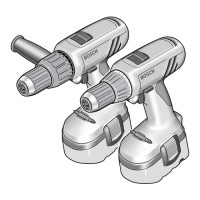
GSB 18 VE-2/GSB 24 VE-2/
GSR 18 VE-2/GSR 24 VE-2:
■ Always use the auxiliary handle supplied
with the machine. Loss of control can cause
personal injury.
■ When working with the machine, always
hold it firmly with both hands and provide
for a secure stance. The power tool is guided
more secure with both hands.
Battery Charging
A battery that is new or has not been used for a
longer period does not develop its full capacity
until after approximately 5 charging/discharging
cycles.
To remove the battery 6, press the unlocking but-
tons 8 and pull out the battery downwards. Do not
exert any force.
The battery is equipped with an NTC temperature
control which allows charging only within a tem-
perature range of between 0 °C and 45 °C.
A long battery service life is achieved in this man-
ner.
A significantly reduced working period after
charging indicates that the batteries are used and
must be replaced.
■ Observe the notes on environmental protec-
tion.
Loosen the handle by turning to the left. Rotate
the auxiliary handle 9 and adapt to the working
position. Make sure that the clamping band 11 of
the auxiliary handle remains in the groove.
Afterwards tighten the handle again by turn-
ing in clockwise direction.
Open the drill chuck 3 by turning until the tool can
be inserted. Insert the tool.
Firmly tighten the sleeve of the keyless chuck 3
by hand until the locking action (“click”) is no
longer heard. This automatically locks the chuck.
Rotate the sleeve in the reverse direction to re-
move the tool.
Screwdriving (see figure )
Insert the screwdriver blade 12 directly into the
tool holder or when using screwdriver bits 13, ad-
ditionally use the universal bit holder 7.
Inserting the Battery
■ Use only original Bosch O-pack batteries with
the voltage given on the type plate of your ma-
chine.
Set the rotational direction switch 5 to the centre
position = lock-off and allow the charged bat-
tery 6 to engage into the handle.
Reversing the Rotational Direction
Operate the rotational direction
switch 5 only at a standstill.
The rotational direction
switch 5 is used to re-
verse the rotational direc-
tion of the machine. How-
ever, this is not possible
with the On/Off switch 4
actuated.
Right Rotation ( )
Turn the rotational direction switch through to the
left stop (normal operation: drilling, screwdriving,
etc.).
Left Rotation ( )
Press the rotational direction switch through to
the right stop (for loosening and unscrewing
screws and nuts).
Before Putting into Operation
Auxiliary Handle (see figure )
(GSB 12 – 24 VE-2/
GSR 18 – 24 VE-2)
A
Changing the Tool
Starting Operation
B
b
a
a
b
2 609 932 156.book Seite 3 Dienstag, 29. März 2005 9:26 09
14 • 2 609 932 156 • TMS • 21.02.05

 Loading...
