Do you have a question about the Bosch HMV5053U and is the answer not in the manual?
Unit is heavy, requires two people or equipment. Use caution when reaching behind or under appliance.
Ensure proper grounding and turn off power before installation. Connections must comply with all applicable codes.
Observe precautions during servicing to avoid microwave energy exposure. Check interlocks and door seals for damage.
Appliance must be grounded via cord and plug into a properly installed outlet. Consult electrician if unsure about grounding.
Remove packaging, never modify appliance construction, and use only metal ductwork to reduce fire risk.
Product contains chemicals known to cause cancer, birth defects, or reproductive harm in California.
Remove filter, accessories, and hardware. Carefully remove carton and Styrofoam protecting the oven.
List of required and optional tools for installation, including screwdriver, drill, level, and tape.
Diagram with required minimum dimensions for cabinet opening, depth, height, and outlet placement.
Details required connections: three prong grounded outlet, 120V, 60Hz, 15 Amp supply with fuse/breaker.
Instructions on how to remove the mounting plate from the microwave oven for use as a template.
Guide to locating wall studs within the cabinet opening using a stud finder or hammer for secure mounting.
Illustrations of preferred installation configurations for mounting plate attachment to wall studs.
Steps for preparing the wall, including drawing lines, taping template, and drilling holes for mounting plate.
Instructions for attaching the mounting plate to the wall using bolts and toggle wings, ensuring it is level.
Steps to reconfigure the blower unit for roof venting, involving rotation and securing the plate.
Steps to reconfigure the blower unit for wall venting, involving rotation and rerouting wires.
Instructions for preparing the upper cabinet, including removing contents, using templates, and drilling holes.
Guidance on troubleshooting, referring to Use and Care Manual and warranty statement before contacting service.
Explains that the data plate contains model and serial numbers and is located inside the appliance.
Contact information for Bosch Customer Support for assistance, questions, or service needs.
Information on purchasing parts, filters, cleaners, and accessories via Bosch eShop or phone.
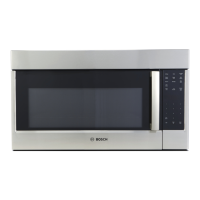
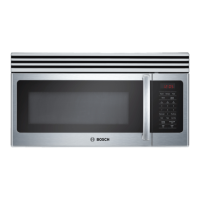
| Style | over the range |
|---|---|
| Color | stainless steel |
| Total Capacity | 2.1 cu. ft. |
| Convection | no |
| Power Levels | 10 |
| Venting Type | convertible |
| Sensor Cooking | yes |
| Quick Start | no |
| Defrost | yes |
| Timer | yes |
| Interior Light | yes |
| Microwave Power | 1, 100 watts |
| Voltage | 120 volts |
| Current | 15a |
| Depth | 15 7/8 inch |
|---|---|
| Height | 17 1/2 inch |
| Width | 29 7/8 inch |
| Net Weight | 70 lbs. |