Factory-supplied
equipment
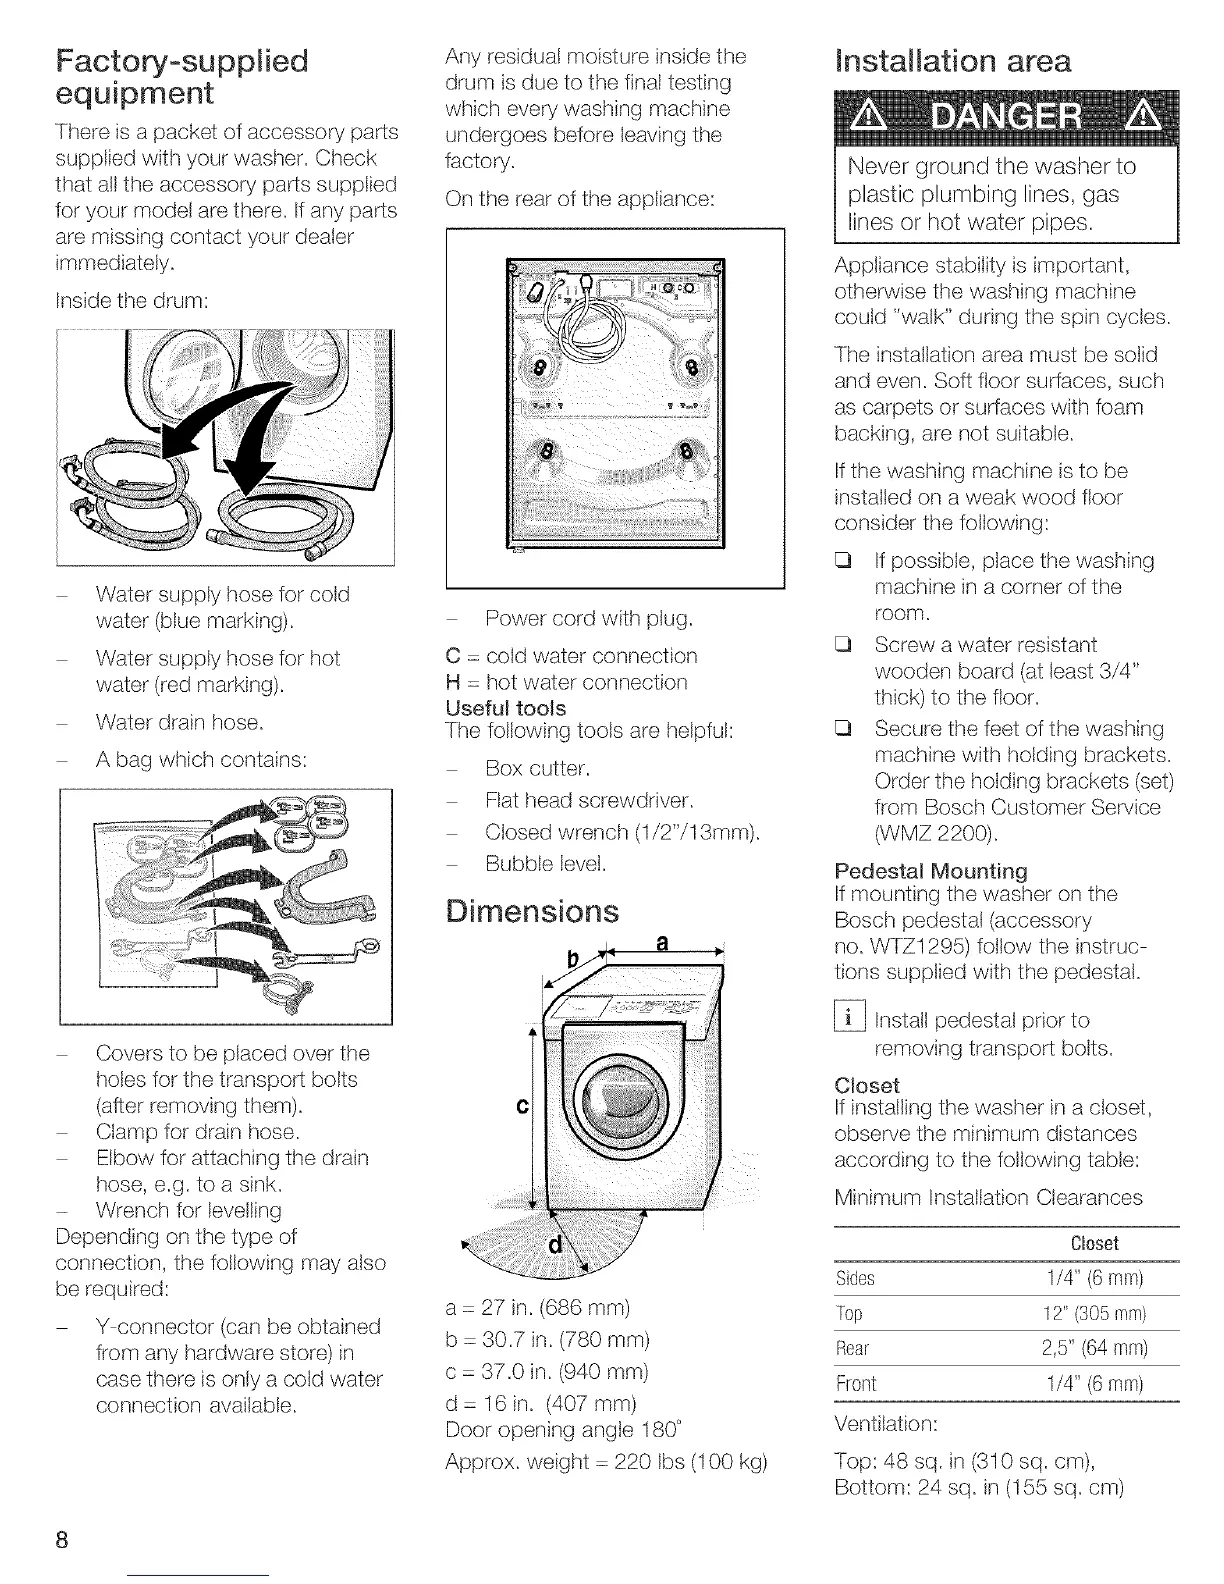
There is a packet of accessory parts
supplied with your washer, Check
that all the accessory parts supplied
for your model are there, If any parts
are missing contact your dealer
immediately,
Inside the drum:
Water supply hose for cold
water (blue marking).
Water supply hose for hot
water (red marking).
Water drain hose.
A bag which contains:
Covers to be placed over the
holes for the transport bolts
(after removing them).
Clamp for drain hose.
Elbow for attaching the drain
hose, e.g. to a sink.
- Wrench for levelling
Depending on the type of
connection, the following may also
be required:
Y connector (can be obtained
from any hardware store) in
case there is only a cold water
connection available.
Any residual moisture inside the
drum is due to the final testing
which every washing machine
undergoes before leaving the
factory.
On the rear of the appliance:
Power cord with plug,
C - cold water connection
H = hot water connection
Useful too_s
The following tools are helpful:
Box cutter,
Fiat head screwdriver,
Closed wrench (1/2'/13ram),
Bubble level,
Dimensions
8
a - 27 in. (686 mm)
b - 30.7 in. (780 ram)
c - 37.0 in. (940 mm)
d - 16 in. (407 ram)
Door opening angle 180 °
Approx. weight - 220 tbs (100 kg)
Installation area
Never ground the washer to
plastic plumbing lines, gas
lines or hot water pipes.
Appliance stability is important,
otherwise the washing machine
could "walk" during the spin cycles,
The installation area must be solid
and even. Soft floor surfaces, such
as carpets or surfaces with foam
backing, are not suitable.
If the washing machine is to be
installed on a weak wood floor
consider the following:
13 If possible, place the washing
machine in a corner of the
room.
(3 Screw a water resistant
wooden board (at least 3/4"
thick) to the floor,
(3 Secure the feet of the washing
machine with holding brackets,
Order the holding brackets (set)
from Bosch Customer Service
(WMZ 2200).
Pedestal Mounting
If mounting the washer on the
Bosch pedestal (accessory
no. WTZ1295) follow the instruc
tions supplied with the pedestal.
[_ Install pedestal prior to
removing transport bolts,
Closet
If installing the washer in a closet,
observe the minimum distances
according to the following table:
Minimum Installation Clearances
Closet
Sides 1/4" (6 ram)
Top 12" (305mm)
Rear 2,5" (64 ram)
Front 1/4" (6 mm)
Ventilation:
Top: 48 sq. in (310 sq. cm),
Bottom: 24 sq. in (I 55 sq. cm)
8




 To Next Page