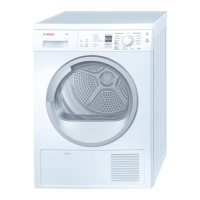
7
Programme overview also see Pa ge 5
After drying: laundry is to be ...
T-shirt
Shirts
Trousers
Skirts/dresses
Sportswear
Work clothing
Anoraks
Towelling
dressing gowns
Underwear
Socks
Bed linen
Table linen
Terry towels
Tea towels/
towels
c
ironed
lightly ironed dry
@c
not ironed
c
passed through a mangle
Cottons
max. 7 kg
For whites and coloureds/cotton or linen.
Iron Dry ø@
è*è*è*è*è*è*è*è*
Cupboard Dry @
è*è*è*è*è*
Extra Dry @
*è*è*è*è*è*
Easy-Care
max. 3.5 kg For non-iron laundry made of synthetic fi bres and blended fabric, cotton.
Iron Dry cø@c
è*è*è*è*è*è*
Cupboard Dry @è*è*
Extra Dry @è*è*è*
Sportswear
max. 1.5 kg
For fabrics with membrane coating, water-repellent fabrics, functional clothing, fleece fabrics (dry jackets/trousers with
removable internal lining separately).
SuperQuick 40’
max. 2 kg
For laundry made of synthetic fibres, cotton or blen ded fabrics (for example) that needs to be dried quickly. The values may
differ from the those specified depending on the type of fabric, mixtur e of laundry to be dried, residual moisture in the fabric
and loading capacity.
Timed Programmes
Warm 20 min.
max. 3 kg
For pre-dried, multi-layered, sensitive fabrics made of acrylic fibres, or separate small items of laundry.
Also for subsequent drying.
1110 / 9000516920
*516920*
Robert Bosch Hausgeräte GmbH
Carl-Wery-Str. 34
81739 München/Germany
WTE84105GB
8
Installation
– Delivery specification: drye r, instructions for installation and use.
– Check dryer for transport d amage.
– The dryer is very heavy. D o not attempt to lift it on your own.
– Be careful to avoid sharp e dges.
– Do not lift the dryer by any of the protruding parts (e.g. the d oor) as they may break off.
– Do not set up in a room th at is susceptible to frost.
Freezing water may cause damage.
– If in doubt, have the appliance connected by an expert.
Setting up the dryer
– The appliance plug mus t always be accessible.
– Ensure that the appliance is installed on a clean, level
and solid surface.
– Keep the cooling grille at t he front of the dryer
unobstructed.
– Keep the area around the dryer clean.
– Make the dryer level usin g the threaded feet
and a spirit level.
Do not remove the threaded feet un der any
circumstances.
Mains connection see safety instructions
a
Page 11.
– Connect to an AC earthed s ocket. If in doubt have the socket che cked by an expert.
– The mains voltage and the voltage shown on the rating plate (
a
Page 9) must correspond.
– The connected load and necessary fuse protection are specified o n the rating plate.
Frost protection/transport
Preparation
1. Emp ty the condensation container
a
page 4.
2. Se lect any programme using the program me selector.
3. Pre ss the Start/
Stop button
a
condensation is pumped into the container.
4. Wa it 5 min., and then empty the condens ation container again.
5. Tu rn the programme selector to Off.
Take all accessory parts
out of the drum.
The drum must be empty.
Make sure that the air
inlet remains unobstructed
Clean and level
Do not operate the dryer if
there is a danger of fro st.
Do not set up the dryer behind a doo r or sliding
door as this may obstruct or prevent the dryer door
from opening. This will prevent a potentia lly fatal
danger to children from locking thems elves in.
9
Technical data
ʠ
Dimensions (DxWxH) 60 x 60 x 85 cm (height adjustable)
Weight approximately 45 kg
Max. capacity 7 kg
Condensation container 4.2 l
Connection voltage
Connected load
Fuse protection see appliance ratin g plate
Ambient temperature
Product number/
Production number
You can find the rating plate on th e back of the dryer.
ʠ
Consumption rates
These are guide values determine d under standard
conditions. Fluctuations up to 10% a re possible.
Spin speed in rpm
(residual moisture)
Drying time
in min.**
Energy
consumption
in kWh**
Cottons 7 kg 13 A 13 A
Cupboard Dry* 1400 (approx. 50 %) 89 3.36
1000 (approx. 60 %) 104 3.92
800 (approx. 70 %) 120 4.48
Iron Dry* 1400 (approx. 50 %) 69 2.42
1000 (approx. 60 %) 82 3.06
800 (approx. 70 %) 94 3.70
Easy-Care 3.5 kg
Cupboard Dry* 800 (approx. 40 %) 42 1.35
600 (approx. 50 %) 51 1.65
*Test program according to DIN EN 61121.
**The values may differ from the tho se specified depending on the type of fab ric, mixture of
laundry to be dried, residual moistur e in the fabric and loading capacity.
ʠ
Drum interior ligh t (depending on model) (bulb E14, 25 W )
The drum is illuminated after the door is opened or closed, and also after the programme is
started. It goes out automatically. Re placing the bulb
a
Page 10.
Optional accessories (o rder from the after-sales service using the order number)
Connection fittings for conden sation outlet
The condensation is conveyed direc tly via a hose.
Washer-dryer stack connection set
The dryer can be placed on top of a suitable washing machine with the same width and depth
to save space. This connection set must always be used to secure the dryer to the washing
machine. With pull-out worktop: W TZ 11300.
Platform
For better loading and unloading.
The basket contained in the drawer can be used to carry the laundry.
Installation underneath the worktop
Risk of electric shock!
Instead of the appliance cove ring plate, you must have a metal cover fit ted by an expert.
10
What to do if ...
If you cannot rectify a fault yourse lf, please contact our after-sales serv ice. We will always find
an appropriate solution and will avoid unn ecessary visits by engin eers. Trust the expert ise of
the manufacturer a nd rest assured that t he repair will be carrie d out by trained service
technicians using original spare parts. T he contact details of your local after-sales service can
be found in the en closed
after-sales service directory, or by calling one of these numbers:
– GB 0844 8928979 (Calls from a BT landline will be charged a t up to 3 pence per mi nute.
A call set-u p fee of up t o 6 pence m ay apply.)
– IE 01450 2655
When contacting the after- sales service, please quote the applia nce's product number (E no.)
and production num ber (FD) (see the inside of the door).
Set the programm e selector to
Off and remove the app liance plug from the socket.
ʠ
The Start/Stop indicator
lamp does not light up.
Mains plug plugged in?
Programme selected?
ʠ
The Container and Start/
Stop indicator lights are
flashing.
Empty the condensation contai ner.
If featured, check hose for cond ensation outlet.
ʠ
The Clean and Start/Stop
indicator lights are flashing.
Clean the fluff filter and/or air cooler
a
Page 4/6.
ʠ
Dryer does not start. Start/Stop button selected ?
Door closed?
Programme set?
Ambient temperature greater than 5 °C?
ʠ
Water is running out. Align dr yer horizontally.
Clean air cooler seal.
ʠ
The door opens by itself. Push the door closed until you he ar it engage.
ʠ
The required degree of
dryness was not achieved or
the drying time was too long.
Clean the fluff filter and/or air cooler
a
Page 4/6.
Empty condensation containe r
a
Page 4.
Check water outlet (if featured).
Ambient temperature higher tha n 35 °C
a
airing.
Air inlet may be blocked
a
keep unobstructed.
Was an unsuitable programme sel ected?
a
Page 7.
Has the dryer been installed with sufficient space on all
sides? Ensure that air can circula te.
Fine layer of scale on the mois ture sensors
a
Clean the
moisture sensors
a
page 6.
ʠ
Laundry damp. Use the next drying programme up or use the timer
programme as a supplement
a
Page 7.
Warm laundry feels damper than it really is!
ʠ
The moisture content of the room
has increased significantly.
Make sure the room is sufficien tly ventilated.
Air inlet blocked?
a
keep unobstructed.
Ensure that the air cooler has b een inserted.
ʠ
Mains failure. Remove laundry from the dryer immediately and spread out.
This allows the heat to dissipate.
ʠ
One or more indicator lights for
programme status are
flashing.
Clean filter and air cooler
a
Page 4/6.
Check installation conditions
a
Page 8.
Switch off, leave to cool down, swi tch on again, restart
programme.
ʠ
The interior light is not working
(depending on model).
Pull out the appliance plug, rem ove the cover cap in the
interior above the door (use Torx 20 screw driver) and
replace the bulb. Close the co ver cap.
Never operate the dryer without a c over cap.
11
Safety instructions
Emergency
– Pull the appliance plug out of the socket immediately or disc onnect the fuse.
ONLY use the
dryer...
– In rooms inside the house.
– To dry fabrics.
The dryer must
NEVER...
– Be used for other purp oses than those described above.
– Be modified in terms of its technology or attributes.
Dangers
– The dryer must not be used by children or persons who have n ot been
instructed in its use.
– Do not leave children u nsupervised near the dryer.
– Keep pets away from th e dryer.
– Remove all objects from pockets.
Make especially sure that cigarette lighters are removed as they constitute an
a
explosion hazard.
– Do not lean or sit on the do or
a
risk of tipping.
Installation
– Secure loose cables
a
tripping hazard.
– Do not operate the drye r if there is a risk of frost.
Mains
connection
– Connect the dryer acc ording to specifications to an AC eart hed socket, as
otherwise it cannot be guarante ed that the appliance is completely safe.
– The cable cross-section m ust be sufficient.
– Only use earth-leakage circuit breakers with the following symb ol:
– The appliance plug a nd socket must be compatible.
– Do not use multiple plugs /couplings and/or extension cables.
– Do not hold the applia nce plug with wet hands
a
risk of electric shock.
– Never pull the applianc e plug out of the socket by its cable.
– Do not damage the main s lead
a
risk of electric shock.
Operation
– Only load the drum with laundry.
Check the contents before you swi tch the dryer on.
– Do not use the dryer if the laundry has been in contact with solvents, oil, wax,
grease or paint (e.g. hair setting s pray, nail polish remover, stain remover,
cleaning solvent, etc.)
a
fire/explosion hazard.
– Dust (e.g. coal dust, flour) poses a danger: do not use the dryer
a
explosion hazard.
– Do not put laundry containing foamed material/rubber in the dryer
a
elastic
material may be destroyed and the dryer may be damaged due to possi ble
deformation of the foamed mat erial.
– Switch off the dryer once the programme has ended.
– Condensation is not dri nking water and may be contaminated wit h fluff.
Defect
– Do not use the dryer if it is defective or if you suspect it is.
Repairs must only be carried o ut by the after-sales service.
– Do not use the dryer if th e mains cable is defective. To avoid d anger, only
have the defective mains cable re placed by the after-sales service.
– Always pull the mains plug out of the socket before changing the bulb for the
interior light
a
risk of electric shock.
Spare parts
– Only use genuine spar e parts and accessories for safety reas ons.
Disposal
– Dryer: pull out the appl iance plug, then cut off the mains cable from the
appliance.
Dispose of at municipal waste d isposal facility.
– Packaging: do not leav e children alone with packing parts
a
risk of suffocation.
– All materials are environmentally sound and can be reused. Dispose of in an
environmentally-responsible mann er.
Instructions for
installation and use
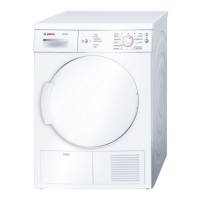
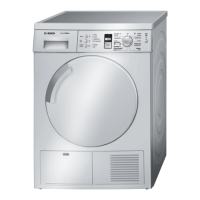
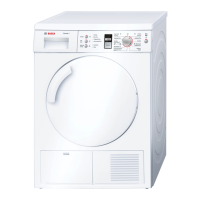
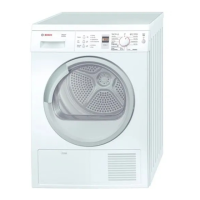
Tumble dryer
Read these instructions before operating the dryer.
en
Observe the safety instructions o n page 11.
 Loading...