6
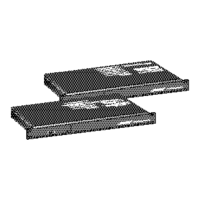
7.3 Pull out the Speakon connector and
remove the wires.
8. Speakon Connector Replacement
8.1 Referring to figure 1, attach the wires to
the Speakon connector (4).
8.2 Align the Speakon connector in the
cabinet.
8.3 Reshape the tinnerman clip (5) or use a
new one. Place an appropriate size wood
block between the Speakon connector (rear
of speaker) and a hard surface. Using a flat-
blade screwdriver (or similar tool) and a
hammer, secure the tinnerman clip into place.
Make sure the Speakon connector is securely
fastened.
6. Crossover Replacement
6.1 Replace the two screws (7) securing the
crossover PCB (3) to the cabinet.
6.2 Perform procedure 4 and 2.
7. Speakon Connector Removal
7.1 Perform procedure 3.1-3.3 to remove the
two center drivers.
7.2 Using a flat-blade screwdriver, pry out the
tinnerman clip (5) securing the Speakon
connector (4) to the cabinet.
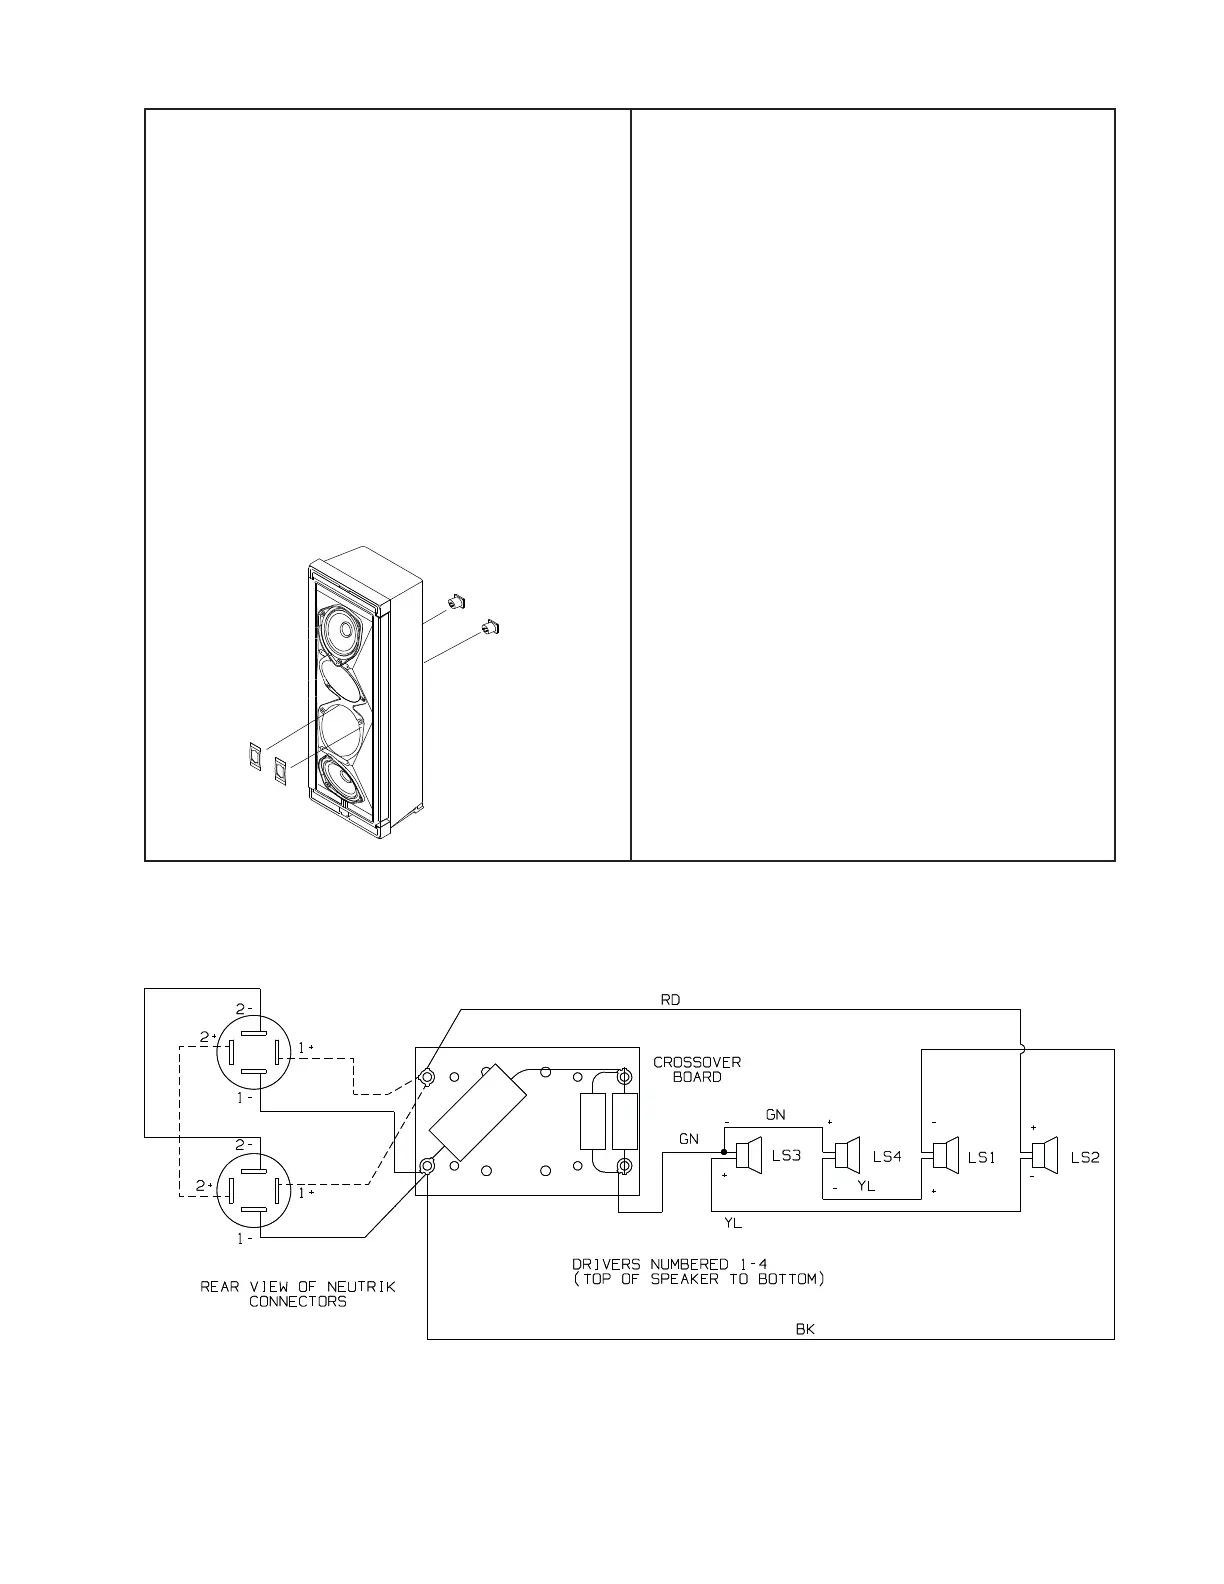
DISASSEMBLY/ASSEMBLY PROCEDURES
Speakon
Connector
Tinnerman Clip
Figure 4. Schematic Diagram
 Loading...