EasyManua.ls Logo

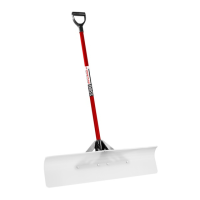
Boss Snowplow THE SNOW PLOW SNOW PUSHER User Manual

Boss Snowplow THE SNOW PLOW SNOW PUSHER
2 pages
To Next Page IconTo Next Page
Page #1 background imageLoading...
Page #1 background image
Attach blade to TUFFBRACE by Inserting 4 hex bolts (1/4”x3/4”) (A) into the 4 holes in the middle of the
blade and fasten to TUFFBRACE with 4 locknuts (B)
THE SNOW PLOW SNOW PUSHER BOSS EDITION
ASSEMBLY INSTRUCTIONS
3. Insert handle into TUFFBRACE.
4. Drill a 1/4” hole in middle dimple on the backside of
the TUFFBRACE with provided 1/4” Drill Bit (E).
5. Secure handle to TUFFBRACE with 2 screws (3/4”) (C)
Insert Hex Bolt (1/4”x2”) (D) in drilled hole and fasten
with locknut (B).
NOTE: Screw the two self tapping screws
in the dimple sections on the back of the
TUFFBRACE handle.
A
A
A
B
A
B B
B
B
A
C
E
DB
C
Insert remaining hex bolt (A) in the top blade hole and fasten to TUFFBRACE with locknut (B).
1.
2.
Question and Answer IconNeed help?

Do you have a question about the Boss Snowplow THE SNOW PLOW SNOW PUSHER and is the answer not in the manual?

Boss Snowplow THE SNOW PLOW SNOW PUSHER Specifications

General IconGeneral
BrandBoss Snowplow
ModelTHE SNOW PLOW SNOW PUSHER
CategorySnow Blower
LanguageEnglish

Summary

Snow Pusher Assembly Steps

Attach Blade to TUFFBRACE

Fasten blade to TUFFBRACE using hex bolts and locknuts.

Insert Hex Bolt and Fasten

Insert hex bolt into top blade hole and secure with locknut to TUFFBRACE.

Insert Handle into TUFFBRACE

Place the handle into the TUFFBRACE connector.

Drill Pilot Hole

Drill a 1/4” hole in the backside dimple of the TUFFBRACE.

Secure Handle with Screws

Attach handle to TUFFBRACE using screws and hex bolt.

Final Assembly and Hardware

Align and Secure D-Grip

Align D-Grip parallel to blade and secure with a self-tapping screw.

Hardware Pack Contents

List of included hardware components for assembly.

Related product manuals