EasyManua.ls Logo

Boss Dr. Rhythm DR-3 User Manual

Boss Dr. Rhythm DR-3
128 pages
To Next Page IconTo Next Page
Page #1 background imageLoading...
Page #1 background image
Owner’s Manual
03236845 1*SX
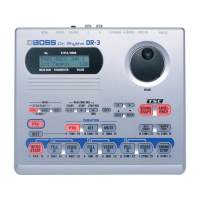
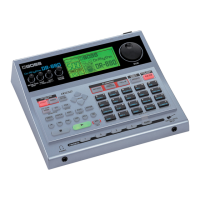
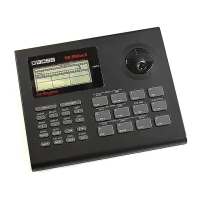
Thank you, and congratulations on your choice of the BOSS DR-3 Dr. Rhythm.
Before using this unit, carefully read the sections entitled:
• USING THE UNIT SAFELY (page 2–4)
• IMPORTANT NOTES (page 5)
These sections provide important information concerning the proper operation of the unit.
Additionally, in order to feel assured that you have gained a good grasp of every feature provided by
your new unit, Owner's manual should be read in its entirety. The manual should be saved and kept
on hand as a convenient reference.
Printing Conventions in This Manual
Text or numerals enclosed in square brackets [ ] indicate buttons.
[SONG] SONG button
START [ ] START button
Reference such as (p. **) indicate pages in this manual to which you can refer.
Copyright © 2003 BOSS CORPORATION
All rights reserved. No part of this publication may be reproduced in any form without the written permission of BOSS
CORPORATION.

Table of Contents

Other manuals for Boss Dr. Rhythm DR-3

Questions and Answers:

Boss Dr. Rhythm DR-3 Specifications

General IconGeneral
TypeDrum Machine
Drum Kits50
Patterns100
Presets50
DisplayLCD
EffectsDelay
ConnectivityMIDI In/Out
Power9V DC
Power SupplyAC Adaptor (included) or 6 x AA batteries
MIDIIn/Out

Summary

USING THE UNIT SAFELY

IMPORTANT NOTES

Power Supply: Use of Batteries

Information on using batteries, including recommendations and precautions.

Placement

Guidelines for properly positioning the unit to ensure optimal performance and safety.

Additional Precautions

Further safety and operational advice beyond standard warnings.

Main Features

Making Your Own Rhythm Pattern Arrangements with Style Play

Creating custom rhythm patterns using drum and bass sounds and fill-ins.

TSC (Total Sound Control) Function

Adjusting overall tone and acoustic characteristics with Sound Shape and Ambience.

Produce Rhythm Patterns Automatically in Auto Mode

Automatic pattern switching for jam sessions, allowing hands-free operation.

Dynamics-Capable Pad Keys

Pads respond to touch dynamics, allowing volume changes based on playing force.

Quick Start

Let’s Listen to the Demo

Instructions for activating and listening to the unit's built-in demo performance.

Let’s Play a Style

Guidance on performing with rhythm styles in Manual mode.

Selecting Styles

Procedure for choosing from the DR-3's 100 pre-programmed rhythm styles.

Let’s Use a Foot Switch

Connecting the Foot Switch

Instructions for connecting an optional foot switch to the DR-3.

Using the Foot Switch

How to use the foot switch for starting, stopping, and switching patterns.

Chapter 1 Overview of the DR-3

The DR-3’s Performance Modes

Explains the different modes available for performing with the DR-3.

Style Play Mode

Details on performing using pre-programmed or user-created rhythm styles.

Makeup of a Style

Explains the structure of a style, including patterns, kits, and variations.

Panel Descriptions

Front Panel

Description and layout of the controls and display on the front of the unit.

Rear Panel

Overview of the connectors and switches located on the rear of the DR-3.

Before You Play

Install Batteries

Step-by-step guide for installing batteries into the unit.

Making Connections

Instructions for connecting the DR-3 to amplifiers, headphones, and other devices.

Turning On/Off the Power

Procedure for safely powering the unit on and off, including connection order.

Chapter 2 Playing Styles (Manual Mode [MANU])

How the Pads Work When Performing Styles

Explanation of how the DR-3 pads function in Manual mode for pattern switching.

Selecting Styles

Procedure for selecting styles to be performed in Manual mode.

Selecting the Patterns to be Played

How patterns are divided into eight performance units and assigned to pads.

Chapter 3 Playing Styles (Auto Mode [AUTO])

Selecting a Style

Procedure for selecting styles to be performed in Auto mode.

Performing in Auto Mode

How to perform with patterns switching automatically in Auto mode.

Changing the Pattern Progression in Auto Mode

Customizing the sequence and length of patterns played in Auto mode.

Chapter 4 Controlling the Styles with a Foot Switch

Starting and Stopping Performances

Using foot switches to start, stop, and pause performances of styles and songs.

Switching Verses

Using foot switches to insert fill-ins and switch to the next verse in a style.

Assigning Functions to the Foot Switch

Customizing functions assigned to foot switches beyond basic start/stop.

Chapter 5 Changing the Overall Tone of the Sound and Acoustics (TSC)

Changing the Overall Tone of the Sound ([SOUND SHAPE])

Adjusting the sound's overall tone using the 3-band equalizer and compressor.

Altering the Acoustic Characteristics of the Overall Sound ([AMBIENCE])

Modifying the sound's acoustic characteristics using ambience effects.

Changing the Sound Shape Parameters

Detailed settings for Sound Shape's equalizer parameters.

Chapter 6 Performing with the Pads

Playing Drum Sounds

Instructions for playing drum sounds using the pads.

Playing Percussion Sounds

Instructions for playing percussion sounds using the pads.

Playing Bass Sounds

Instructions for playing bass sounds using the pads.

Selecting a Different Sound (VARIATION [KIT])

Switching between the two drum kits included with each style.

Chapter 7 Creating Styles

Procedure for Creating Styles

Step-by-step guide for creating new user styles.

<1> Selecting a Number for the Style You Are Creating

Choosing a unique number for a new user style.

<2> Making the Settings for the New Style

Setting tempo, beat, kit, mute, TSC, and pattern measure settings for a new style.

<3> Recording the Patterns

Recording patterns using real-time or step recording methods.

Chapter 8 Creating and Performing Songs ([SONG])

What is a Song?

Definition of a song as an arrangement of patterns and its storage capacity.

Procedure for Creating Songs

Step-by-step guide for creating new songs on the DR-3.

<2> Make the Settings for the New Song

Setting initial tempo, TSC, and other parameters for a new song.

<4> Editing Songs

Inserting, deleting, copying, and tempo-changing segments within recorded songs.

Chapter 9 Changing the Operating Environment (System)

How to Make the Settings

Procedure for accessing and changing system settings like pad sensitivity and MIDI.

Adjusting the Pad Sensitivity

Adjusting pad sensitivity for nuanced or strong accent performance.

Chapter 10 Creating Your Own Kits

How to Make the Settings

Procedure for editing user kits, including instrument assignments and sound playback.

Selecting the Sounds Assigned to the Pads

Choosing instruments to assign to the pads for drum and bass sounds.

Naming the Kit

Editing the name of a selected kit using up to eight characters.

Chapter 11 Connecting and Using External MIDI Devices

What is MIDI?

Explanation of MIDI and its role in connecting electronic musical instruments.

Setting the MIDI Channels

Assigning MIDI channels for drum and bass parts to ensure proper data reception.

Setting Sync Mode

Determining if the DR-3 acts as a slave device for MIDI synchronization.

Recording Performances on MIDI Keyboards and MIDI Pads

Recording MIDI keyboard or pad performances into DR-3 patterns in real time.

Appendices

Troubleshooting

Solutions to common operational problems and issues encountered with the DR-3.

Message List

List of system messages, their causes, and recommended actions.

Parameter List

Comprehensive list of all adjustable parameters and their values.

Related product manuals