This document is a Quick Start Guide for Boss Laser LS Series machines, providing essential information for unpacking, setting up, and performing a basic operation with the laser engraver.
Function Description:
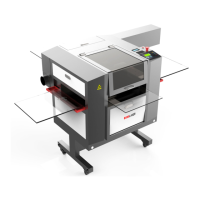
The Boss Laser LS Series machine is a laser engraving and cutting system designed for various material processing tasks. It utilizes a laser beam to engrave designs or cut through materials based on digital designs. The machine requires several external components to function, including an exhaust blower, an air assist system (either a pump or a compressor), and a water cooling system (either a water pump or a chiller). The laser's operation is controlled via software, LightBurn, which allows users to design, import, and send jobs to the machine. The machine's control panel provides direct interaction for setting parameters, initiating jobs, and performing maintenance functions like autofocus.
Usage Features:
Unpacking and Setup:
Upon delivery, the laser machine arrives in a large wooden crate. Users are instructed to inspect the crate for any damage before unpacking, taking pictures of any issues for insurance purposes. The unpacking process involves carefully removing bands, the top lid, and side panels, being cautious not to damage the machine or the plywood panels (which should be saved for potential future moves). Inside the cabinet, foam material and plastic zip-ties securing the laser head must be removed to allow free movement of the X and Y axes.
Accessory Hook-Up:
The guide details the hook-up procedures for various essential accessories:
- Exhaust Blower: Depending on the model (LS-1416s & 1420s or LS-1630s & Up), either a 4-inch or 6-inch exhaust blower is provided. The blower connects to the machine's exhaust port using tubing and hose clamps, directing fumes away from the workspace. Power requirements for each blower type are specified.
- Air Assist: The air assist system, crucial for preventing flare-ups and clearing debris during laser operation, can be set up with either a dedicated air pump or an air compressor. The guide provides step-by-step instructions for installing the 6mm hosing and fittings for both options, including removing original fittings and installing new ones using specific wrench sizes.
- Water Cooling System: The laser tube requires cooling to operate efficiently and prevent overheating. Two options are covered:
- Water Pump: This involves submerging a water pump in a 5-gallon bucket filled with distilled water. Silicone tubing connects the pump to the machine's "Water In" port, and a second tube returns water from the "Water Out" port back to the bucket, creating a closed-loop cooling system. Maintaining a water temperature between 18-25 degrees Celsius (64-77 degrees Fahrenheit) is recommended.
- Water Chiller (CW-3000 & CW-5000): For more advanced cooling, a water chiller is used. Silicone tubing connects the chiller's outlet to the machine's "Water In" port and the chiller's inlet to the machine's "Water Out" port. A chiller signal cable and power cord are also connected. The chiller should be filled with distilled water, and temperature recommendations are provided (18-25 degrees Celsius for CW-3000, CW-5000 is factory set within this range).
Toolbox Contents:
The machine comes with a toolbox containing various items, including:
- Exhaust hose clamps, high-pressure hosing, and a resistor with wiring clamps (for testing).
- Air nozzle regulator, high-precision proximity switch, and water chiller bypass signal (for testing).
- Fuses, universal machine door keys, a processing test file sample, and a Phillips head screwdriver.
- A 500 MB flash drive, ignition keys, a set of Allen keys, a focal guide, a 6-pin terminal with wire loop (for testing), mirror removal tool, lens removal tool, power cord, and nozzle removal tool.
- Three different size nozzles (2", 2.5", and 4") are provided, each correlated with specific lens sizes and recommended for different applications (engraving, cutting, or a balance of both).
"HELLO WORLD" Walkthrough (Basic Operation):
The guide includes a practical walkthrough for running a "HELLO WORLD" engraving job using the LightBurn software:
- Launch LightBurn: Open the software.
- Select Text Tool: Click the "Text" icon.
- Type "Hello World": Click on the grid space and type the text.
- Set Speed and Power: Access the "Layer Options" in LightBurn. Double-click the layer color to open the "Cut Settings Editor."
- Set "Mode" to "Fill."
- Set "Power (%)" to 25% (Min. & Max.).
- Set "Speed (mm/sec)" to 300 (max 500).
- Set "Line Interval (mm)" to 0.065 (recommended range 0.065-0.1).
- Click "OK."
- Send File to Machine: Ensure the Black USB Cable connects the PC to the machine and the machine is ON. Click the "Send" button in LightBurn, name the file (e.g., "HELLO"), and click "OK."
- Load File on Machine: On the machine's LED screen, press the "File" button. Select the "Hello" file (which will be highlighted with a preview) and press "Enter."
- Autofocus: Place material on the worktable. Press the "Z/U" button on the machine's control panel, navigate to "Auto Focus" using the down arrow key, and press "Enter." The worktable will move to autofocus the material. A focal guide can be used to double-check the focus.
- Start Job: Close the front lid of the machine to activate the interlock switch. Ensure all components (water chiller/pump, air compressor/pump, exhaust blower) are turned on. Use arrow keys to position the laser head, then press "ORIGIN." Press "FRAME" to preview the job area. Finally, press the "Start-Pause" button to begin the engraving. The milliamp reader should show activity during operation.
- Job Completion: After the job, open the lid to view the engraved "HELLO WORLD" on the material.
Maintenance Features:
- Distilled Water: For both water pump and chiller systems, only distilled water should be used to prevent mineral buildup and ensure optimal cooling.
- Temperature Monitoring: Maintaining the recommended water temperature (18-25 degrees Celsius) is crucial for the longevity and performance of the laser tube.
- Crate Panel Retention: Users are advised to save the crate panels in case the machine needs to be moved again, implying they can be reused for protective transport.
- Warranty Disclaimer: The document includes a warranty disclaimer, emphasizing that any modifications without written consent from Tech. Support will void the machine's warranty. This encourages users to contact support for any issues or desired changes, promoting proper maintenance and avoiding unauthorized alterations.
- Technical Support: The guide directs users to contact Tech. Support (phone or email) for warranty service, problem determination, and appropriate solutions, indicating a support system for maintenance and troubleshooting.