The BOSSWELD ST 141X / ST 181X Inverter DC MMA Welder is a lightweight welding machine designed for stick and TIG welding applications. It utilizes IGBT MMA Stick Electrode Welder technology to provide a smooth and stable output, making it suitable for various welding jobs around the home, farm, workshop, or on-site.
Function Description:
The welder performs two primary welding processes:
- STICK (MMA) Welding: This is the easiest process to learn and is ideal for quick repairs. It is slower than MIG welding but more forgiving in dirty or rusty environments. It is not recommended for thin sheet metal welding.
- TIG Welding: This process offers a better weld finish and accurate heat control. It is considered more challenging to learn but is excellent for welding thin material. TIG welding requires argon gas.
Important Technical Specifications:
The manual references two models, ST 141X and ST 181X, with differences in their input power requirements and maximum amperage.
- Input Power:
- ST 141X: 10 Amp input power lead.
- ST 181X: 15 Amp input power lead. (Note: Warranty will be void if the 15Amp plug is ground down).
- Welding Current: The welding current level is determined by the electrode size. As a rule of thumb, an electrode requires about 40 Amps per millimeter (diameter).
- 1.6mm rod: 40-50 Amps
- 2.0mm rod: 50-75 Amps
- 2.5mm rod: 75-105 Amps
- 3.2mm rod: 105-140 Amps
- 4.0mm rod: 140-160 Amps
- Electrode Size Selection (based on General Purpose 6013 Electrode):
- 1.0-2.0mm metal thickness: 2.0mm electrode
- 2.0-5.0mm metal thickness: 2.6mm electrode
- 5.0-8mm metal thickness: 3.2mm electrode
- 8.0mm+ metal thickness: 4.0mm electrode
- Operational Environment:
- Height above sea level: ≤1000m
- Operation temperature range: -10~+40°C
- Relative humidity: ≤ 90% (20°C)
- Angle of inclination: Maximum angle does not exceed 15 degrees.
- Protection: Protect the machine against heavy rain and direct sunshine.
- Dust/Corrosion: The content of dust, acid, corrosive gas in the surrounding air or substance must not exceed normal standard.
- Ventilation: Ensure sufficient ventilation during welding, with at least 30cm free distance between the machine and wall.
Usage Features:
- Front Panel Layout:
- Power Indicator Light
- Overload Error Indicator
- Digital Display
- MMA/TIG switch
- Current Adjustment Knob
- Positive Output Connection Socket
- Negative Output Connection Socket
- Rear Panel Layout:
8. Mains Power Switch (10Amp for ST 141X, 15Amp for ST 181X)
9. Cooling Fan
10. 240V AC Mains Power Cord
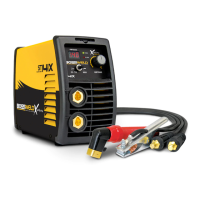
- Box Contents:
- BOSSWELD ST 141X or ST 181X Inverter DC MMA Arc Welder
- Electrode Holder Lead
- Welding Earth Lead
- Carry Strap
- Owners Manual (not shown)
- Welding Setup:
- STICK/MMA Welding:
- Plug the machine into the wall socket, ensuring the power switch is OFF.
- Connect the Electrode Holder to the positive terminal and the Earth Clamp to the negative terminal (DCEP/Negative Polarity for common application).
- Alternatively, for DCEN/Straight Polarity, connect the Earth Clamp to the positive terminal and the Electrode Holder to the negative terminal.
- Insert a bare metal rod end into the electrode holder and twist firmly.
- Ensure the electrode/electrode holder is not near the work-piece or can earth out. Turn the machine ON; the front displays will light up and the cooling fan will start.
- Select the required current using the Welding Parameter Adjustment Knob.
- TIG Welding:
- Plug the machine into the wall socket, ensuring the power switch is OFF.
- Install the TIG Torch by connecting the Dinse Connector to the Negative Output Connection Socket, the Gas hose to the regulator, and the TIG Torch Control Socket. Screw the nut up firmly.
- Set up the TIG torch: Place the Tungsten Electrode into the torch head and ensure the back cap and collet body are screwed in firmly.
- Connect the Argon Gas Regulator to the Gas bottle and connect the Gas Hose from the torch to the Input socket on the Regulator. Ensure the Gas regulator is in the OFF position.
- Connect the earth clamp to the positive terminal and firmly to the work-piece, ensuring good contact with bare metal.
- Turn on the machine using the mains power switch.
- Select TIG mode on the MMA/TIG switch.
- Turn on the regulator and set gas flow to between 10-15 L/min depending on your welding environment.
- Turn the valve on the torch head to start the flow of gas.
- Select your required current by turning the Welding Parameter Adjustment Knob.
- Lift Arc Start (TIG):
- Lay the outside edge of the Gas Cup on the work piece with the Tungsten Electrode 1-2mm from the work piece.
- With a small movement, rotate the Gas Cup forward so that the Tungsten Electrode touches the work piece.
- Press the button on the TIG torch.
- Rotate the Gas Cup in the reverse direction to lift the Tungsten electrode from the work piece to create the arc.
- Arc Force (Dig and Arc Control): Provides variable additional amperage during low voltage (short arc length) conditions, helping to avoid "sticking" stick electrodes.
- Overload Protection: If the duty cycle is exceeded or the transformer overheats, the thermostatic protection will activate and cut off the machine to cool down. The overload error indicator will illuminate. After cooling, the protector will reconnect.
- Welding Gas Selection (TIG): Argon gas is required for TIG welding of Mild Steel, Stainless Steel, Low Alloy Steel, and Aluminium. MIG Gas (Ar-CO2-O2) is not suitable for TIG welding.
Maintenance Features:
- General Maintenance:
- Before cleaning or maintenance, switch OFF and disconnect the machine from the mains supply.
- There are no user-serviceable parts inside. Refer to qualified service personnel for internal maintenance.
- After use, wipe the welder down with a clean, soft, dry cloth.
- Regularly inspect the supply cord; replace immediately if damaged.
- Keep welding cables, earth clamp, and electrode holder in good condition.
- Storage/Transport:
- Store the welder and accessories out of children's reach in a dry place.
- If possible, store in the original packaging.
- Secure the appliance against falling or rolling over during transport.
- Disposal:
- Recycle packaging where facilities exist.
- Dispose of unusable welders in an environmentally friendly way, checking with local council authority for recycling advice.
- Personal Protective Equipment (PPE): Always use protective gloves, fire-resistant clothing, a welding helmet, and safety glasses.
- Work Area Safety: Ensure a clear, well-lit, and well-ventilated work area. Maintain easy access to the ON/OFF switch and electrical mains supply. Do not expose the welder to rain or operate in damp/wet locations.
- Electrical Contact: Use adequate electrical insulation. Avoid direct contact with the welding circuit. Use a Residual Current Device (RCD) with a rated residual current of 30MA or less for additional protection. Avoid extension leads; if used, ensure they are suitable current-rated, heavy-duty, and earthed.
- Welding Surfaces: Do not weld containers that held flammable liquids/gases or on coated/painted/varnished surfaces.
- Work Piece: The work piece remains hot for a long time. Do not touch with bare hands; use welding gloves, pliers, or tongs.
- Fumes & Gases: Welding fumes and gases are hazardous. Do not breathe them; keep your head out of the fumes. Ensure good ventilation or use fume extraction. In confined spaces, wear an approved air-supplied respirator. Do not weld near de-greasing, cleaning, or spraying operations. Do not weld galvanized, lead, or cadmium-plated steel without proper ventilation and/or respirator.
- High Frequency (HF) TIG: Be aware that HF generates abnormally high electromagnetic emission (EM) which can cause interference with electronic equipment. Take care to avoid interference with control systems and instruments.
Warranty:
- Period: 3 Years (ST 141X) / 3 Years (ST 181X) from the date of purchase.
- Conditions: The warranty covers manufacturing defects. It does not cover damage from transport, misuse, neglect, or if the product has been tampered with.
- Thermal Overload: If the welder stops due to thermal overload, the overload indicator light will illuminate. The welder will cool itself down and automatically reconnect. This is not a warranty issue.
- Voiding Warranty: The warranty is void if the 15Amp plug is ground down. Do not grind your plug; this will void any warranty on your machine.