35796-0-0815Page 6
Tools Needed:
Protective Gloves
Phillips Screw Driver or Power Drill with Philips Drive
Before you begin: Do not, handle these logs with your bare hands!
Always wear gloves to prevent skin irritation. After handling logs,
wash your hands gently with soap and water.
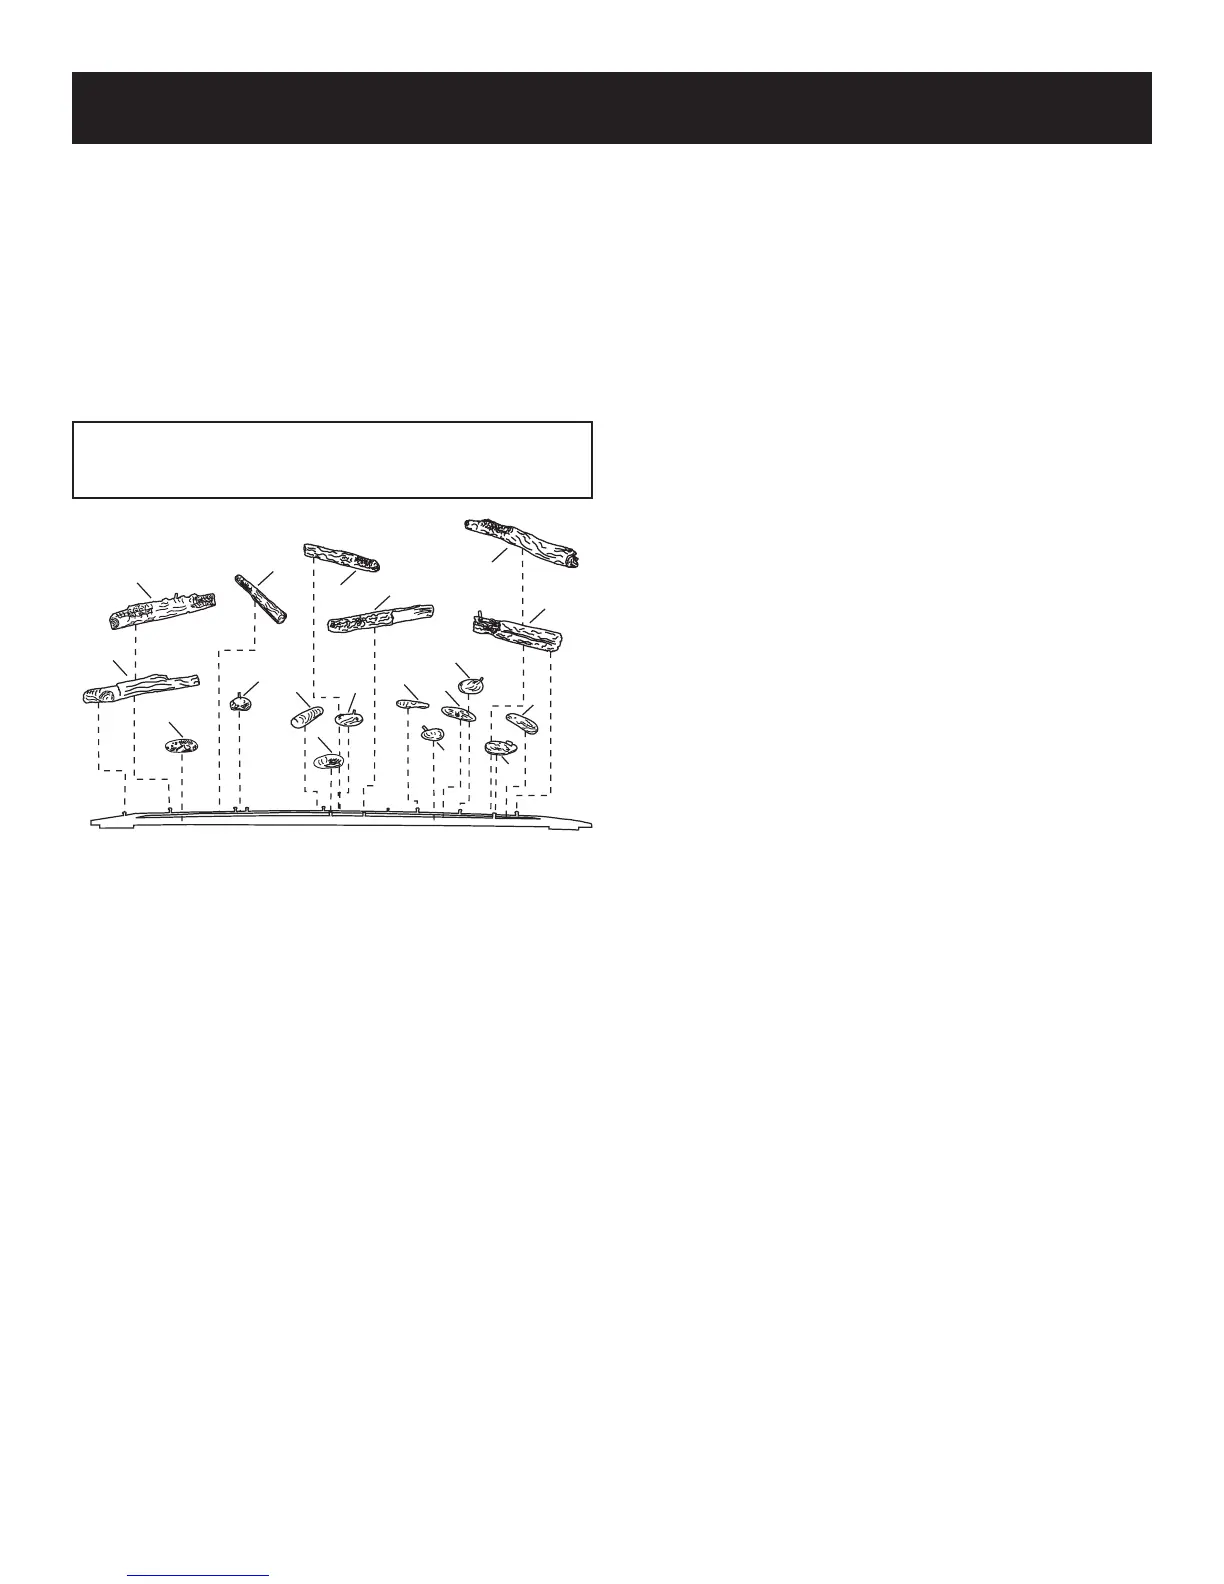
All Logs
The positioning of the logs is critical to the safe and clean operation
of this heater. Sooting and other problems may result if the logs are
not properly and rmly positioned in the appliance.
Refer to Figure 1 for the following warning.
Warning: Failure to position the parts in accordance with this
diagram or failure to use only parts specically approved with
this appliance may result in property damage or personal injury.
F
Q
L
M
N
R
P
O
A
B
C
G
D
I
E
H
K
J
Log Placement - Figure 1
LOG PLACEMENT
Attention: Refer to Pages 4 and 5 Parts List and Parts View to
order logs or rocks.
NOTE: Once the installation is complete with the logs, rocks, and
crushed glass media in place, operate the replace to verify ame
appearance. If there are ames directly impinging a log, turn off
replace, then remove the crushed glass media directly below where
the ame impingement occurred. This should eliminate sooting on
the log, and provide a more pleasing ame appearance.
Installation of the Pins for Log and Rock Placement
The LS60THF Log and Rock kit includes twelve 8-32x3/4" long
self-threading screws, and twelve 9/16" long spacers that will
need to be installed prior to the log and rock placement.
Note: It is highly recommended that the replace liner be installed
prior to installling the log and rock spacers so interference with
the locator pins is avoided.
Use a standard Philips screwdriver or power drill with a philips
drive to install the screws through a spacer at each of the twelve
pilot hole locations provided in the burner cover. See Figure 2.
These will be the locator pins for the logs and rocks.
 Loading...