Do you have a question about the Bouncyband Comfy Peapod and is the answer not in the manual?
Deflate the Peapod, clean the area and patch with rubbing alcohol, ensuring the surface is completely dry.
Cut a smooth patch 1 inch wider than the hole and position it without glue, marking the placement area.
Apply glue to the patch and peapod, let it set, carefully place the patch, and rub intensely to secure.
Place a heavy object on the patch for 24-36 hours, then check security and re-inflate the Peapod.
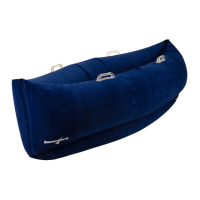
This document outlines the repair instructions for a "Bouncyband Comfy Peapod," which appears to be an inflatable seating or sensory device. The instructions detail a patching process to fix punctures or damage.
The Bouncyband Comfy Peapod is an inflatable device, likely designed for seating or sensory input, given the "Comfy Peapod" name and the need for inflation/deflation. Its primary function is to provide a comfortable and possibly calming space for users. The repair instructions focus on restoring the device's inflatable integrity after it has been punctured or damaged, ensuring it can hold air and maintain its intended shape and function.
The document provides comprehensive instructions for repairing a puncture in the Bouncyband Comfy Peapod. This process can be broken down into several key steps:
Preparation:
Patch Preparation:
Patch Placement and Tracing:
Glue Application:
Curing and Adhesion:
Post-Repair Check and Re-inflation:
The document also provides contact information for customer support, including a phone number (646) 926-2440 and an email address (sales@bouncyband.com), and directs users to bouncyband.com/pages/installation-guide for video inflation instructions, indicating that the product likely has specific inflation requirements beyond just patching.
| Brand | Bouncyband |
|---|---|
| Model | Comfy Peapod |
| Category | Indoor Furnishing |
| Language | English |