Always check your vehicle’s owner manual before using your
charger and follow the manufacturer’s instructions.
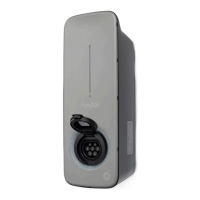
After your bp pulse home charger has been installed and powered-up,
it will complete its start-up lighting sequence (flashing amber, green and
red LEDs). This can take up to 2 minutes and once it finishes, the top
amber LED will be illuminated. This will stay illuminated whenever the
unit is connected to an electrical supply.
Starting a charge
1. For tethered units, fully un-wrap the cable
2. Open the charging socket on your vehicle
3. Grip the handle on the charging cable and remove the connector from
the docking socket
4. Insert the connector into your electric vehicle (EV)
5. To switch the unit on, turn the key switch from the ‘Off’ vertical position
a quarter of a turn to the right
Ending a charge
1. Grip the handle of the charging connector and remove it from your
vehicles charging socket. Refer to your vehicle owner manual to check
how to do this
2. If disconnecting a Type 1 connector, press the button to release the
connector from the vehicle’s socket
3. Once the charging connector is removed, the green LED charging icon
on the unit will go out
4. Turn the key switch on the unit from the horizontal ‘On’ to the vertical
‘Off’ position
5. Store the charging cable safely. For tethered units, wrap the cable
loosely around the charger and place the connector securely back into
the docking socket on the front of the unit
6. Close any charging socket access lids on your vehicle
Please note, your EV may take up to 2 minutes to complete its diagnostics before
the charging cycle begins. The connector only becomes live once it is connected to
a vehicle with the correct charging signal.
Depending on the make and model of your EV, there should be some
sort of notification (e.g. a sound, light or icon on dash etc.) to let you
know the cable is connected to your vehicle.
After completing these steps, charging will start. The green LED will
illuminate to show your EV is charging.
After your unit has been installed, allow 24 hours for it to start
communicating with us. You can also manage your charger online,
go to www.homecharge.chargevision.com/login
Adjust the rate
of charge
View your
charging history
Schedule a charge
If you’re using a Tethered Type 1 connector, make sure you
insert the connector firmly. DO NOT press the button while
connecting the cable to the vehicle. The button should only be
used to release the cable.
Get smart with your home charger
The Smartcharge app lets you manage your unit and usage via your
phone or tablet. You can use the app to:
If you’re using a Type 2 socket, then connect the cable supplied
with the EV into the vehicles charging socket first. Then lift the
flap on the front of the unit and insert the Type 2 connector into
the Type 2 socket on the front of the unit.
 Loading...