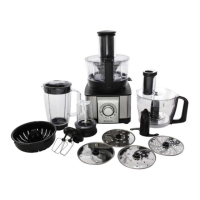
USING YOUR FOOD PROCESSOR
NOTE: This appliance is equipped with a protective device against high temperatures. If
the temperature becomes too high, the unit will turn off automatically and resume
operation after the motor has cooled down sufficiently (after about 30mins).
NOTE: Do not operate the appliance for more than 1min at a time. Suggested
usage: 1min on and 3mins off, max. 5 cycles, then turn off the machine and let it
cool down to room temperature.
Installation
1. Position the motor base (2) on a flat and dry surface.
2. Position the processing bowl (3) on to the motor base, turn clockwise to fix it firmly.
3. Place driving shaft (4) on to the rotor inside the bowl, place it vertically.
4. Open the blade storage box (11) of the motor base and take out the blade you want.
For example, when using the chopping blade (13) or kneading blade (12), just place
it in the driving shaft (4). When using the slicing, grating or french fry blades, attach
them to the blade holder (5) first and then place the blade holder (5) in the driving
shaft (4).
ATTENTION : Only one blade can be used at a time.
5. Put the ingredients into the processing bowl (3) and then close the bowl cover (6)
when using the chopping blade (13) or kneading blade (12). When using slicing,
grating or french fry blades, make sure to lock the bowl cover (6) first. Ingredients
should be filled through the feed chute after the machine is ready.
6. Lock the bowl cover (6) and the protection cover (8) - the safety lock (7) will then be
active.
7. At this point, the switch should be on 0 speed. Plug in the appliance and use the
pulse function to confirm whether the machine is correctly assembled. If there is
anything abnormal, unplug the machine and re-assemble as above.
Chopping blade (13)
Standard processing time is 30secs to 1min. For appropriate volumes per batch, please
refer to the following table:
Kneading blade (12)
Standard processing time is 15secs. Use speed 6~7. If using for whisking or to
make a milkshake, please choose speed 1~5. For appropriate volumes per batch,
please refer to the following table:
Ingredient
Flour & soft cheese
Eggs
Tips and warning
The ratio of flour to water when making dough is 1:0.6, which means 800g flour needs
480g water to achieve the best result. The standard processing time is within 15secs
using speed 7. That’s because the flour will become sticky and stick to the blade adapter
if the kneading time is too long. This can cause the machine to shake and work
abnormally.
There are 1-7 speed gears from slow to fast and a pulse gear on the rotary switch.
Please choose appropriate speeds according to the food hardness and your processing
needs. Normally, soft food can be processed by low speeds. If the food fails to be
processed or is stirred very slowly, it means that the speed is inappropriate. Then you
need to use a higher speed.
Medium & fine slicing & grating blade, french fry blade (15-19)
Standard processing time is 1min.
1. Choose the blade according to ingredients and the shape you want. Put the blade
you choose into the plastic blade holder (5), then place it in the driving shaft (4),
close the processing bowl cover and lock the feed chute cover with the safety lock
(7) on lid.
2. To process small pieces of food, insert the big pusher (9) in bowl cover (6) and
gradually feed the pieces into the opening, then using the small pusher (10) inserted
into the large pusher (9), push the pieces into the food processor with moderate
pressure. If large pieces are to be processed, then feed the large pieces into the
bowl cover (6), insert the large pusher (9) and push the food into the food processor
with moderate pressure. This will prevent blockages and excessive force being
needed.
3. If the food item is big such as a whole potato or large vegetable pieces, please open
the feed chute cover, put the food in, close the cover and then, with moderate
pressure, use the big pusher (9) with the small pusher (10) on it for safe operation.
4. Take care when pushing the ingredients in the feed chute with the pusher, do not
force the pusher too hard. It is better to chop larger ingredients into smaller pieces
to fit the feed chute. A lower speed is recommended when slicing softer ingredients.
Tips and warning
All the blades are very sharp, so please take care when handling them.
When cleaning the chopping blade, it is better to put it into the chopping blade
cover (14) to avoid exposure to the edge of the blade.
The spatula (20) should only be used to remove ingredients from the bowl after
the machine has stopped. It is strictly prohibited to put the spatula into the bowl
while the food processor is on.
Blender jug (23)
Standard processing time is 1min.
1. Prepare the ingredients, put them in the blender jug (23) and put the blender cover
(24) in place.
2. Position the blender jug (21-24) on motor base; turn clockwise to fix it firmly.
3. The switch should be on 0 speed. Plug in and use pulse 2-3 times for pre-blending.
4. Choose speeds 1 to 7 for processing. During operation, you can take out the small
lid on blender cover (24) and add water or any other ingredients you want through
the feeding hole.
5. Do not open the blender cover (24) to add ingredients during operation!
6. Always add in some water when using the blender for ice crushing.
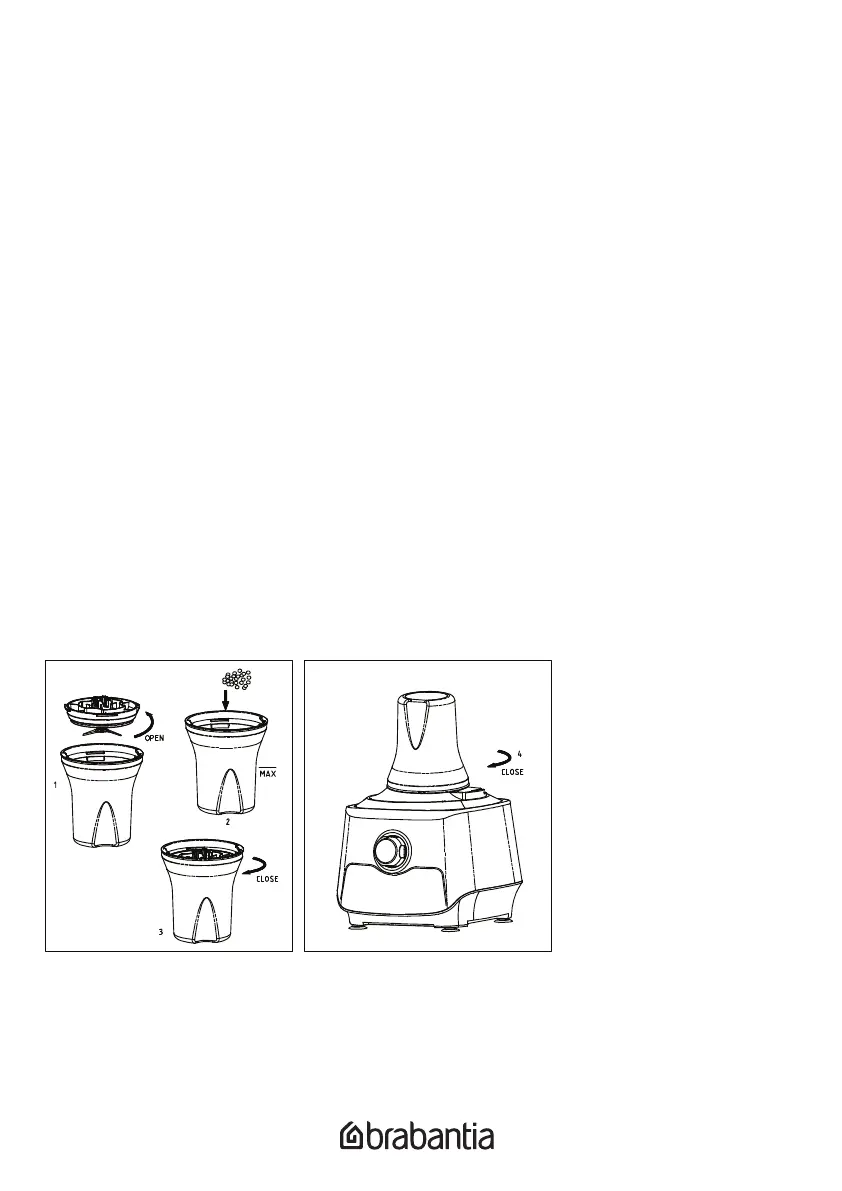
Grinder (25/ 21-22)
Standard processing time is 1min.
1. Put the motor base on a flat and dry surface.
2. The plastic blender jug and grinder cup share a common blade base. Turn
anti-clockwise to remove the blender jug from the blade base and then fix the
grinder cup firmly to the blade base (turn clockwise).
3. Put your chosen ingredients into the grinder (as above picture shows). Please do not
overfill the grinder cup - fill about halfway
4. Attach the grinder cup/ blade base to the motor base. Turn clockwise and make sure
the safety lock is firmly in place.
5. The switch should be on 0 speed. Plug in and use pulse 2-3 times for pre-grinding.
Choose 7 speed for grinding.
6. Do not use continuously for more than 30secs at a time. Stop for 1min to let the
motor cool down before repeating.
7. After grinding is complete, turn the speed control knob to 0. Turn anti-clockwise to
take off the grinder. Turn the grinder container upside down and tap with moderate
force to make sure that all the ground contents fall into the container.
As per chart 1, dissasemble the grinder and remove the contents.
CLEANING
1. Please unplug the power cord to protect from electric shock while cleaning the
machine.
2. Do not immerse motor base and power cord in water.
3. All removable accessories can be cleaned in water except the motor base. Dry the
wet parts after cleaning.
4. Always store the machine in dry and ventilated place.
5. Do not use abrasive detergents to avoid damaging the appliance.
6. All plastic accessories and blades are dishwasher proof.
TROUBLESHOOTING
1. Problem: Machine doesn’t work.
Solution: Ensure correct assembly. Make sure power plug is plugged in properly.
Check if the mains have tripped or if there is a power outage.
2. Problem: Machine stops running suddenly.
Solution: Processing bowl may loosen during vigorous processing. Please re-install
the bowl cover.
3. Problem: Motor is running, while components do not run.
Solution: Make sure the driving shaft is installed correctly.
ENVIRONMENT FRIENDLY DISPOSAL
This marking indicates that this product should not be disposed of with
other household waste. To prevent possible harm to the environment or
human health from uncontrolled waste disposal, recycle it responsibly to
promote the sustainable re-use of material resources. To dispose of your
appliance correctly, please contact or take it to your local refuse/recycling
centre. Alternatively, contact your local council for information on your local re-use
centre. Please make this product environmentally safe for recycling.
WARRANTY
In the unlikely event that you have a problem with your Brabantia appliance, please be
aware that your Brabantia appliance has a warranty.
Warranty exclusions:
The warranty will not be valid if:
1. The product has not been installed, operated or maintained in accordance with
the manufacturer's operating instructions provided with the product.
2. The product has been used for any purpose other than its intended function.
3. The damage or malfunction of the product is caused by any of the following:
- Incorrect voltage
- Accidents (including liquid or moisture damage)
- Misuse or abuse of the product
- Faulty or improper installation
- Mains supply problems, including power spikes or lightning damage
- Infestation by insects
- Tampering or modification of the product by persons other than authorised
service personnel
- Exposure to abnormally corrosive materials
- Insertion of foreign objects into the unit
- Usage with accessories not pre-approved by Brabantia
Please refer to and heed all warnings and precautions in this Instruction
Manual.
Due to continuous product development, specifications may be subject to
change without prior notification.
 Loading...