6
OPERATING INSTRUCTIONS ________________________________________________
Filling Fluid Reservoir
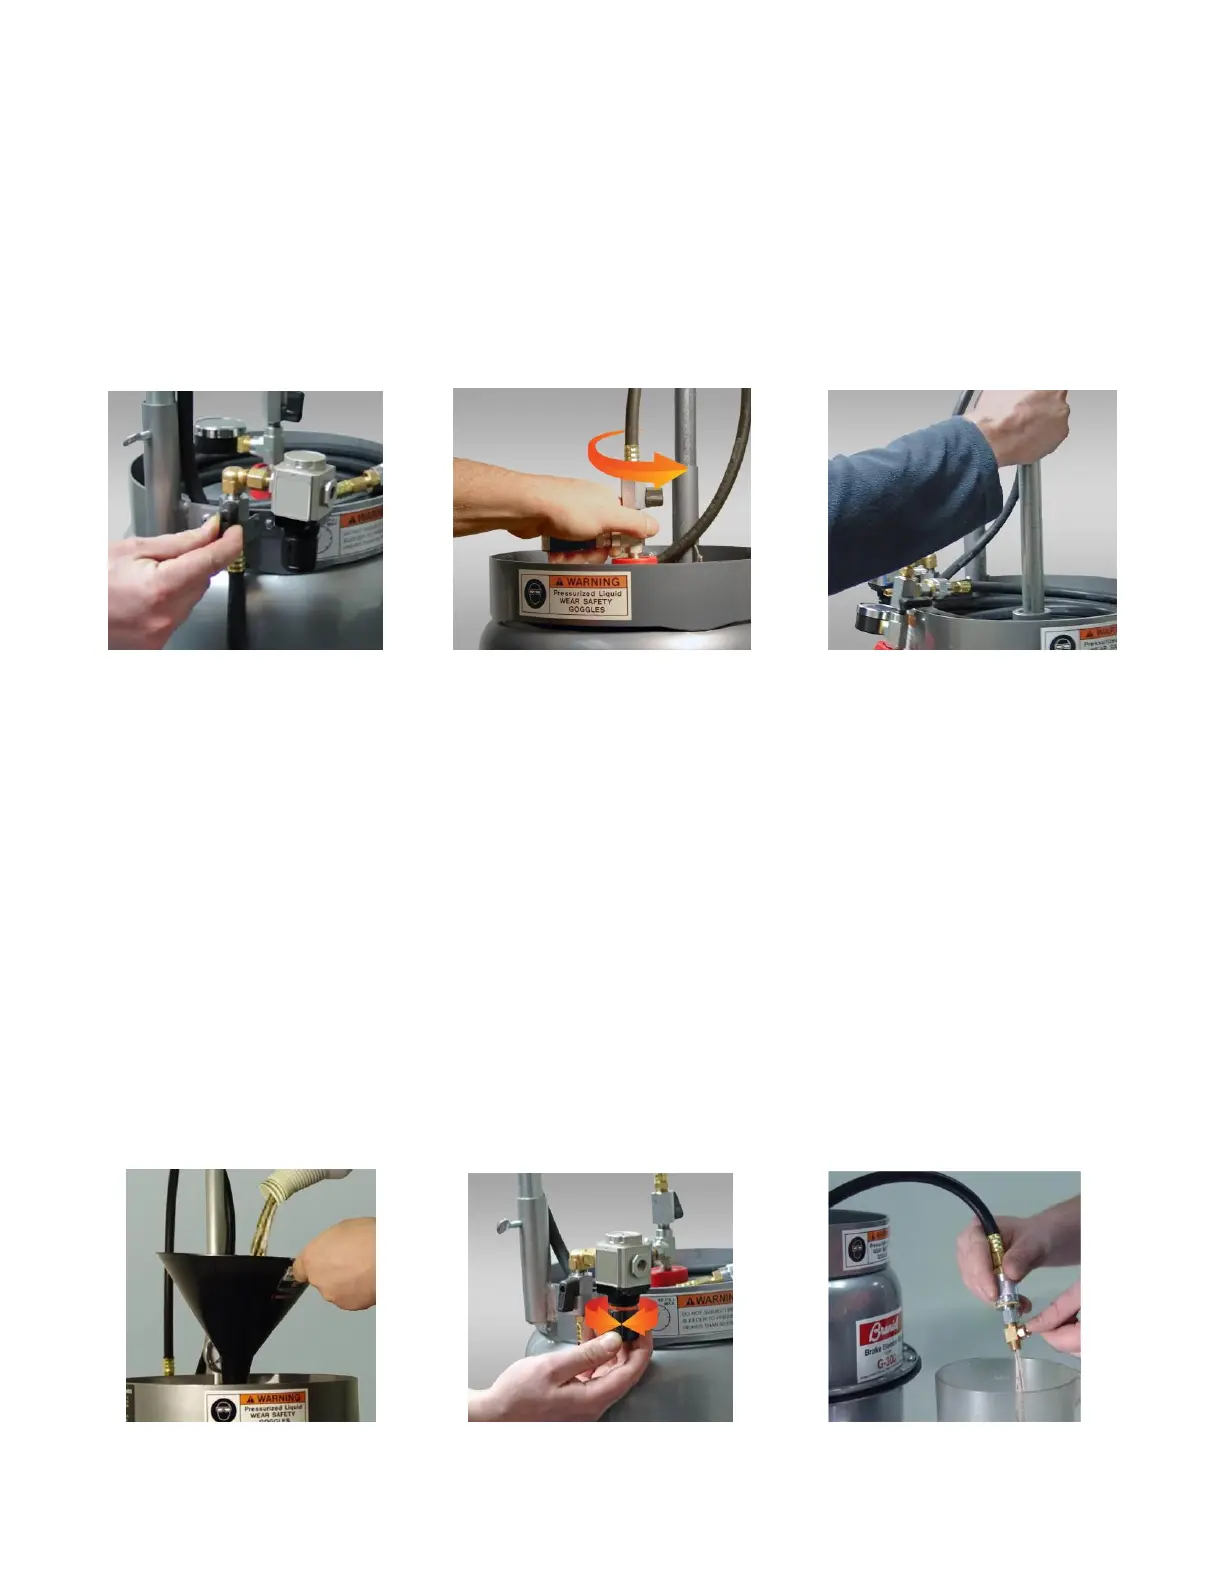
1. If connected, disconnect the air line from the air inlet. Open the air inlet valve to allow remaining air to
escape (Fig. 1).
2. Remove the bleeder hose from the top of reservoir by unscrewing (counterclockwise) the filler port
adapter under the red plastic cap and moving the hose away from the filler port (Fig. 2).
3. If refilling, the internal rubber diaphragm might be inverted inside the tank and must be gently pushed back
into place using the handle or a clean blunt instrument inserted through the filler port (Fig. 3).
Note: Using a sharp object or too much force can damage the rubber diaphragm.
Figure 1 Figure 2 Figure 3
4. Insert a plastic funnel tightly into the filler port and fill with brake fluid (Fig. 4). If the reservoir overfills and
fluid enters the funnel, use the suction syringe to remove any excess.
5. To re-install the bleeder hose on the filler port, place the filler port adapter on the filler port and turn it
clockwise. Hand tighten until snug.
6. Check the ball valve on the bleeder hose to ensure it is closed (turn clockwise until it stops).
Pressurizing Brake Bleeder
Note: Maximum pressure is 60 psi.
1. If the air inlet valve is open, close the valve and connect the air line.
2. To adjust the bleeder air pressure pull down on the regulator knob and turn (Fig. 5) until the desired
pressure is shown on the pressure gauge. Open the air inlet valve.
3. Insert the air purge valve assembly into the quick coupler on the end of the bleeder hose.
4. Open the bleeder valve and bleed air from the hose and reservoir by opening the purge valve (counter-
clockwise) over a container (Fig. 6). This is complete when the fluid produces a smooth steady stream.
5. To maintain constant bleeder pressure, leave the air line attached to the regulator. If desired, the air line
can be removed from the regulator. Close air inlet valve before removing air line to maintain pressure.
Figure 4 Figure 5 Figure 6