15
5. 3. 2 CLEANING
1 Prepare at least two gallons of a mild cleaning solution of
warm (45-60 °C 120-140 °F) potable water and dishwashing
detergent. Do not use abrasive detergent.
Important: if present, follow label directions, as too strong a
solution can cause parts damage, while too mild a solution will
not provide adequate cleaning.
2 Using a brush, suitable for the purpose, thoroughly clean all
disassembled parts in the cleaning solution.
3 Do not immerse the lighted top covers in liquid. Wash them
apart with the cleaning solution. Carefully clean their
undersides.
4 In the same manner clean the evaporator cylinder(s) using
a soft bristle brush.
5 Rinse all cleaned parts with cool clean water.
5. 3. 3 SANITIZING
Sanitizing should be performed immediately prior to
starting the machine. Do not allow the unit to sit for
extended periods of time after sanitization.
1 Wash hands with a suitable antibacterial soap.
2 Prepare at least two gallons of a warm (45-60 °C 120-
140 °F) sanitizing solution (100 PPM available chlorine
concentration or 1 spoon of sodium hypoclorite diluted with two
litres of water) according to your local Health Codes and
manufacturer’s specifications.
3 Place the parts in the sanitizing solution for five minutes.
4 Do not immerse the lighted top covers in liquid. Carefully
wash their undersides with the sanitizing solution.
5 Place the sanitized parts on a clean dry surface to air dry.
6 Wipe clean all exterior surfaces of the unit. Do not use
abrasive cleaner.
5. 3. 4 ASSEMBLY
1 Slide the drip tray into place.
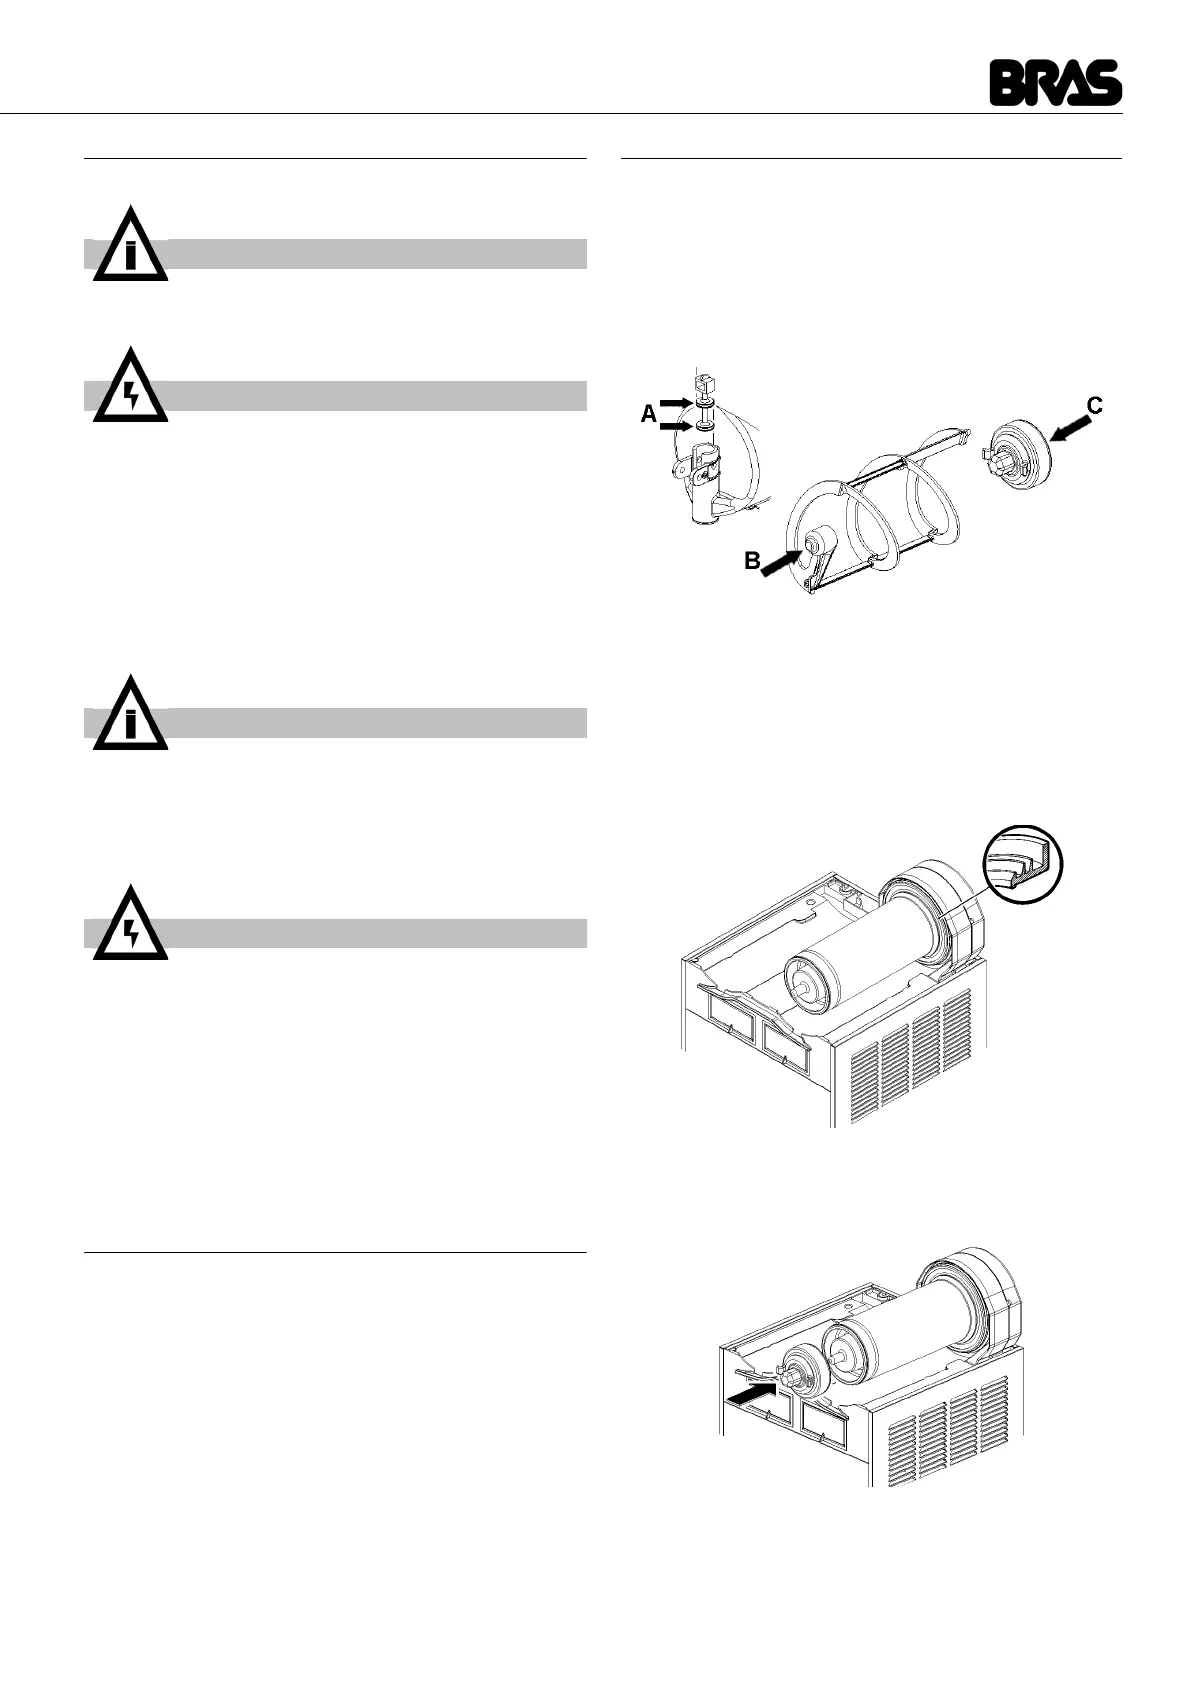
2 Lubricate faucet piston, outer spiral and outside magnetic
rotor (see points A, B and C of figure 13) only with the grease
supplied by the manufacturer or other food grade approved
lubricant.
figure 13
3 Assemble the faucet by reversing the disassembly steps
(see figure 12)
4 Fit bowl gasket around its seat.
Note: the largest brim of gasket must face against the rear wall
(see figure 14).
figure 14
5 Insert the magnetic outside rotor in the evaporator taking
care to accompany it to the end (see figure 15).
figure 15
6 Install the outer spiral. Slide it over the evaporator until its
hexagonal front notch engages with the hexagonal exposed
IMPORTANT
Do not attempt to wash any machine components in a
dishwasher.
AT TENTION
Before any disassembly and/or cleaning procedure make
sure that the dispenser is disconnected from its power
source.
IMPORTANT
In order to prevent any damages to the dispenser use
only a detergent suitable with plastics parts.
AT TENTION
When cleaning the machine, dump it, do not allow exces-
sive amounts of water around the electrically operated
components of the unit. Electrical shock or damage to
the machine may result.