Do you have a question about the Bresser 8020310 and is the answer not in the manual?
Warning about choking hazard from packaging materials like plastic bags and rubber bands.
Warning about electric shock from device components and the need for adult supervision.
Warning about fire or explosion risks from high temperatures, batteries, or improper handling.
Instructions not to immerse the unit in water or expose it to extreme conditions.
Advice on not disassembling, using recommended batteries, and proper battery replacement.
Lists available product variants with model numbers, names, and colors.
Lists the items included in the product package, such as the wall clock and manual.
Specifies the type and quantity of batteries required for operation.
Informs that batteries are not included with the product purchase.
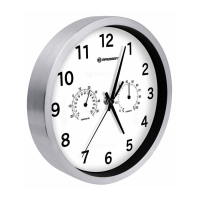
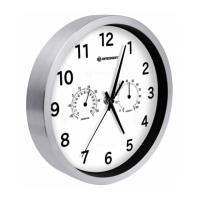
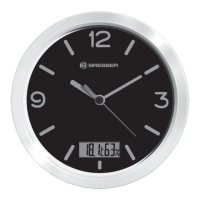
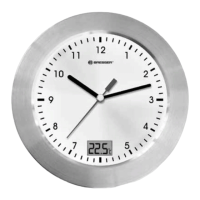
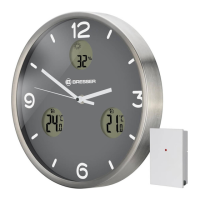
The front face of the clock displaying time and measurements.
The hands indicating the current time on the clock dial.
The dial showing the indoor humidity level.
The dial showing the indoor temperature.
The component used for mounting the clock on a wall.
The location where the battery is inserted for power.
Overview of buttons: RESET, REC, and M.SET for device functions.
Pin that secures the clock mechanism during transit or shipping.
Instruction to remove the locking pin from the clockwork mechanism.
Steps to insert the required battery into the compartment to power the clock.
Describes the automatic time synchronization process using the DCF radio signal.
Instructions to manually trigger the DCF signal search for time synchronization.
Steps for manually adjusting the clock's time and date.
Explains how temperature and humidity measurements are displayed and updated.
Guidance on safely mounting or placing the wall clock.
Explains interference from other devices affecting radio signal reception.
Steps to resolve general malfunctions or unresponsiveness of the clock.
Informs that resetting the clock deletes all received data.
Instruction to remove batteries before cleaning the device.
Recommends using a dry cloth for cleaning to protect electronics.
Guidance on proper disposal of packaging materials like paper or cardboard.
Prohibits disposal of electronic devices in household garbage; advises contacting local services.
Details the regular 2-year warranty, voluntary extension, and website registration.
Provides website, email, and phone number for service and detailed instructions.