just above the specimen area and slowly let the
water drain into the cup.
With a paper towel, pat the underside of the
slide dry. Be very careful and try not to touch the
specimen. Allow the specimen to air dry for sev-
eral minutes.
Some of the specimen will be ushed away, but
enough will remain on the slide to make good
observations.
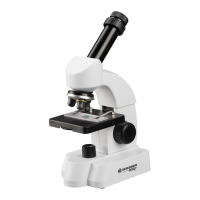
The Micro-Slicer
Insert specimens you wish to study into the
holes of the micro-slicer (J, Fig. 1). Rotate the
knob to
cut your specimen into thin slices. The Microslic-
er is an ideal tool in the making of section slides.
CAUTION: The blade of the micro-slicer is very
sharp. Handle the micro-slicer with care.
A Simple Section Slide
Section slides are extremely thin slices of tis-
sues of skin, leaves, ower stems and other
materials.
Generally, section slides are very difcult to
make without special equipment and proce-
dures.
However, there is one common household item
which can be sectioned without special equip-
ment: the common onion, made up of layers of
tissue.
Peel off the very thinnest layer you can. One that
is nearly transparent will make an ideal section.
Slice into a piece about 1/4 x 1/4 inch (7 x 7
mm).
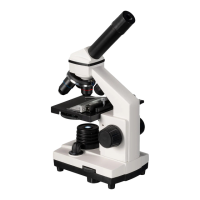
Put two drops of Eosin Red Dye or Fenazo Blue
Dye (M, L, Fig. 1) in a collecting vial (E, Fig. 1).
Pick up the piece of onion with your tweezers
and place it in the vial.
Wait for a minute or two. Remove the piece from
the stain and ush it with clean water, holding it
with tweezers over the waste cup. Place it on a
clean slide.
Use your micro-slicer to slice off very thin slices
of other types of foods.
Life Under Glass
Fill a wide mouth jar with fresh water. Let it stand
for three or four days without the lid. Then drop
CAUTION: The blade of the
microslicer is very sharp.
Handle the micro-slicer with
care.
Need Help? Toll Free 866-252-3811