8
FEATURES
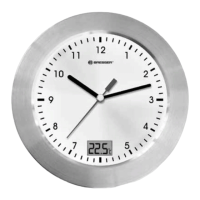
• Water resistant
• LCD display with indication of indoor temperature (° C)
• Easy to install with four strong suction cups
• Modern design with an elegant aluminum frame
START-UP/POWER SUPPLY
1. Turn the housing cover (9) with a little force, counter-clock-
wise and detach it.
2. Remove the locking pin from the clockwork. The clock can be
operated only after the pin has been removed.
3. Insert a 1.5V battery into the battery compartment (6) AA/LR6.
Pay attention to the correct polar direction (+ / - ) of the battery
as indicated inside the battery compartment.
RADIO CONTROLLED TIME
The radio controlled signal for time (DCF) is transmitted from the
central atomic clock in Frankfurt/Main in short intervals. It has a
reception range of approx. 1500 km.
• During night-time hours, atmospheric disturbances are typically
less severe and radio signal reception may improve. A single
daily reception is sufcient enough to keep the clock accuracy
within 1 second.
• Make sure the unit is positioned at 8 feet (2 meters) distance
from any interference source such as a TV, computer monitor,
microwave, etc.
• Within concrete wall rooms such as basements or ofce build-
ings, the received signal may be weakened.
TEMPERATURE DISPLAY
After inserting the battery, the interior temperature is displayed
on the LCD display (8). The temperature range is between 0°C ~
+50°C.
MOUNTING/POSITIONING OF THE CLOCK
There are 3 ways to mount this clock on the wall or on a at surface:
1. Open the housing cover (9) and remove the pedestal stand (3).
Insert it into the receptacle for the stand (7) and position the
clock on a at surface (e.g. bathroom cabinet).
2. Hang the clock using a screw or nail (not included) onto the
desired and suitable wall (2).
3. Slightly moisten the suction cups (4) and press the clock with
the suction cups against a at wall surface.
CAUTION:
Always make sure to mount or stand the clock securely. Dropping
the unit may cause serious damage, for which the manufacturer
takes no responsibility! The suction cups must be placed on a
perfectly at, clean and dry surface. Moisture favours slipping!
NOTES ON CLEANING
Before cleaning the device, disconnect it from the power supply
(remove batteries).
Only use a dry cloth to clean the exterior of the device. To avoid
damaging the electronics, do not use any cleaning uid.