Adjustments :
The input selector switch chooses the asymmetrical inputs as well as the symmetrical inputs.
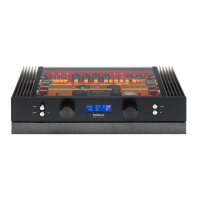
The selected input is indicated on the display at the front panel.
By pushing the button "on-off", the preamplifier is connected to the power supply via relays,
the red LED turns off and the display is illuminated.
The button "mute" clears the inputs and outputs, the button is cleared as soon as the writing
"MARCONI" on the display fades and the input and level settings are shown.
To protect the power amplifiers and loudspeakers, the DC-offset at the outputs is measured
and switches the outputs off, when a certain level is exceeded. In that case the display
shows –DC-Offset-.
Please allow some minutes of burn in after switching on, to prevent the DC-sensors to
switch off because of some slowly reducing DC from the tube stages. Avoid to raise the
volume control to high volumes during that time.
Setup :
First all needed inputs and outputs should be plugged in and the preamplifier be connected
to the power supply before this is connected to the mains. It is essential of being careful not
to create a short circuit, because a (lasting) short circuit can lead to damages in the
preamplifier (i.e. take off short circuit bridges at symmetrical power amplifier inputs when
connected symmetrically).
In order to connect the preamplifier to the mains, the power supply has to be plugged into a
socket or a multiple plug with double poled power switch.
The mains-plug has a red mark on one side, the terminal at this side should be connected to
the hot pole of the mains to get the best sound quality.
The LED at the front panel of the power supply starts to glow when the power supply of the
preamplifier is connected to the mains. The power supply needs a minimum of current when
the preamplifier is switched off, only the micro-controller of the preamplifier is still under
current.
The preamplifer should be placed on its granite base as far away as possible from power
supplies, (magnetic fields, humming).
The granite base can be equipped with felt gliders or spikes to improve the setup.
The tubes have a normal life span of aproximately 10 years. If they have to be changed, they
should be replaced only by a complete set of the original tubes. The tubes used in this
preamplifier are specially selected and matched for their purpose. They can be ordered as a
whole set from the manufacturer by giving the preamplifier serial number. A special tool is
needed to replace the tubes.
 Loading...