ENGLISH 7
- Yellow light: 90 % of the filter capacity has been used. Remember
to buy a new replacement filter cartridge.
- Red light: The filter cartridge needs to be changed.
E Reprogramming the BRITA Cartridge Status Indicator
If the maximum volume is reached or the cartridge has been used
for 12 months, the BRITA Cartridge Status Indicator’s LED will start
flashing red (only if BRITA lever is in the filtering position).
In this case the filter cartridge should be replaced (chapter 4). Once
the cartridge has been replaced the BRITA Cartridge Status Indica-
tor has to be reset. For this purpose push the reset button (fig. 5)
of the Cartridge Status Indicator for three seconds until it starts
flashing green (for this step, you do not need to remove the BRITA
Cartridge Status Indicator from the BRITA lever).
After replacing of the empty battery the commissioning should be
followed in accordance with section 3.2.
Technical data:
• Battery: 1x CR2032 (removable)
• lifetime of battery: app. 2 years
!
Do not immerse Cartridge Status Indicator in water
3.3 Step 3: Installing the BRITA Dispenser
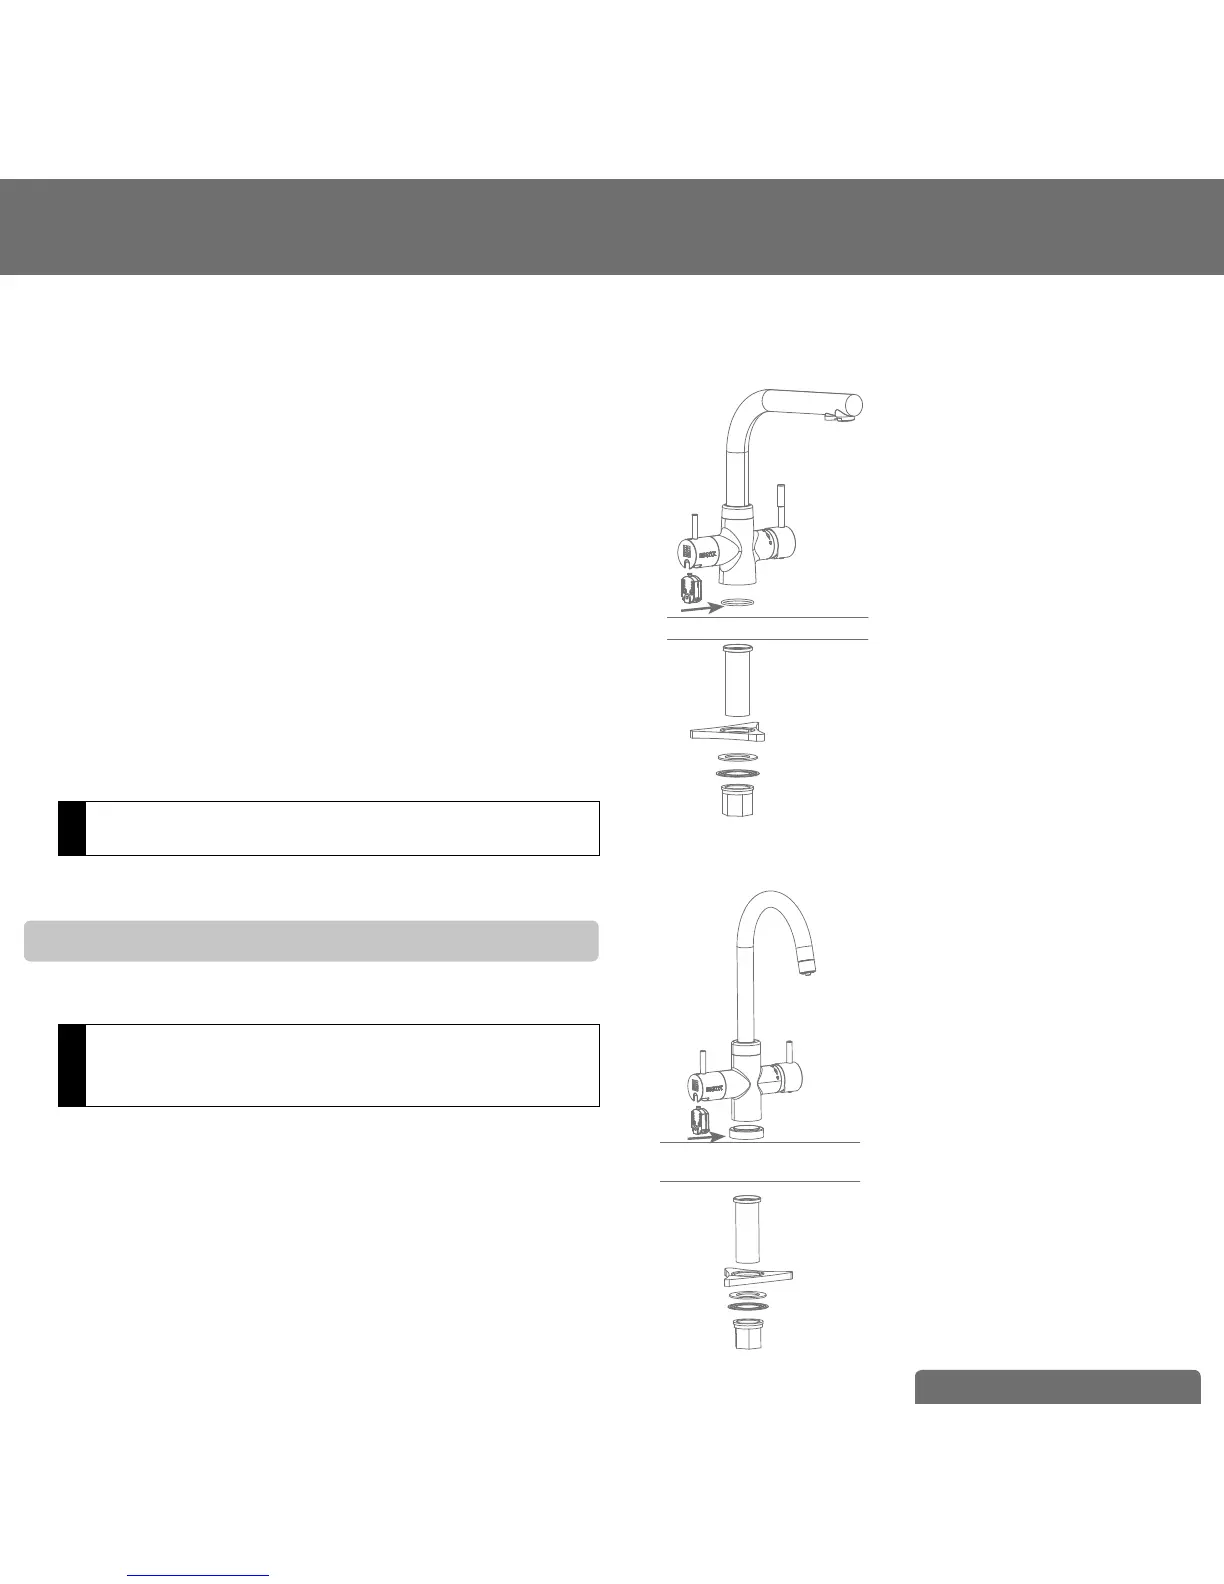
To install the BRITA Dispenser, firstly ensure you have all the
components required.
!
Please, make sure that there is enough room and access
under the sink to allow for the installation of the filter head
and cartridge, and to connect the two supplied hoses.
WD 3020
1. BRITA Dispenser with 3 hoses
2. BRITA Cartridge Status Indicator
3. O-Ring
4. Shank
5. Joint (Is only necessary for installa-
tion of the dispenser if you directly
mount it onto your sink. If you
mount it onto your countertop-plate,
you do not necessarily need this
part. It helps stabilizing the tap at
your sink)
6. Flat Gasket
7. Flange
8. Hex nut
WD 3030/ WD 3040 and WD 3050
(fig. 7)
1.
2.
3.
4.
5.
6.
7.
8.
1. BRITA Dispenser (design may differ)
with 3 hoses
2. BRITA Cartridge Status Indicator
3. Base
4. Shank
5. Joint (Is only necessary for installa-
tion of the dispenser if you directly
mount it onto your sink. If you
mount it onto your countertop-plate,
you do not necessarily need this
part. It helps stabilizing the tap at
your sink)
6. Flat Gasket
7. Flange
8. Hex nut
7.
8.
1.
2.
3.
4.
5.
6.
(fig. 6)


 To Next Page