11
Version 2.0FWHS-201 installation instructions
household filtration
» If leaks continue, turn o the water supply and call
Customer Service or your local plumber.
Leaks between
head assembly and
filter housing
* Turn o household water supply.
* Purge water from lines by turning on all faucets
and drain lines completely.
* Press red pressure-relief button on housing
head to release pressure.
* Unscrew and remove housing head using filter
housing wrench.
* Remove black o-ring and inspect. Clean and
lubricate with silicone grease.
* Clean grooves in top of filter housing where the
o-ring sits.
* Place the clean, lubricated o-ring back in the
groove.
* Screw filter housing back onto the
housing head and hand-tighten.
DO NOT OVERTIGHTEN.
Filter Replacement
(every 3 months)
household filtration
11
R
E
P
L
A
C
E
E
V
E
R
Y
T
H
R
E
E
M
O
N
T
H
S
* Turn o the household water supply.
* Purge water from water lines by turning on
all faucets in your home and draining completely.
* Tighten all fittings.
* Turn on the household water supply, and inspect
for leaks.
* If leaks continue, disassemble the configured
unit, reapply plumber's tape or sealant, and
reinstall the filter.
Leaks around fittings
For FREE Filter Replacement Reminder, go to www.protectplus.com
Note: Place paper towels or rag under the filter housing to catch any water drips.
*Note: To prevent leaks and/or housing ruptures, please properly seat filter cartridge at top and bottom within filter housing.
• Turn off household water supply to the home.
• Turn on all faucets in home to drain water lines.
Before You Begin
• Rinse filter housing.
• Fill 1/3 with water and add 2 tbsp. of Clorox® bleach.
• Wipe Head and Housing.
• Rinse Filter Head thoroughly to remove bleach.
Step 2
Clean
Filter Housing
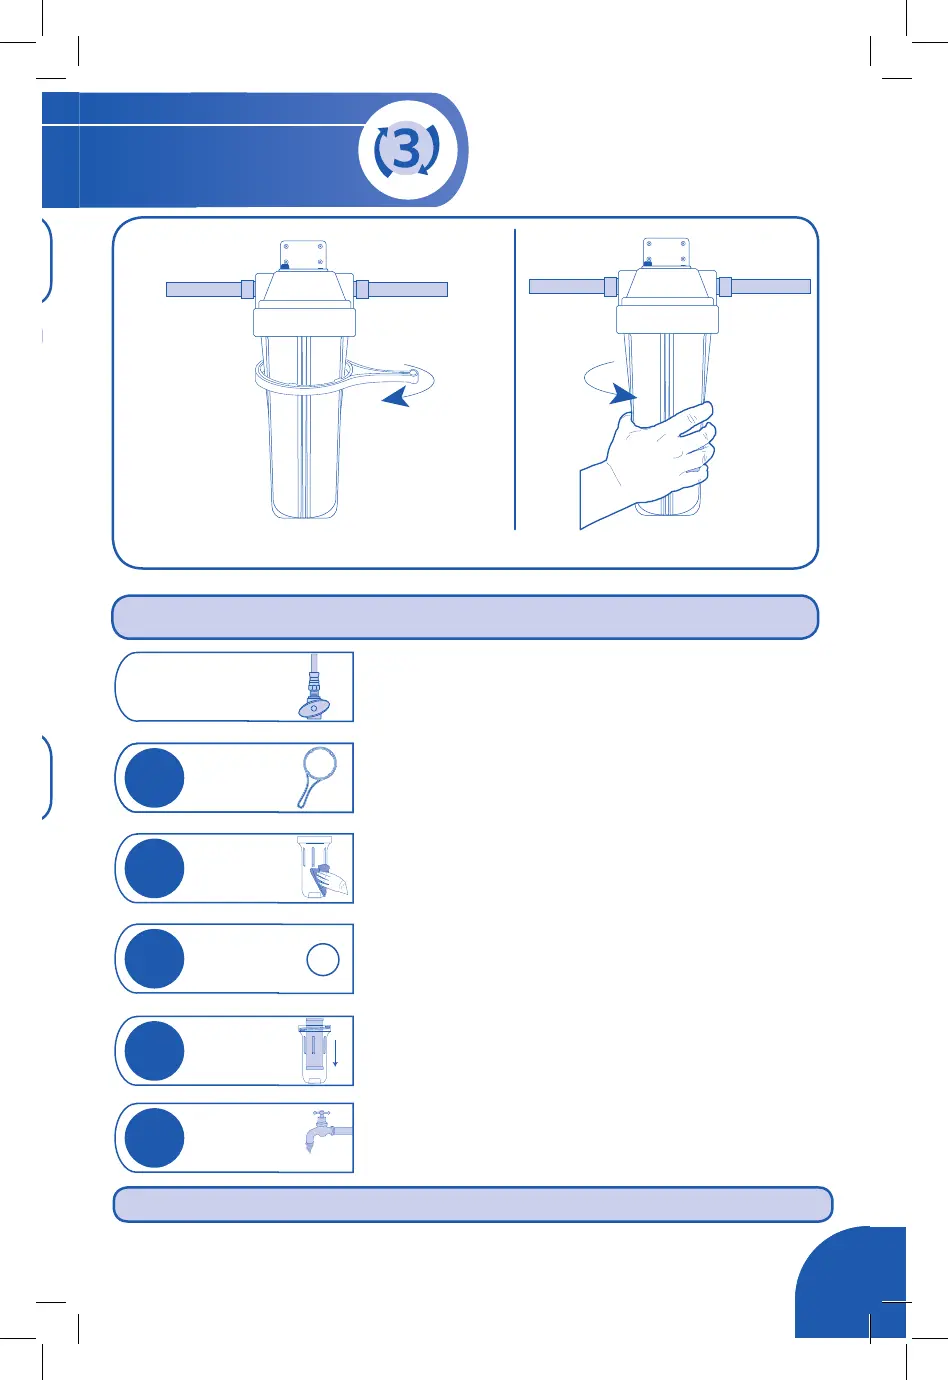
• Insert new Filter over standpipe in bottom of
Housing.
• Attach Housing to Head and hand tighten.
• Using the Wrench, tighten 1/4 turn.
DO NOT OVERTIGHTEN.
Step 4 Insert New Filter
• Press the red pressure relief button.
• Use the wrench to remove the filter housing.
• Careful: Filter housing will contain water.
Step 1
Unscrew
Filter Housing
• Remove and wipe clean o-ring.
• Lubricate o-ring with silicone grease.
• Return o-ring and seat securely for a good seal.
Step 3
Clean and
Lubricate O-Ring
• Slowly turn on household water supply.
• Check for leaks.
•
Press red pressure relief button to release trapped air.
• Open the faucet and flush for 40 minutes.
Step 5 Flush New Filter


 To Next Page